• Skip to primary navigation
  • Skip to main content
  • Skip to footer

Stickytapeandstring

Created with WordPress managed by 1&1

  • Craft projects
    • craft business tips
    • craft blog
    • Crochet patterns
    • Upcycling
    • craft with kids
  • Blogging
    • New to blogging
    • Blog diary
  • Bullet Journal
  • About me
  • Welcome!!

crochet design

Hearts and Flowers Scarf

January 31, 2021 by Annie Leave a Comment

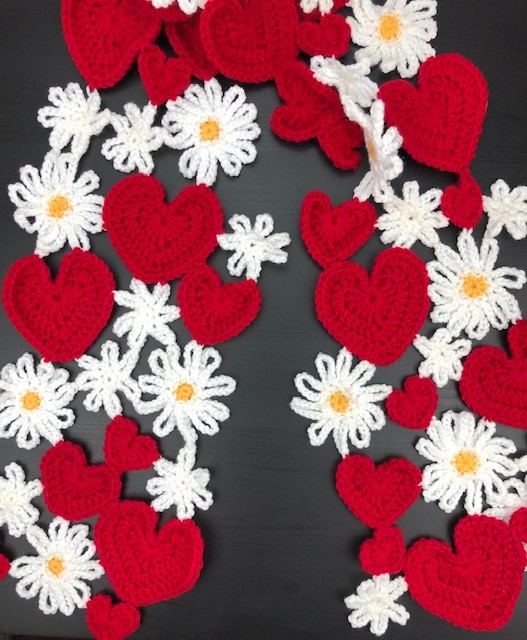
Sharing with you my latest heart based pattern – Hearts and Flowers Scarf. This pattern is based on the new large heart pattern I shared a couple of weeks ago. The pattern uses three sizes of heart but they are actually all the same pattern. To make the different sizes you simply stop after the first, second or third rounds. There are also two sizes of flower ๐Ÿ™‚

hearts and flowers scarf

Materials

The scarf pictured here is made from Stylecraft Special Chunky yarn. The shades used are Lipstick – 1246, Saffron – 1081 and White – 1001. I buy all my yarn from woolwarehouse here in the UK. The flowers and hearts are made using a 6mm crochet hook. TIP – have a smaller sized hook available to use for fiddly bits – more later on this!

You could make this scarf using oddments of any weight of yarn. It would be a great stash busting pattern if you did just use up any scraps you have. You could use a complete mix of colours but I think it would be most effective if you keep one pallet of colours for the hearts and a different pallet of colours for the flowers.

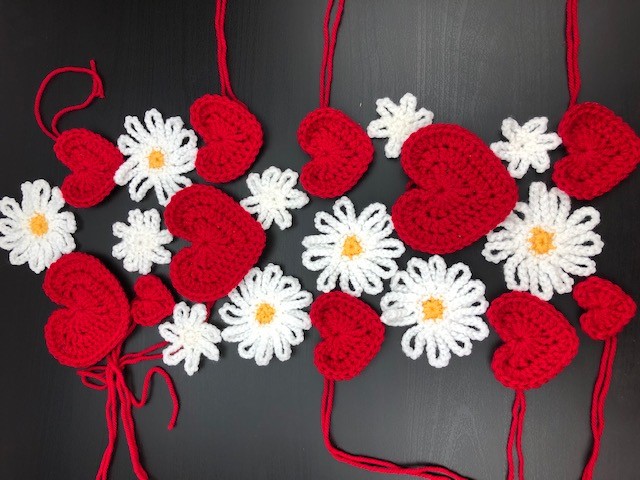
This pattern is ‘free form’ rather than being a specific layout. This means you make lots of hearts and flowers then lay them out as you like them before joining them together to make the scarf.

Start your own Hearts and Flowers Scarf

‘Free Form’ is all very well but you have to know what you are aiming for! There are two options for this. The first option is very simple if you have a scarf you already like the length and width of. Lay that scarf out on a flat surface. Second option, if you don’t have a suitable scarf to base your hearts and flowers scarf on then as a rough guide, a scarf is normally between six and eight inches wide and about as long as you are tall. Cut a template out of newspaper or tape together scrap paper till you have something the size and shape of the scarf you are making.

Whichever your base, the next step is to place on the hearts and flowers in a design you like. Bear in mind that you will need to join them up with a couple of stitches so aim for each shape to touch another in a couple of places without being bent or forced to do so. If you have to bend or stretch a shape to make it fit then you will end up with unwanted bumps and lumps in your scarf.

You could make the hearts and flowers and build the design up as you make them. Or, you could use paper templates to design the scarf first which then tells you how many of each shape you need to make.

Here is a free download which contains outlines of the hearts and flowers in all sizes. You can cut these out and play with shapes until you get the design you want. Note these sizes are representative of the space required only and not accurate versions of the flowers. They are based on my own tension using Stylecraft Special chunky and a 6mm hook. If you are using scraps of different yarns you will need to use your own shapes to make templates.

Hearts and Flowers template (14881 downloads )
hearts and flowers scarf layout
laying out the hearts and flowers to design the scarf

Heart and flower patterns

The heart pattern can be found here. To make the three sizes simply finish off after the first, second or third round!

Large flower pattern

First round – in first yarn, make a magic loop, Chain 2 and work six DC (SC in US terms) into the loop. Pull closed and slip stitch into the top of the two chains to form a small disc.

Second round – join a contrast yarn, Chain 2 work a round of DC (Sc in US terms) work 2Dc (Sc in US terms) into the second and 5th stitch and slip stitch to join back to the start point.

Third round – with the wrong side of the disc facing you work 12 Chain then slip stitch into the next stitch. Work 12 chain and slip stitch into the following stitch. Proceed like this until you get back to the start of the round. This should give you 10 ‘petals’ but to be honest, if it gives you 11 or 9 it really doesn’t matter!

Small flower pattern

First round – make a magic loop, Chain 2 and work six DC (SC in US terms) into the loop. Pull closed and slip stitch into the top of the two chains to form a small disc.

Second round – with wrong side facing, chain 9 then slip stitch into the next stitch. Work 9 chain and slip stitch into the following stitch. Proceed like this until you get back to the start of the round. This should give you 7 ‘petals’ but again, if it gives you 6 or 8 it really doesn’t matter!

Finish off all the ends on the flower centres. Leave the ends on the petals and hearts and use these to join the hearts and flowers.

Making up your Hearts and Flowers Scarf

You can start anywhere when you make this scarf up. I started at one end adding each element as I went. I think if I was making this with scraps, I would start in the middle and keep each side more or less even with the colours.

Pick up your first heart. Using one of the ends that you left without finishing, thread a wool needle and work the end through the heart to the point where it touches the next element in your layout. Join to this next element with a couple of stitches then continue to finish off the end by weaving it into the heart as normal.

Lay the two joined elements back into your design. Pick up the next element that touches these and again join using the other unfinished end. If you have too many joins and not enough unfinished ends then you can thread your needle with a yarn scrap to form the join but I tried to get away without doing this!

One final point on the layout. Pushing the hearts and flowers together closely to minimise the gaps and spaces, will make the scarf more substantial and warmer. Spreading the hearts and flowers out, leaving larger gaps, will make the scarf more decorative than warm!

If you use this pattern please share your results – it would be lovely to see them. I am happy for anyone to use these or any of my patterns to make things to sell or share but please include a link back to my blog if you do.

I have one more heart based pattern to come for this years Valentines day so watch this space. Hope to be posting that one in the coming week. Happy crocheting!

Annie ๐Ÿ™‚

Filed Under: Crochet patterns Tagged With: crochet, crochet design, crochet project, flowers, free crochet pattern, hearts, hearts and flowers, scarf, stash busting, stashbuster

Log Cabin Love crochet block

January 24, 2021 by Annie Leave a Comment

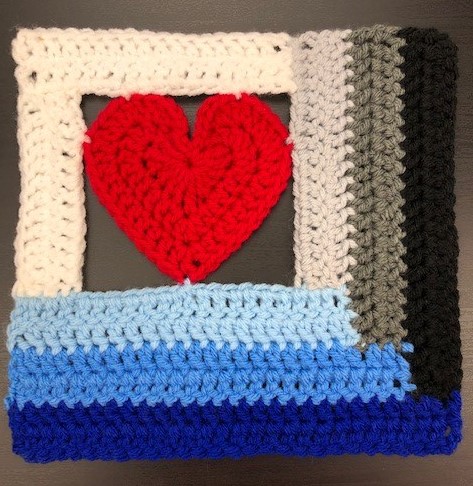
Here is my latest heart themed block. This one is a great stash buster! You can use any scraps of yarn you have to make the log cabin love crochet block. However, the yarn does need to be roughly the same weight.

To make the examples shown here I have used Stylecraft Special Chunky and a 6mm hook. You can see the range here where I buy all my yarn at Woolwarehouse.

It is possible to mix different yarn types and I can cover this in a separate post if you would find it helpful. Please leave a comment to let me know.

NOTE – This pattern will be a lot easier to follow when I add photos which will follow in the coming week – before end Jan 21. If you find it hard to follow please come back when the photos are up. ๐Ÿ™‚

Log Cabin Love crochet block pattern – UK crochet terms

NOTE – for US terms simply work DC where the pattern states Tr.

The heart of the pattern (see what I did there?) is the crochet heart. To make the heart you need to follow this link to my new large crochet heart pattern. The link takes you to another page on my blog where you will find the free pattern in both UK and US crochet terms. I made a few of these hearts then started to build the log cabin panels around them.

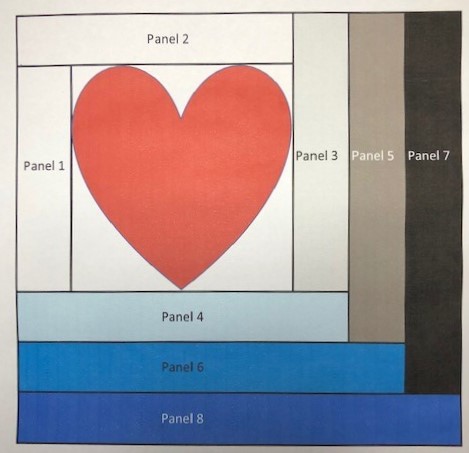
This diagram shows you the order in which the panels are worked.

log cabin love block diagram
log cabin love block panels

First panel

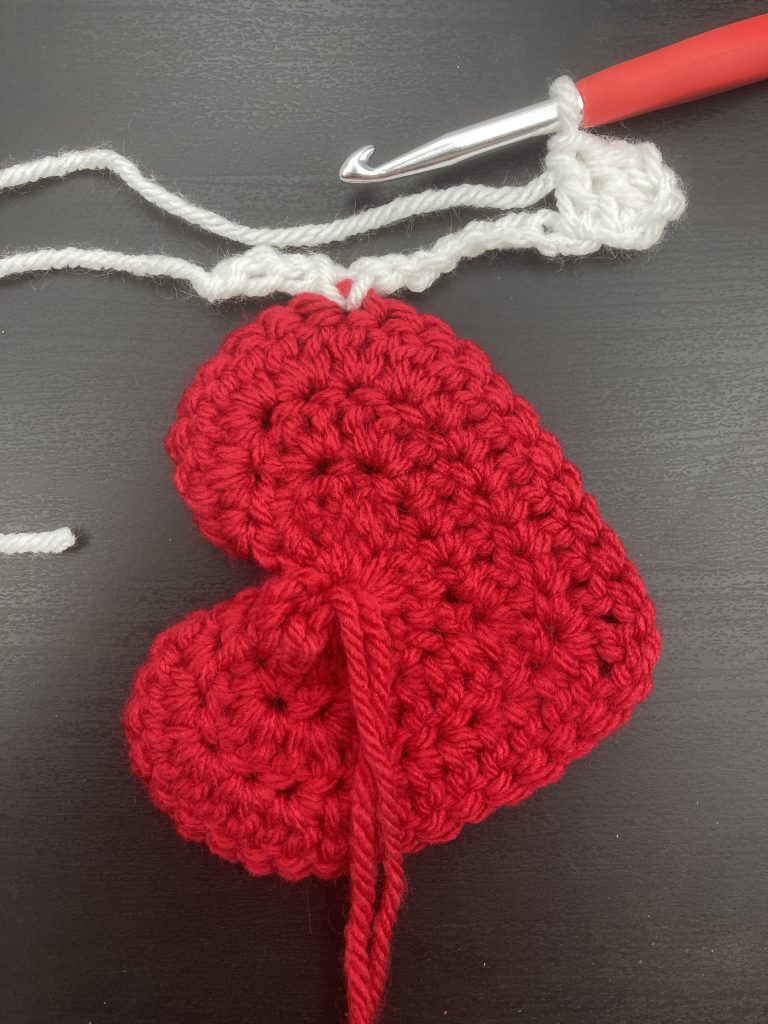
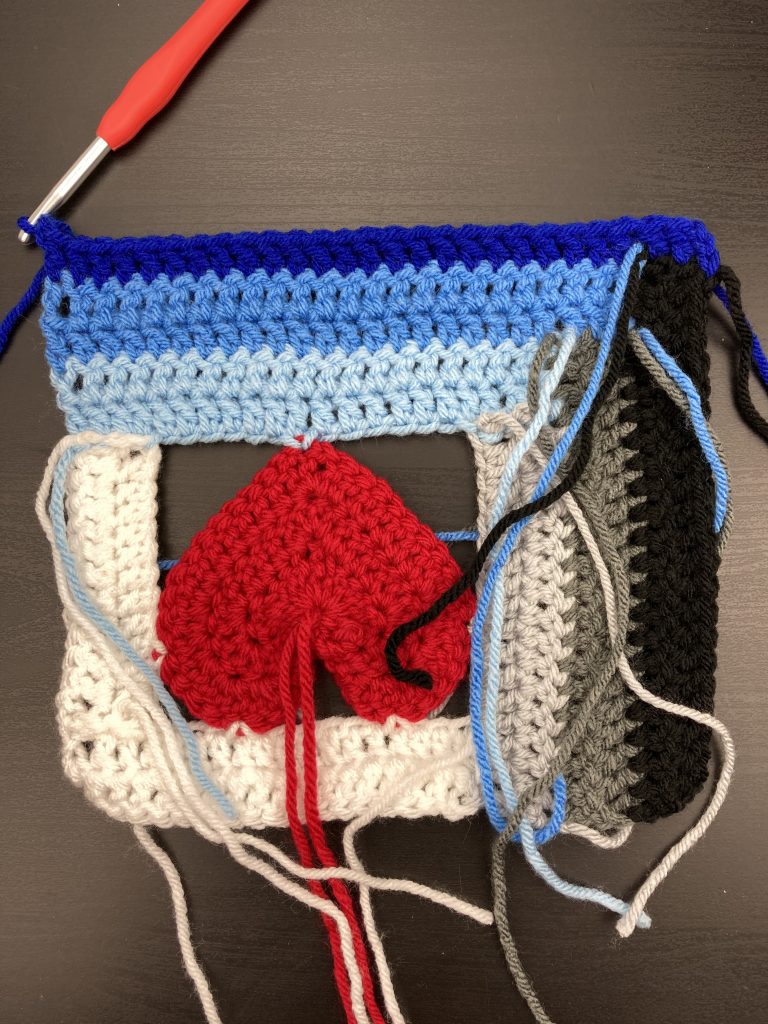
With your crochet heart face up this panel sits down the left hand side of the heart. We will be working from top to bottom of the block. The first four blocks have foundation rows made of chain stitch or slip stitches. This is because they frame the heart and are not joined to anything else in places.

First row
log cabin love panel 1
start by adding foundation for panel 1

Make a loop to start and chain 3. Count the stitches up the left side from the bottom of the heart with the bottom stitch being #1, slip stitch into #13 to attach your chain to the heart. Continue with 12 more chain. Turn the work ready for the second row.

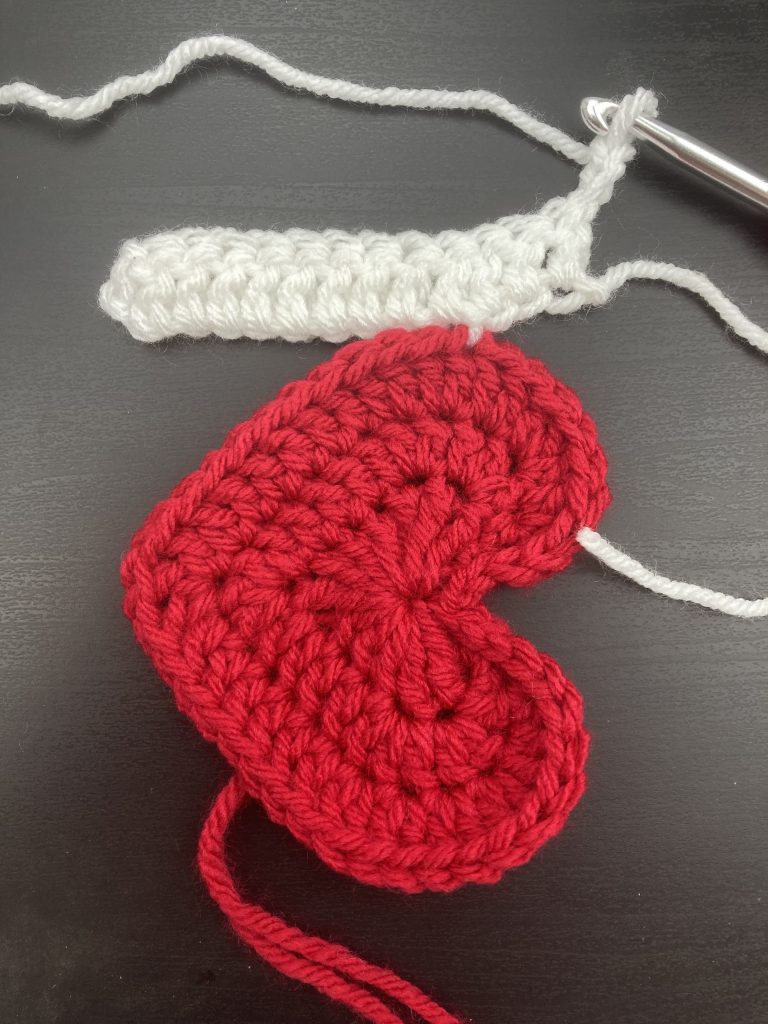
log cabin love panel 1 - second row
starting the second row of panel 1
Second row

(wrong side facing) work 1Tr into the fourth chain from the hook. Continue working Tr along this row, 7 more Tr will take you to the slip stitch on the edge of the heart. Work 1 Tr into this stitch then 1Tr into each of the three chain stitches to reach the end of the row. CH3 and turn the work ready for the final row of this first panel.

log cabin love block - end of second row of panel 1
3CH at end of second row of panel 1
Third row

(right side facing) miss the first stitch and work 12 Trs to take you to the end of the row. Fasten off the yarn.

Second panel

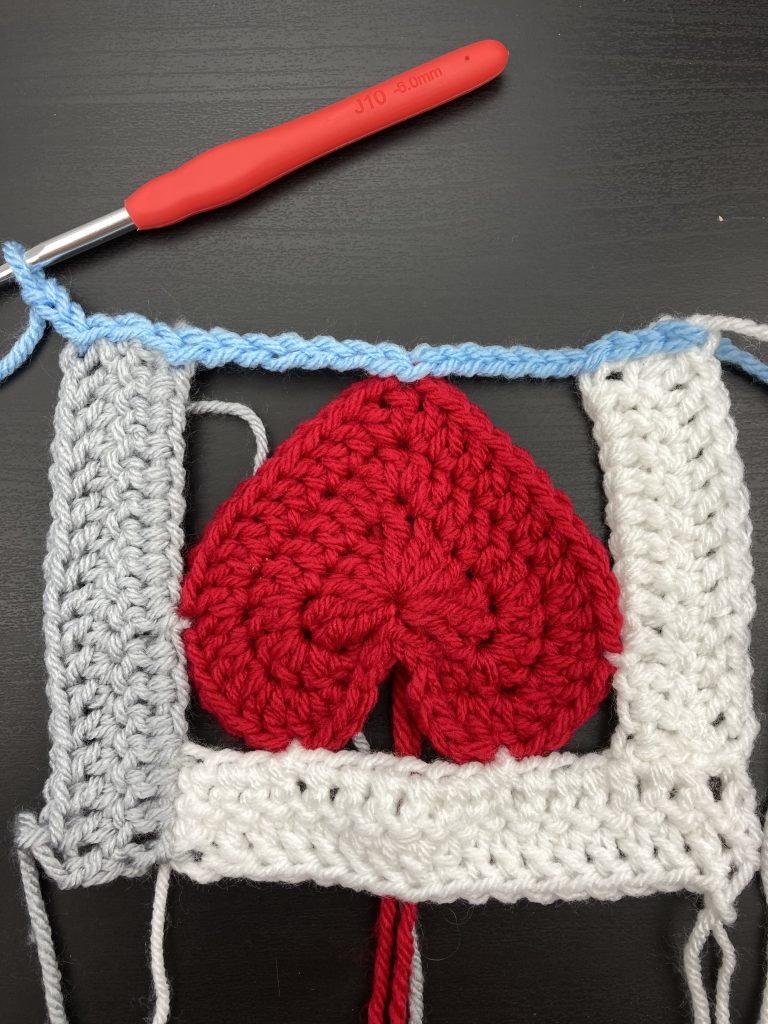
With your crochet heart face up this panel sits across the top of the heart. We will be working from right to left of the block.

First row

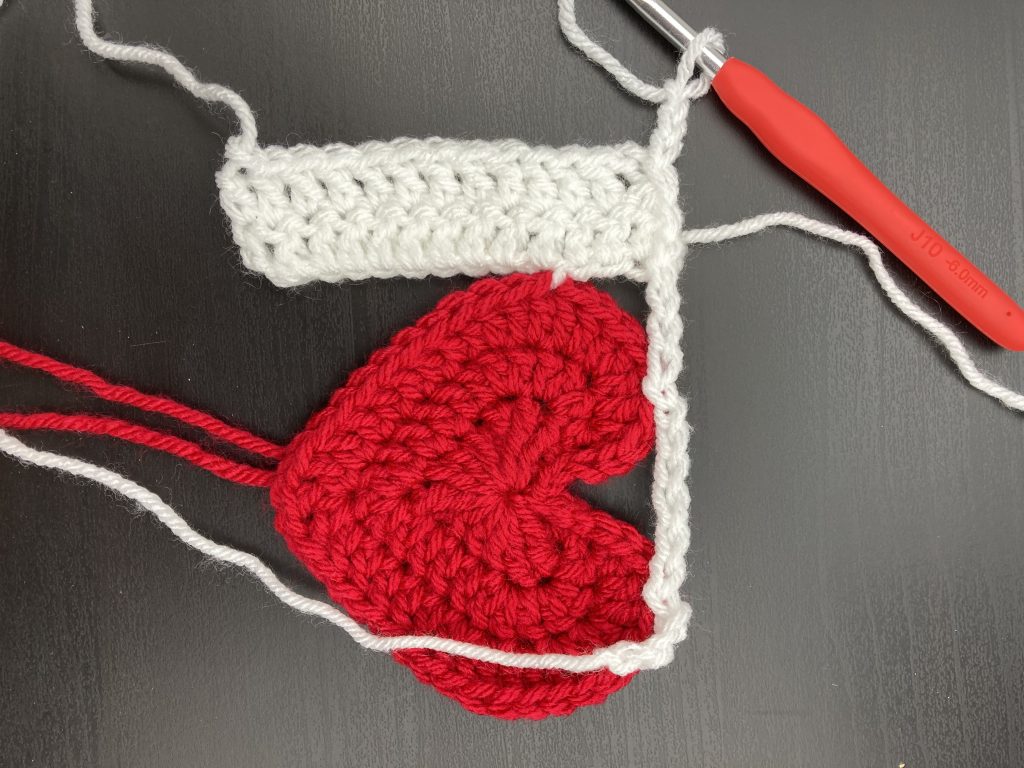
Make a loop to start and chain 3. Slip stitch into the top of the right side of the heart to attach your chain to the heart. Continue with 6 more chain stitches then slip stitch to attach the chain to the top of the left side of the heart. Chain 3 then slip stitch into the edge of the top of panel 1 and work 3 more slip stitches across the top of block 1 to take you to the top left hand corner of the log cabin love block. Chain 3 and turn the work ready for the second row.

adding the second panel of the log cabin love block
foundation row for the second panel
Second row

(wrong side facing) miss the first stitch then work 3Tr into the slip stitches across the top of block 1. Work 3Tr into the three chain stitches then one Tr into the slip stitch at the top of the left side of the heart. Work 6Tr into the middle chain section then 1 Tr into the slip stitch at the top of the right side of the heart. Finally work 1Tr into each of the three chain stitches to reach the end of the row. CH3 and turn the work ready for the final row of the second panel.

Third row

(right side facing) miss the first stitch and work 17 Tr to take you to the end of the row. Fasten off the yarn.

Third panel

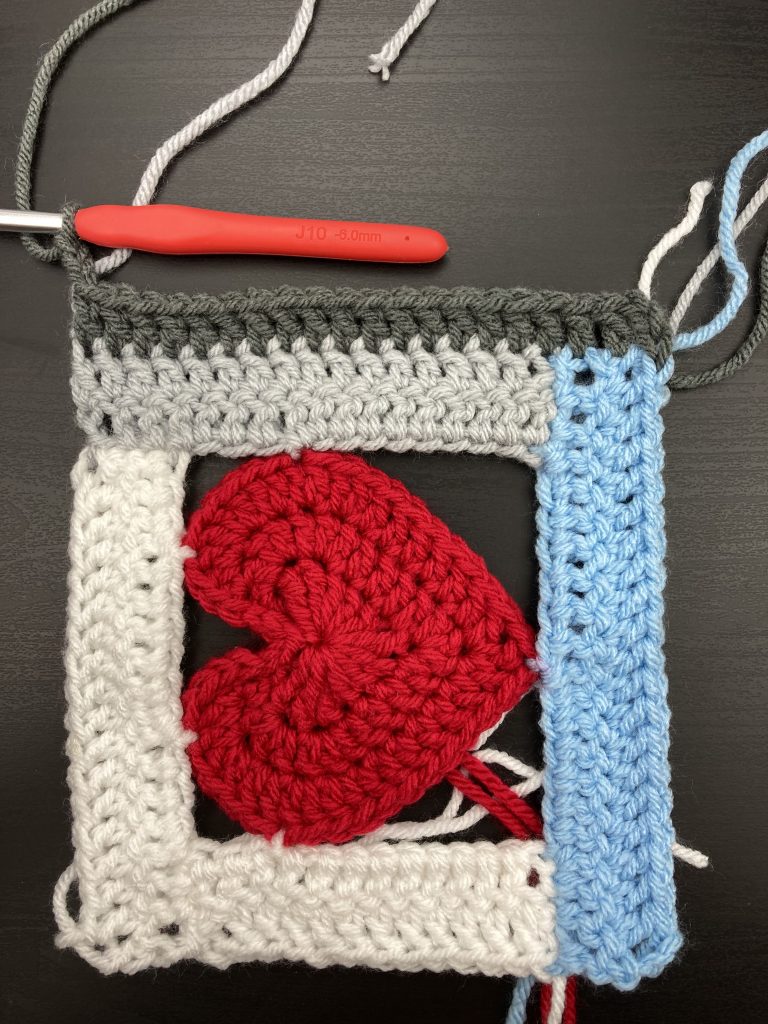
With your crochet heart face up this panel sits down the right hand side of the heart. We will be working from the bottom to the top of the block.

First row

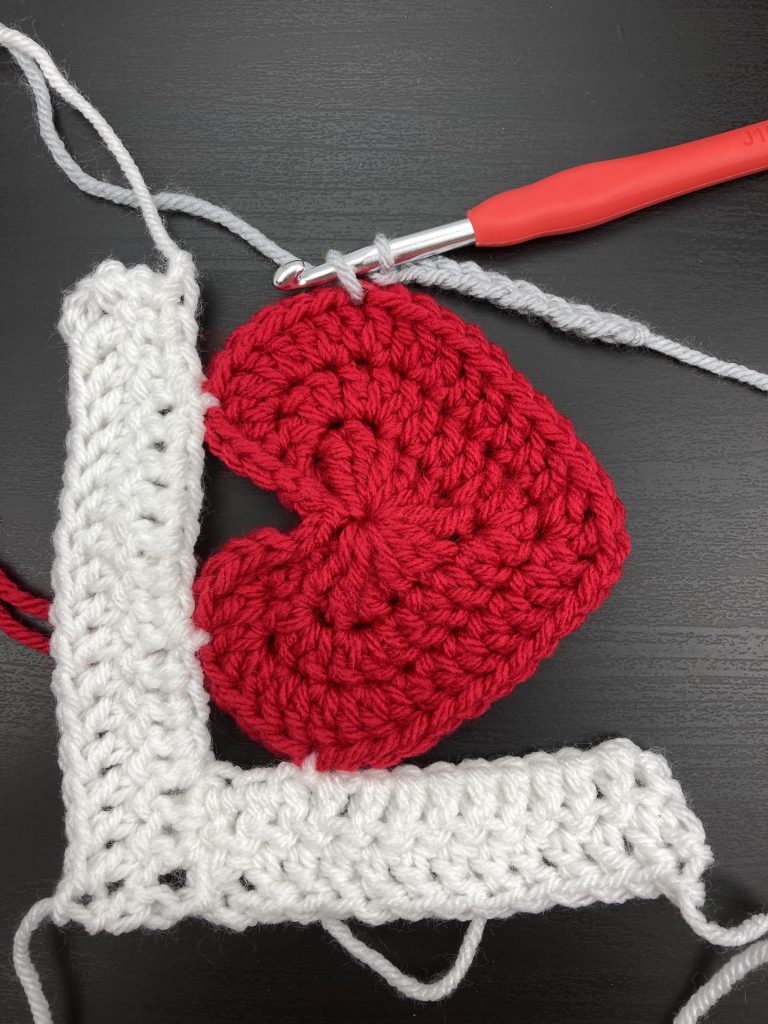
Make a loop to start and chain 9. Count the stitches up the right side from the bottom of the heart with the bottom stitch being #1, slip stitch into #13 to attach your chain to the heart. Continue with 3 more chain then slip stitch into the bottom corner of panel 2 and work 3 more slip stitches across the end of panel 2. Turn the work ready for the second row.

adding the third panel of the log cabin love block
start the 3rd panel with a chain then slip stitch to the heart
Second row

(wrong side facing) miss the first stitch and work 3 Tr into the slip stitches on the previous row. Work 1Tr into each of the 3CH then one Tr into the slip stitch at the right side of the heart. Finally work into the Chain 9 Tr to reach the bottom of this panel. CH3 and turn the work ready for the final row of this third panel.

Third row

(right side facing) miss the first stitch and work 16 Tr to take you to the end of the row. Fasten off the yarn.

Fourth panel

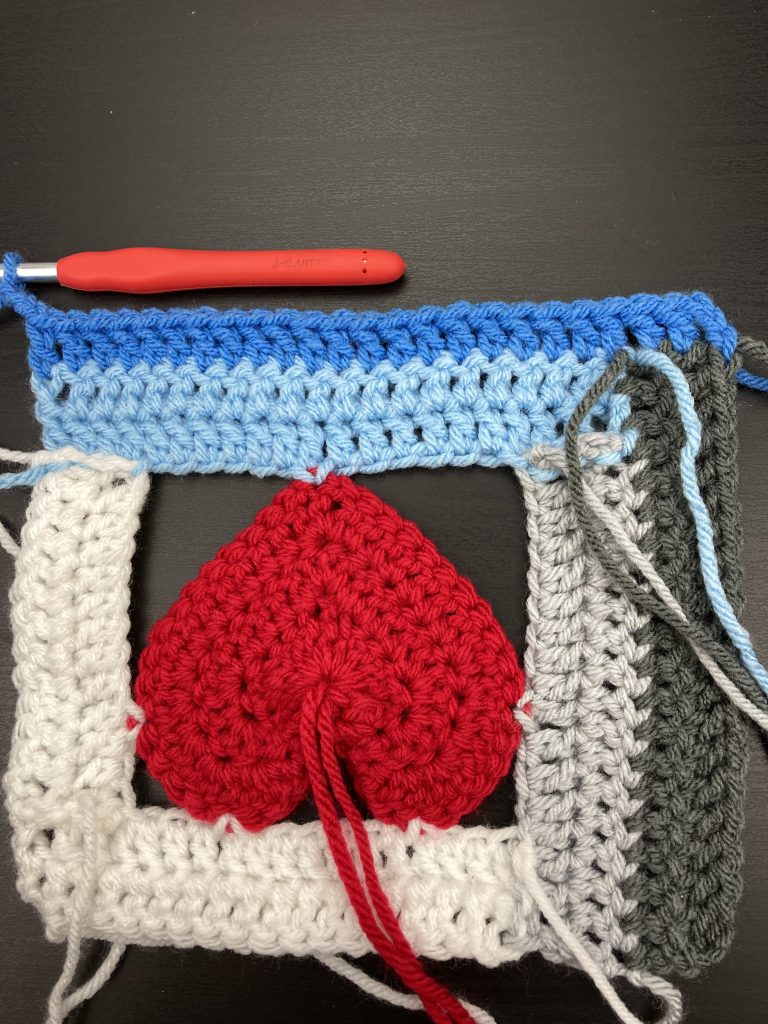
With your crochet heart face up this panel sits across the bottom of the heart. We will be working from left to right across the bottom of the block.

First row

Attach your yarn to the outside corner of the bottom of panel 1. Slip stich 4 across the bottom of panel 1 then chain six and work one slip stitch into the bottom of the heart. Chain 6 and work four slip stitches across the bottom of panel 3. Chain 3 and turn the work ready for the second row.

foundation row for the fourth panel of the log cabin love block
foundation row for the fourth panel of the block
Second row

(wrong side facing) Miss the first stitch then work 3Tr into slip stitches across the bottom of panel 3. Continue working 6 Tr into the chain and 1 Tr into the slip stitch at the bottom of the heart. Work 6 Tr into the chain and four Tr into the slip stitches across the bottom of panel 1 to reach the end of the row. CH3 and turn the work ready for the final row of this fourth block.

Third row

(right side facing) miss the first stitch and work 20 Tr to take you to the end of the row. Fasten off the yarn.

Fifth panel

With your crochet heart face up this panel sits along the right side of the block next to panel 3. We will be working from the bottom to the top of the block. Things get easier now with no need for a foundation row.

First row

(right side facing) Attach your yarn to the bottom right corner of the work – at the corner of panel 4 and chain 3. Work 2 Tr into the end of panel 4 then work 17 Tr along panel 3. Chain 3 and turn the work ready for the second row.

fifth panel of the log cabin love block
adding the fifth panel
Second row

(wrong side facing) miss the first stitch and work 19 Tr to take you to the end of the row. Fasten off the yarn.

Sixth panel

With your crochet heart face up this panel sits across the bottom of the block below panel 4. We will be working from the right to left side of the block.

First row

(wrong side facing) Attach your yarn to the bottom right corner of the work – at the corner of panel 5 and chain 3. Work 2 Tr into the end of panel 5 then work 21 Tr along panel 4. Chain 3 and turn the work ready for the second row.

sixth panel of the log cabin love block
adding panel six to the block
Second row

(right side facing) miss the first stitch and work 23 Tr to take you to the end of the row. Fasten off the yarn.

Seventh panel

With your crochet heart face up this panel sits along the right side of the block next to panel 5. We will be working from the bottom to the top of the block.

First row

(right side facing) Attach your yarn to the bottom right corner of the work – at the corner of panel 5 and chain 3. Work 2 Tr into the end of panel 5 then work 20 Tr along panel 3. Chain 3 and turn the work ready for the second row.

adding panel seven to the log cabin love block
adding panel seven to the block
Second row

(wrong side facing) miss the first stitch and work 22 Tr to take you to the end of the row. Fasten off the yarn.

Eighth panel

With your crochet heart face up this panel sits across the bottom of the block below panel 6. We will be working from the right to left side of the block.

First row

(wrong side facing) Attach your yarn to the bottom right corner of the work – at the corner of panel 7 and chain 3. Work 2 Tr into the end of panel 7 then work 24 Tr along panel 6. Chain 3 and turn the work ready for the second row.

adding the final panel to the log cabin love block
adding the final panel!
Second row

(right side facing) miss the first stitch and work 26 Tr to take you to the end of the row. Fasten off the yarn.

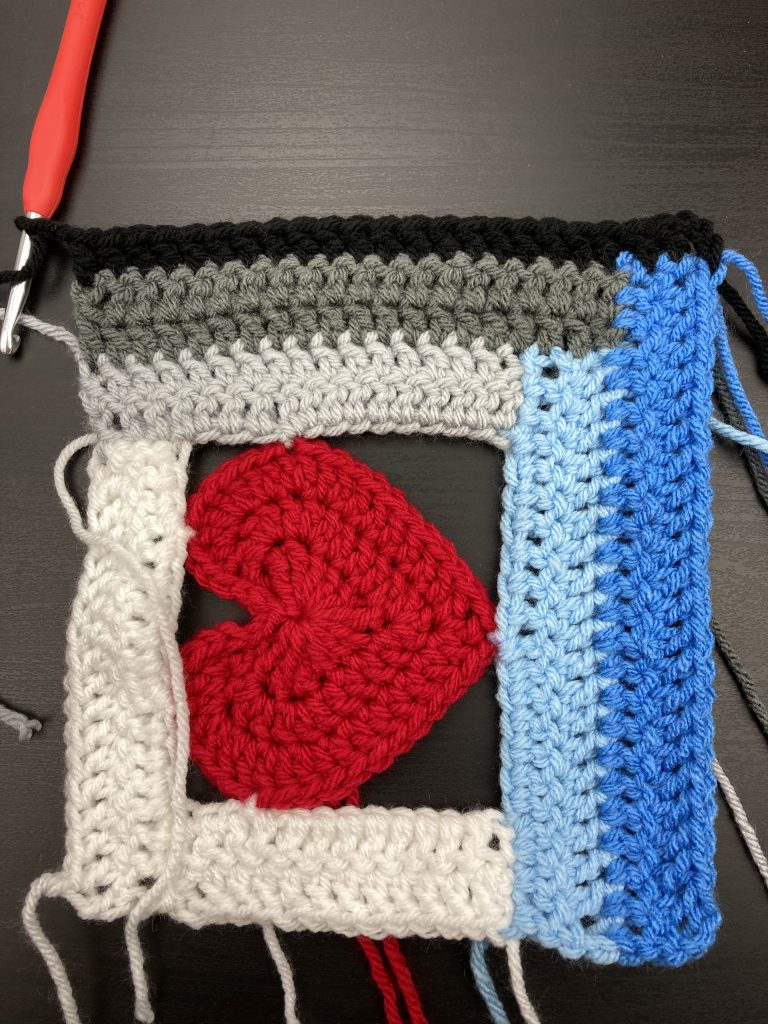
Log Cabin Love crochet block

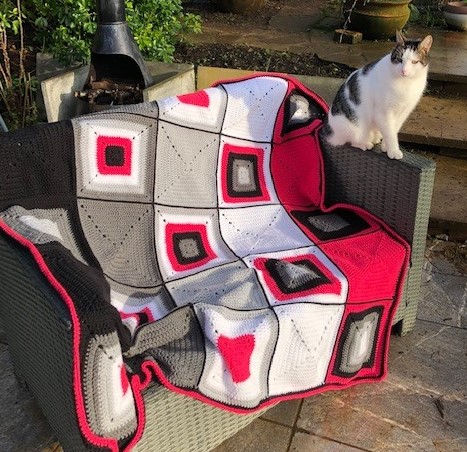
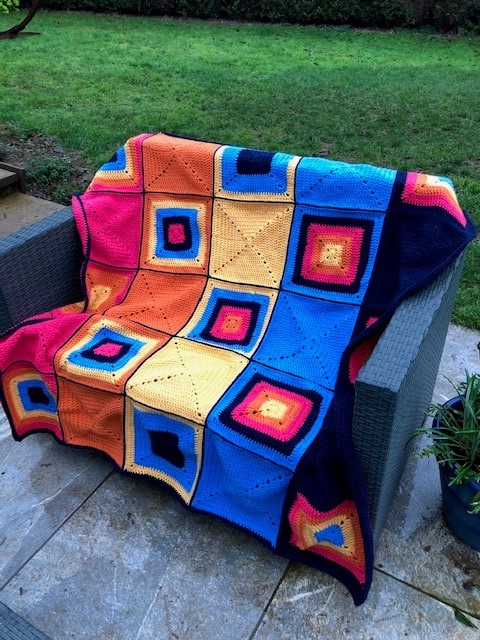
I hope you love this Log Cabin Love crochet block and have fun making log cabin blankets to share the love. I have some suggested blanket layouts which I will post separately but I wanted to get his pattern out there! Happy crocheting!

Annie ๐Ÿ™‚

Filed Under: Crochet patterns Tagged With: crochet, crochet block, crochet blocks, crochet design, crochet heart, crochet heart block, crochet log cabin block, crochet project, free crochet pattern, Free pattern, log cabin block

Crochet blog – January update

January 3, 2021 by Annie Leave a Comment

Hello everyone. Welcome to my crochet blog – January update with a couple of free patterns to start 2021. I have been reviewing and overhauling old blog posts. Turns out the last time I sent a general update was back in April 2019! There is nothing that points to success as a blogger better than consistency ๐Ÿ™‚ Possibly why my little blog is still just that…. a very little blog!

Anyway – thank you for reading, despite my lack of proper application to the task.

Project Updates

Lockdown Lapghan

In recent months I have been working on two projects. Firstly I created a pattern for a Lapghan using only one stitch, five colours and a pattern suitable for beginners. I called it Lockdown Lapghan and have worked it up in two sets of colours. You can see these below.

Lockdown Lapghan - berries in snow
Lockdown lapghan – Berries in the snow (with Milo)

lockdown lapghan - autumn sunset
lockdown lapghan – Autumn Sunset

The pattern for the Lapghan is spread across three separate posts as follows:

Lockdown Lapghan charts available to download here

Lockdown Lapghan basic pattern in UK and US instructions here

Lockdown Lapghan finishing and edging instructions here

New Large Heart and Edged Heart patterns

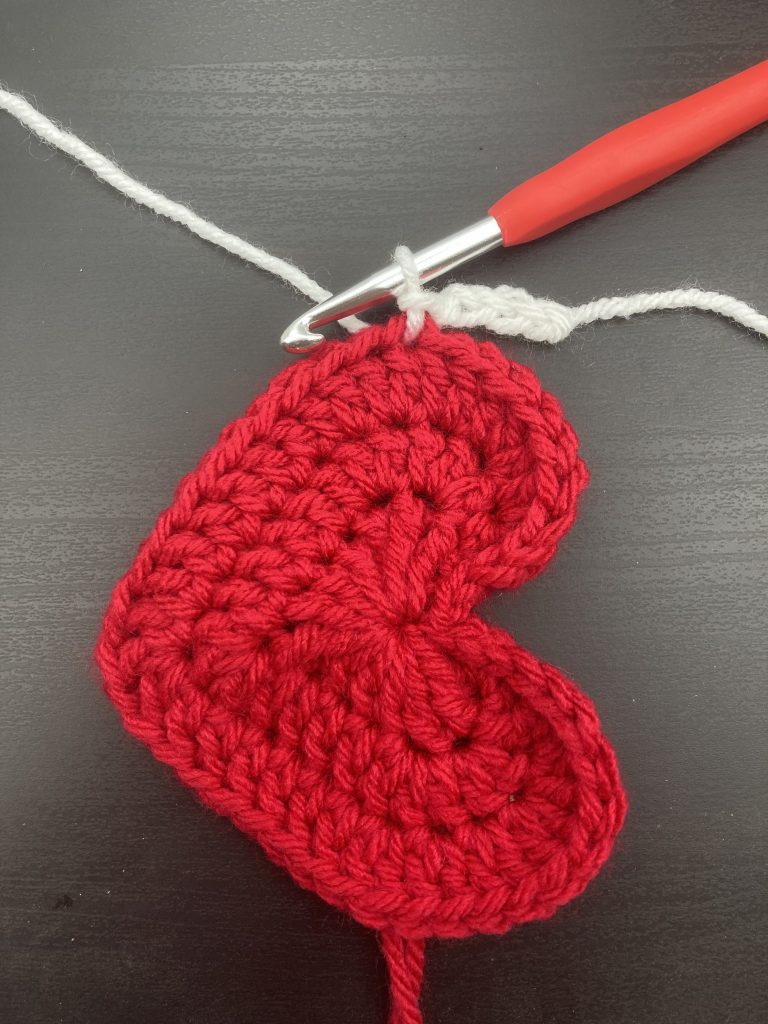
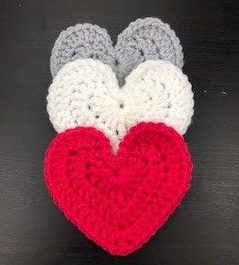
The other project I have just completed is a new crochet heart pattern. This is based on my previous heart pattern which remains my most popular (only popular) blog post. I wanted to create a larger sized heart. This one is c 10cm across when worked in chunky yarn. The free pattern for the new large heart is available here and I have also just added an edging pattern which is shown below. The original post for crochet hearts in three sizes is here

free pattern for new large heart
new large heart pattern

New Large Heart Edging – UK instructions

Starting at the centre of the top of the heart in a contrasting colour work 6 Dc. At the top of the heart into the next stitch work 2Dc. Work 2Dc into the next stitch then Dc into the following stitch. Then work 2Dc into the next stitch and 13 Dc down the left hand side of the heart. At the bottom of the heart work 1 Dc into the gap made by the chain on the previous row then 3Dc into the bottom stitch of the heart.

We are going to complete the second half of the heart edging as a mirror to the first. Work 1 Dc into the gap made by the chain on the previous row then 13 Dc up the right hand side of the heart. Next work 2Dc into the next stitch then Dc into the following stitch. Work 2Dc into each of the next two stitches. Finally work 6Dc down the centre of the right hand side of the top of the heart and finish off.

New Large Heart Edging – US instructions

Starting at the centre of the top of the heart in a contrasting colour work 6 Sc. At the top of the heart into the next stitch work 2Sc. Work 2Sc into the next stitch then Sc into the following stitch. Then work 2Sc into the next stitch and 13 Sc down the left hand side of the heart. At the bottom of the heart work 1 Sc into the gap made by the chain on the previous row then 3Sc into the bottom stitch of the heart.

We are going to complete the second half of the heart edging as a mirror to the first. Work 1 Sc into the gap made by the chain on the previous row then 13 Sc up the right hand side of the heart. Next work 2Sc into the next stitch then Dc into the following stitch. Work 2Sc into each of the next two stitches. Finally work 6Sc down the centre of the right hand side of the top of the heart and finish off.

crochet blog January update - New Large Heart - edging
new large heart pattern with edging

That is it for the crochet blog – January update. Spot the new year’s resolution to be better at posting updates and newsletters and blogging in general. Expect more in February (or not ๐Ÿ™‚ ) Happy Crocheting!

Annie ๐Ÿ™‚

Filed Under: Blog diary, Crochet patterns Tagged With: crochet, crochet blanket, crochet blog, crochet design, crochet heart, crochet pattern, free crochet pattern, heart

Finishing your Lockdown Lapghan

December 28, 2020 by Annie Leave a Comment

This post is the third of my lockdown lapghan instructions. The first post covers the pattern for the basic square so if you are just starting you need to following this link to pick up the free pattern – Lockdown Lapghan free pattern. The second post covers the design of the lockdown lapghan. You can find the second post here – lockdown lapghan design. In this third post I will give you the instructions for finishing your lockdown lapghan.

Finishing off each square

The first job you have to complete is to finish off all the ends. Depending on your choice of colour changes you might have lots of these! Using a wool needle you need to weave each end into the work securely. Try to make them invisible by weaving in and out of a patch of the same colour. It is possible to make them ‘disappear’ from both sides with a little practice. Finishing off ends is not my favourite task but it is made an awful lot easier with the right equipment.

I highly recommend KnitPro Wool Needles. These have a big flexible loop rather than a fixed eye which makes threading eveng the thickest yarn very easy. You can find these easily on an Amazon search. They are less than ยฃ3 for three at the time of writing. Please note – I do try to work as an Amazon Affiliate from time to time. This means that it is possible that if you click on any advert or a link to Amazon in my blog I might receive a small payment. However, I only ever recommend products that I love – whether I am paid to say so or not!

I say above that I TRY to work as an Amazon Affiliate because if you sign up with Amazon and nobody clicks on any adverts for a few months, Amazon end your affiliate membership. So far it hasn’t worked for me – I think I have had my membership cancelled three times now ๐Ÿ™‚ I have written a series of posts on my blog progress if you would like to read more on this. I will keep trying!!

Finishing your lockdown lapghan – sewing up

Although I call this sewing up we will actually be joining the squares together using a very simple technique with a crochet hook. I covered this method in an earlier post which has full instructions and clear pictures. You can find these instructions here.

I like to lay out all my squares in the final positions once the ends are finished off and they are blocked. Blocking really helps with the appearance and is covered in my first post. I then gather up the squares for the two rows I am going to join into two piles. Starting at what will be the edge of the blanket I begin joining two squares along one edge. Once these are joined I pick up the next pair and join these without breaking the yarn. The advantage of not breaking the yarn? Fewer ends to finish off!

When I am joining my squares I work all the way down the blanket in one direction. After four joins, all the squares are attached at the top and bottom but not the sides. Then I start the four joins that run top to bottom and again work each of these in one continuous thread. I will add some pictures of this process when I am finishing my second blanket.

lockdown lapghan - autumn sunset
lockdown lapghan – Autumn Sunset

Finishing your lockdown lapghan – edging.

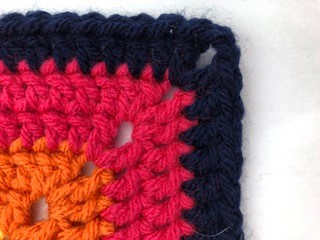
I promised this would be a very easy pattern so your edging can be very simple. Work one round of the same stitch we have used all the way through in a colour of your choice. At each corner follow the corner pattern from the odd rows of the block ie just do one Tr, 2CH, Tr (or DC, 2CH, DC in US terms) The picture of the finished blanket above includes just this simple edge as shown below.

lockdown lapghan treble edge
lockdown lapghan basic edge

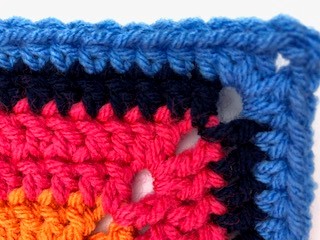
There are other options with the edging though! If you are up for a little bit more complication, I would recommend adding a row of HTr (UK terms) or HDc (US instructions). This is a strong stitch for a border but does mean you need to learn another stitch! If you do go for an additional row of HTr work the corners as follows: UK terms – 2Htr, 2ch, 2Htr. US terms – 2HDc, 2CH, 2HDc. You can play with the colours in your border. Put in more than one row of different colours if you choose. The picture below shows the effect of adding a row of HTr (UK terms) or HDc (US terms).

edge with tr and htr
additional row of half trebles to give a stronger edge

If you are feeling more adventurous you could use one of my other favourite edging stitches. There is a free pattern on my blog for a three colour rope edging which I think I am going to use for my second blanket – pics to follow.

And you are done. Unless you feel like adding tassels to the corners ๐Ÿ™‚ I hope you have enjoyed this free pattern and that if you are new to crochet you manage to produce your first blanket! Happy crocheting!

Annie ๐Ÿ™‚

Filed Under: Crochet patterns Tagged With: beginner crochet, crochet, crochet beginner, crochet blanket, crochet blog, crochet design, easy crochet lapghan, free crochet pattern, Free pattern

Crochet Rope Edging

August 24, 2020 by Annie Leave a Comment

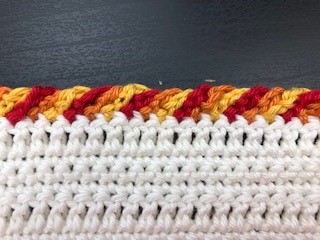
This three coloured rope crochet edging makes a beautiful finish to any project. I was looking for an neat edge that used all three of the colours from my project. This edging forms a pretty rope effect and although it feels a bit fiddly to start with you will soon find you get into a rhythm.

crochet rope edging
three colour crochet rope edging

The materials I am using in this example are Sirdar Cotton DK and a 4mm hook. These photographs use the following colours, Red (shade 510), Honeysuckle (shade 508) and Citrus (shade 531). The base colour is Vanilla (shade 502).

Three coloured rope crochet edging pattern

Choose your start point and join in the first colour. Make a chain of five stitches and take the hook out of the stitch to leave a loop. Tip – as you work it is easy to pull out stitches so I recommend pulling a bit of thread through to leave a larger loop.

Join in the second colour to the stich alongside your first chain and again make a chain of five stitches then remove the hook.

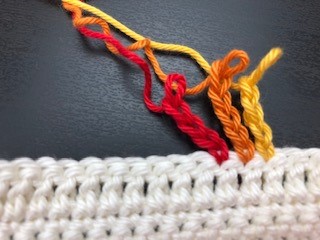
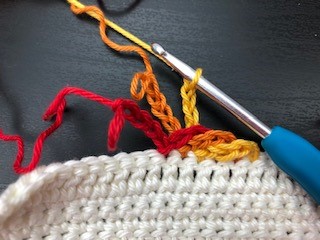
Finally join in the third colour into the next stitch of your project, making your final chain of five stitches. When you have joined your third colour the work should look like this picture below.

crochet rope edging
three colours joined

Start making the three coloured crochet rope

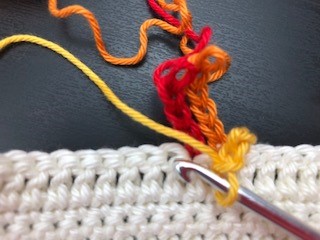
Next we are going to start to make the rope. Put your hook back into the loop at the end of the first chain you made. In my work above this is the yellow chain. This is where it gets a bit fiddly! I found if I worked slowly at first and kept the colours from tangling, I got into an easy rhythm after a few colour changes ๐Ÿ™‚

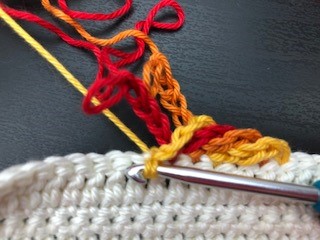
With your hook in the loop at the end of the first chain, bring this chain down in front of all the others and put your hook into the stitch next to the third colour. This is the next available stitch on the edge of your project as shown below.

crochet rope edging
hook placement for first twist of the rope

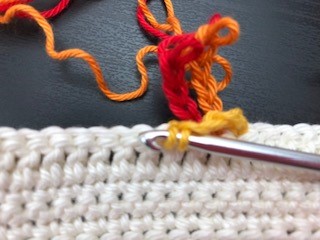
Make a slip stitch by putting your hook into this stitch, wrapping the yarn around and pull back through the work as shown below. Next pull this through the loop on the hook to form a slip stitch.

slip stitch to make the first twist
slip stitch to secure the first twist

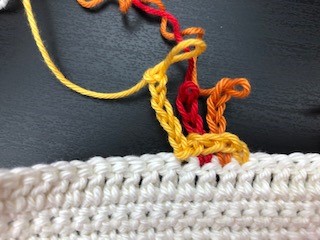
Work another five chains with this colour and remove the hook from the work. Your edging should look like this picture below.

crochet rope edging 4
crochet rope edging after the first twist

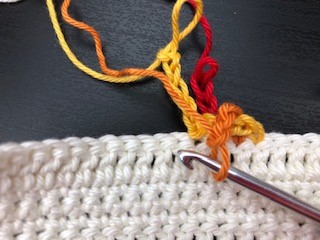
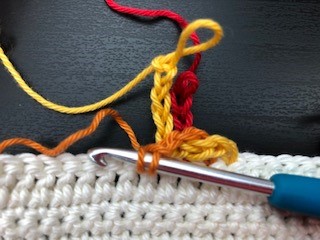
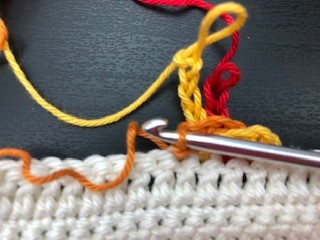
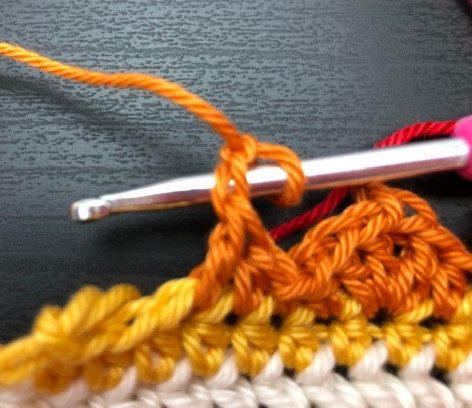
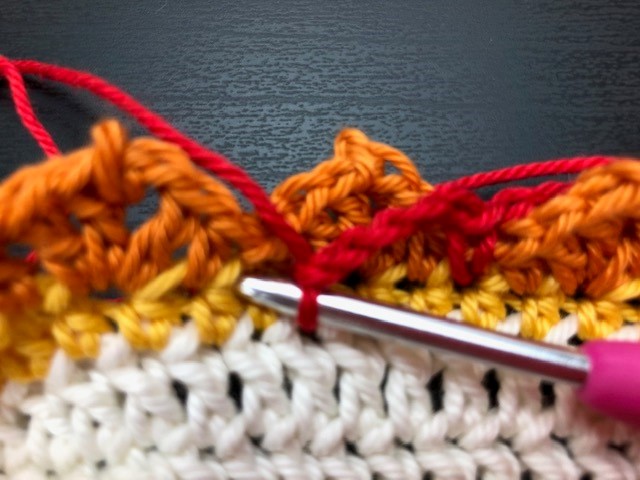
You have made the first twist and the rest of the crochet rope follows the same method. Put your hook into the end of the chain nearest to the right of the work. Bring the chain to the front of the work and put your hook into the next available stitch to the left of the work. For my example here this means putting the hook into the end of the orange chain. Bring this chain forward and secure the twist with a slip stitch into the stitch next to the yellow chain, as shown in the photos below.

crochet rope edging 5
bring the next chain to the front of the work
crochet rope edging 6
work into the next available stitch
crochet rope edging 7
slip stitch leaving one loop on the hook
crochet rope edging 9
work another five stitch chain and move the hook to the next colour

Finishing your work – Tips

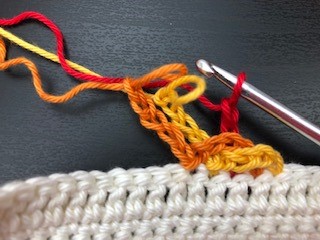
That really is all there is to it. Continue picking up each colour, bringing it to the front of the work and secure with a slip stitch before making a new five stitch chain. You will see your rope start to grow. More pictures below along with a few final tips.

crochet rope edging 10
third twist secured
crochet rope edging 11
keep going in the same way to form the rope

Using the rope edging on the ends of rows side

If you are working along an edge that has the ends of rows rather than a neat set of stitches this can be difficult to space. Measure the gap between two slip stitches of the same colour on your first edge and use that as a guide to place your slip stitches on this edge.

Changing the pattern to suit different weights of yarn or tension

If you find that the tension of the rope doesn’t sit well or look right then adjust the number of stitches you have in your chain. I found five chain stitches was perfect for this Cotton DK. You might need more/fewer if you are working with a different weight of yarn. Just find the right tension by trial and error working a small section then see how the edging sits.

Dealing with corners

If you are working on a square or rectangular project you will have to deal with a 90 degree corner or rather four corners! You should find that if you work three colours into one stitch either side of the corner the rope will continue round the corner. This means that you work all three colours into the last stich of the row before the corner. Turn and again work all three colours into the first stitch on the next side. Please let me know if you would like to see photos of this and I will add them or put up a separate post.

Adding in more colours

I only used three colours in my design here but you could work a rope with more colours or fewer. Simply adjust the length of chain you use to give the desired effect.

I think that is it for now. I put up a pattern for flower petal edging if you would like to try something different. You can see that pattern here – flower petal edging. Please let me know if you like this edging pattern and if there is anything else I can help with. Happy crocheting!

Annie ๐Ÿ™‚

Filed Under: Crochet patterns Tagged With: crochet blog, crochet design, crochet edging, free crochet pattern, Free pattern

Flower Petal Edging Pattern

July 28, 2020 by Annie Leave a Comment

I was absolutely thrilled to receive a comment on one of my early posts requesting this Flower Petal Edging Pattern. This edging completed my Sunshine Flower Blanket which you can see as it grows in these posts. These goes back to the early days of my blog ๐Ÿ™‚

Sunshine Flower Blanket

Sunshine Flower Blanket – Progress!!

The Edging takes the theme of the flower squares I used to make the blanket. You can find the flower square pattern in a book by Tracey Lord called A Square a Day. I love this book and have used it as a source of inspiration many times.

Here is the pattern. For your ease I will list it twice using UK then US terms. The pattern uses three colours but you could keep to one or two if you prefer. My blanket was worked in Sirdar Cotton DK which is a glorious yarn with beautiful stitch definition and a lovely soft texture. I used their cream shade called Vanilla 502 for the background for the blanket.

The colours I used for the edging are:

  • Yellow – Yarn A – Citrus 531
  • Orange – Yarn B – Honeysuckle 508
  • Red – Yarn C – Red 510

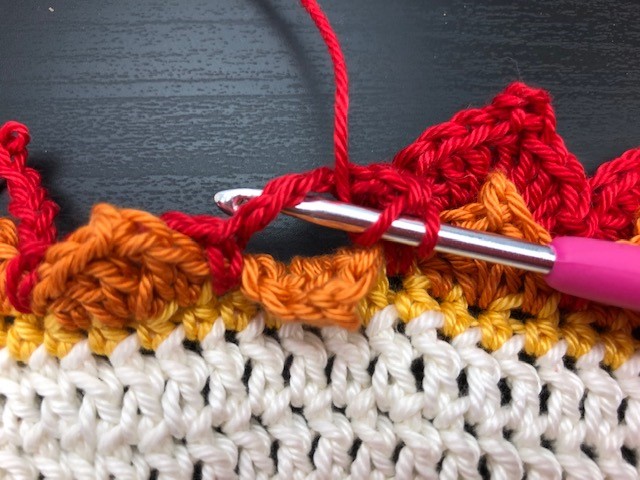
Before we start there is a stitch here that you might not have come across. Picot 2 or Picot 3. These little stitches create the peak of each petal. I used Picot 2 on the orange round of petals and Picot 3 on the final round of larger red petals. To perform this stitch simply chain 2 for picot 2 and then slip stitch into the first chain stitch. For Picot 3, you guessed it – chain 3 then slip stitch into the first chain stitch. The stitch creates a little knot which adds texture and definition.

working the slip stitch to form the Picot 2.

Flower Petal Edging pattern – UK crochet terms

First round

Using Yarn A join the yarn to the edge of your work with a slip stitch and work two chain. Work a row of Htr into each stitch of the edge of your project.

Second round

TIP – there is no need to start each round in the same place. Moving the start point around the project will spread the positioning of the ends you will need to weave in and also improves the overall uniform appearance.

Using Yarn B join in the yarn to the edge of your work with a slip stitch chain two, (1Tr, picot 2*, 2Tr) all into the same stitch, 1Htr, slip stitch. This should give you your first petal. The first petal is slightly different as it has the starting chain so I will write out the repeating petal pattern next. Each petal is worked over four stitches of the row below. (*see instructions above)

[1Htr, (1Tr, picot 2, 2Tr) all into the same stitch, 1Htr, Slip stitch]

Repeat this petal all the way around your project.

Third round

Using Yarn C – join in the yarn between any two petals with a slip stitch working into the stitch from the first round. The pictures show where you should put your hook.

Work 5 chain and then 1DC between the next two petals. Again you are working into the stitch you created on the first round. This round should be super quick and it forms the foundation for the final round of petals.

The chain loops might be at the front or the back of your work once you finish this round. It doesn’t really matter where they end up – mine are normally at the front. Push them to the back as you work the final round, pulling the petals from the previous round to the front.

Fourth and final round

Keeping with yarn C working into the chain loop you created on the last round in each chain loop work as follows: 1DC, 3Tr, picot 3, 1Dtr, 3Tr, 1DC. A total of 8 stitches into the chain loop then move onto the next chain loop and repeat all the way around your project.

picture shows the front of the work – working the petals into the chain loops

Finish off the ends and you are done!!

Flower Petal Edging pattern – US crochet terms

First round

Using Yarn A join the yarn to the edge of your work with a slip stitch and work two chain. Work a row of HDc into each stitch of the edge of your project.

Second round

TIP – there is no need to start each round in the same place. Moving the start point around the project will spread the positioning of the ends you will need to weave in and also improves the overall uniform appearance.

Using Yarn B join in the yarn to the edge of your work with a slip stitch chain two, (1Dc, picot 2*, 2Dc) all into the same stitch, 1HDc, slip stitch. This should give you your first petal. The first petal is slightly different as it has the starting chain so I will write out the repeating petal pattern next. Each petal is worked over four stitches of the row below. (*see instructions above)

[1HDc, (1Dc, picot 2, 2Dc) all into the same stitch, 1HDc, Slip stitch]

Repeat this petal all the way around your project.

Third round

Using Yarn C – join in the yarn between any two petals with a slip stitch working into the stitch from the first round. The pictures above in the UK terms section show where you should put your hook.

Work 5 chain and then 1SC between the next two petals. Again you are working into the stitch you created on the first round. This round should be super quick and it forms the foundation for the final round of petals.

The chain loops might be at the front or the back of your work once you finish this round. It doesn’t really matter where they end up – mine are normally at the front. Push them to the back as you work the final round, pulling the petals from the previous round to the front.

Fourth and final round

Keeping with yarn C working into the chain loop you created on the last round in each chain loop work as follows: 1SC, 3Dc, picot 3, 1Tr, 3Dc, 1Sc. A total of 8 stitches into the chain loop then move onto the next chain loop and repeat all the way around your project. See picture above in the UK terms section.

Finish off the ends and you are done!!

I hope you love this edging as much as I do. Happy crocheting!

Annie ๐Ÿ™‚

Filed Under: Crochet patterns Tagged With: crochet, crochet design, crochet petal, edging, flower petal, flower petal edging, Free pattern, petal edging

  • Page 1
  • Page 2
  • Go to Next Page »

Footer

Newsletter

Copyright © 2025 ยท Genesis Sample on Genesis Framework ยท WordPress ยท Log in