Hello and thank you for visiting my crochet blog. In this post I am sharing one of my latest patterns with you for free. If you would like to see the pattern advert free then it will also be available to buy on my Etsy store as a pdf download. The bunny stitch itself is one I created early in 2021. I have used the stitch in a few patterns but I think this one is my favourite. As I designed it I was looking forward to Easter and better weather! I really hope you love this free crochet pattern for a bunny sunhat.
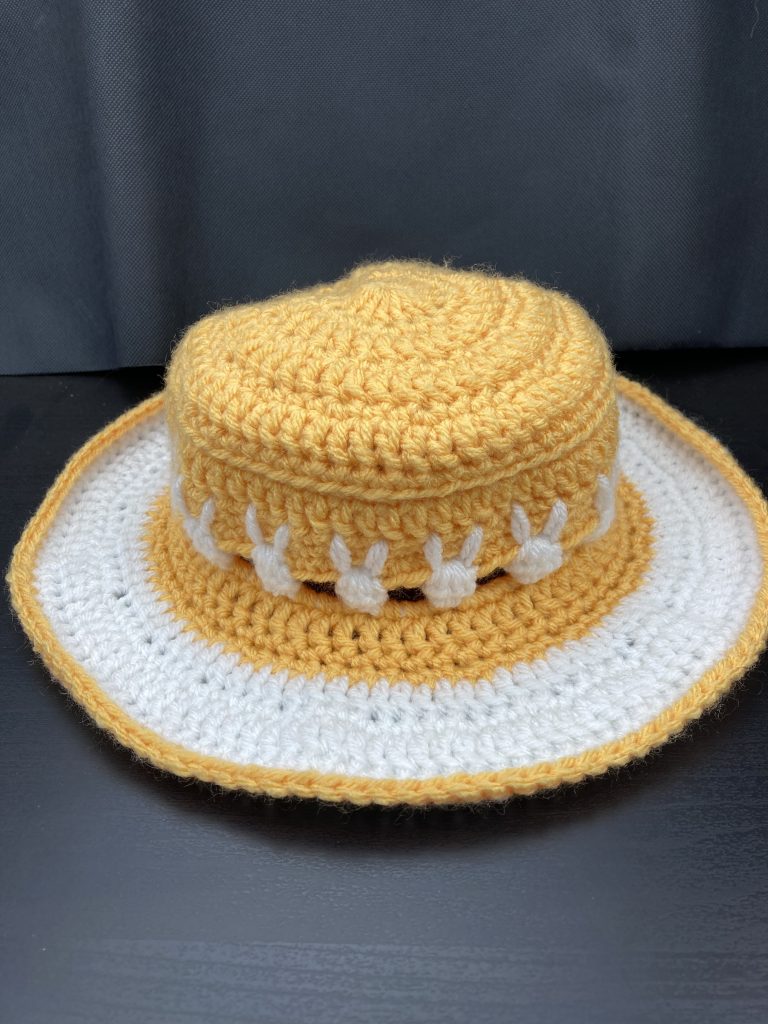
The pattern comes in two sizes. The Adult size has a headband of about 21 inches depending on your tension. The Children’s size has a headband that measures around 19 inches.
Crochet Bunny Sunhat – materials
This pattern is worked in Stylecraft Special Chunky yarn using a 6mm hook. I love the range of colours available in this yarn. I buy all mine from Woolwarehouse. You can see the full range of colours on their site here.
To make each hat you need just one ball of yarn in the colour of your choice (yarn A) and one ball in the contrast colour for the bunnies and hat band (yarn B). You can make the child’s hat in a solid colour with no contrast band using just one ball. Then you would only need oddments for the bunnies.
Free crochet pattern for a Bunny Sunhat -UK crochet terms
For US crochet terms I will add a separate post and will put a link here when it is live. If you want to work from these instructions then for DC read SC and for Tr or Treble read DC.
The hat is worked from the centre of the crown down and out to the brim in one piece. All the rows are worked on the right side of the hat apart from the row of bunny bodies for which we will turn the work inside out and work from the wrong side.
Adult and Child size – uk terms
Foundation and round 1
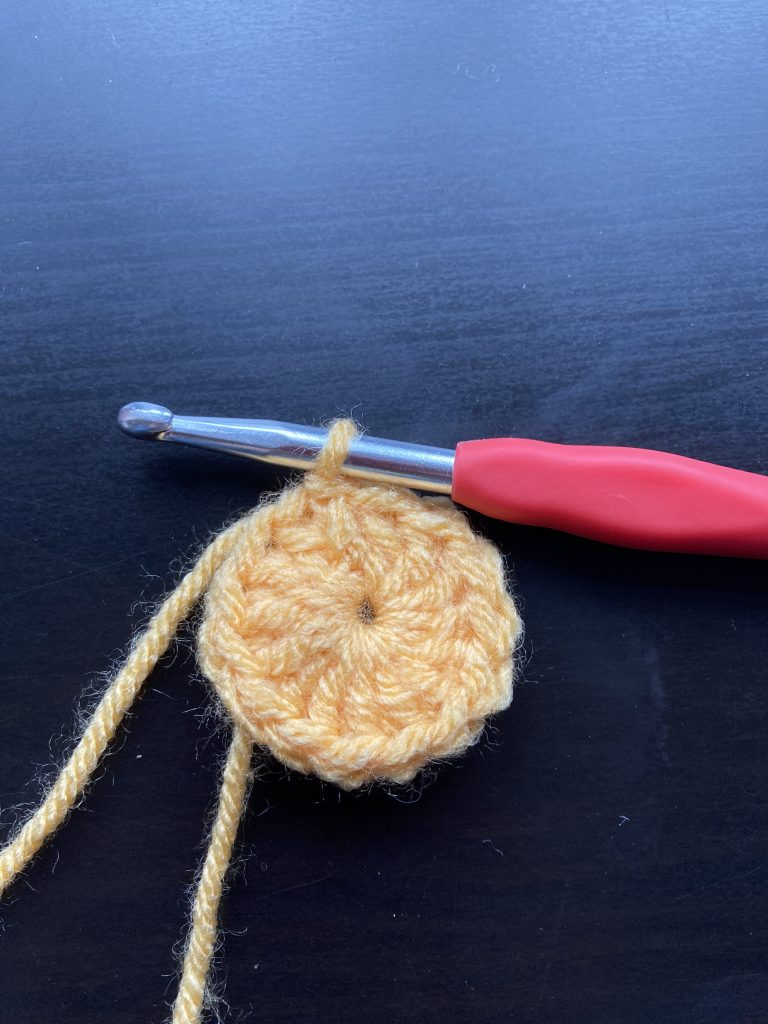
Start in Yarn A. Make a magic loop, CH3 and work 14Tr into the loop then pull the loop closed and slip stitch to join to the top of your starting chain stitches.
Round 2
CH2 then work 2DC into each of the stitches on the previous row. Join with a slip stitch to the top of the starting chain stitches.
Round 3
CH3 and work 29Tr then join with a slip stitch to the top of the starting chain stitches.
Round 4
CH2 then work (2DC into the next stitch and 1 DC into the following stitch) repeat the stitches in brackets 14 times then work 2DC into the final stitch of the round and make a slip stitch to join to the top of the starting chain stitches.
Round 5
CH3 and work 44Tr then join with a slip stitch to the top of the starting chain stitches.
Round 6
CH2 then (work 2DC into the next stitch and 1DC into each of the following two stitches) repeat the stitches in the brackets 14 times then work 2DC into the next stitch and 1DC into the following stitch and join with a slip stitch to the top of the starting chain stitches.
Round 7
CH3 and work 59Tr then join with a slip stitch to the top of the starting chain stitches.
Carry on with these instructions for the CHILD size hat. Jump down in these instructions to the ADULT size.
Round 8 – Child
CH2 then (work 2DC into the next stitch then work 1DC into each of the next 14 stitches) repeat the stitches in the brackets 3 times then work 2DC into the next stitch and 1DC into each of the the following 13 stitches and join with a slip stitch to the top of the starting chain stitches.
Round 9 – Child
This round is the edge of the crown and start of the bunny band. CH2 then work DC into the back of the loops only to leave a ridge at the front of the work. You should have 63DC then join with a slip stitch to the top of the starting chain stitches.

Round 10 – Child
Chain 3 and work 63Tr then join with a slip stitch to the top of the starting chain stitches.
Round 11 – Child
Chain 2 and work 63DC then join with a slip stitch to the top of the starting chain stitches.
Round 12 – Child
Chain 2 and work 63DC then join with a slip stitch to the top of the starting chain stitches.
Round 13 – Child
This round we will add the bunny ears. The photographs that follow show the stitch being worked on a plain band not the hat so do not expect yours to look like this 🙂
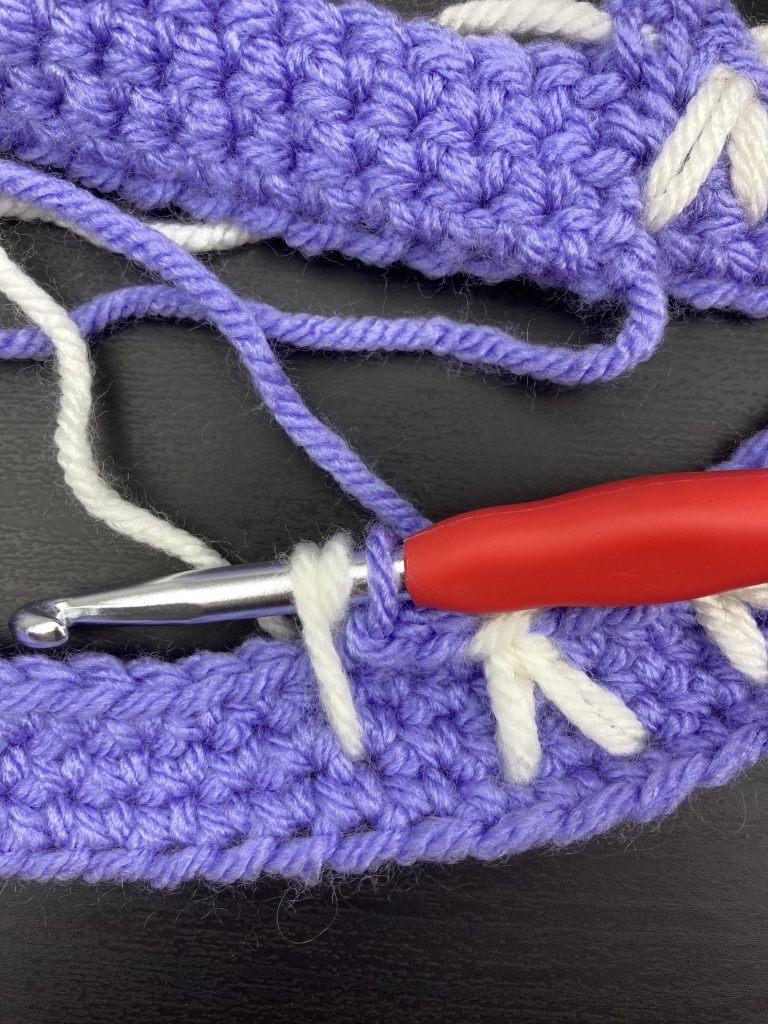
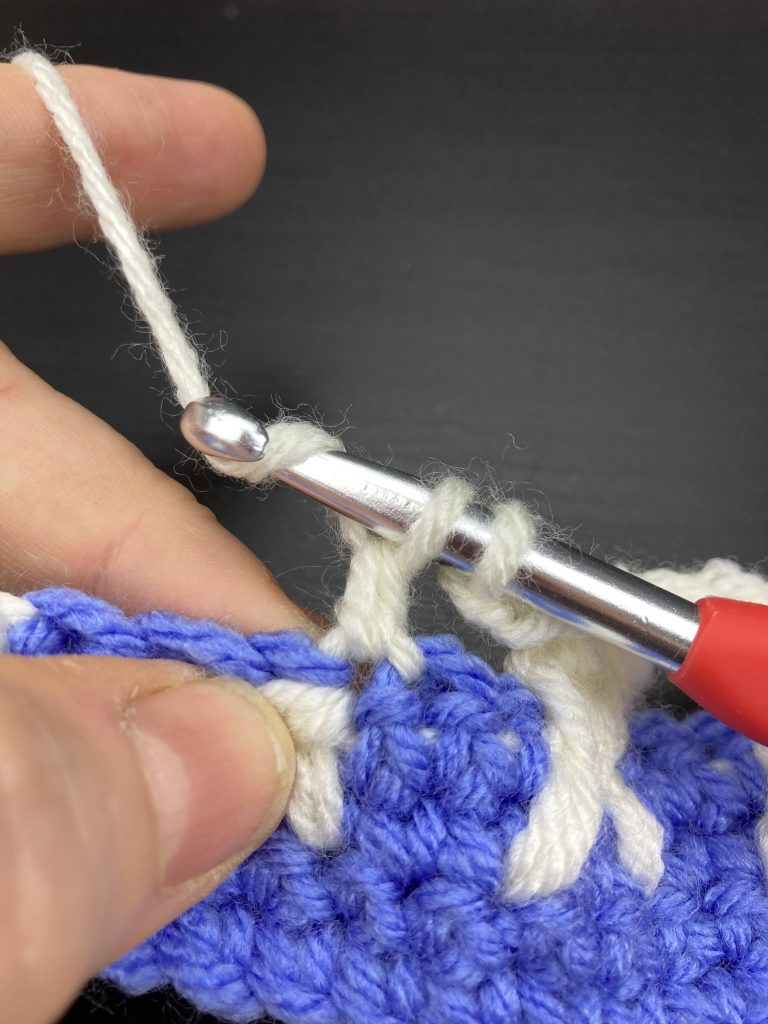
CH2, joining in the contrast yarn B then work one DC in yarn A. Remember to place yarn B against the top of the work as you work this DC. You can see in the picture that yarn B is carried along the work. The picture below shows the positioning of the yarn as you start the stitch.

Now for the ears!
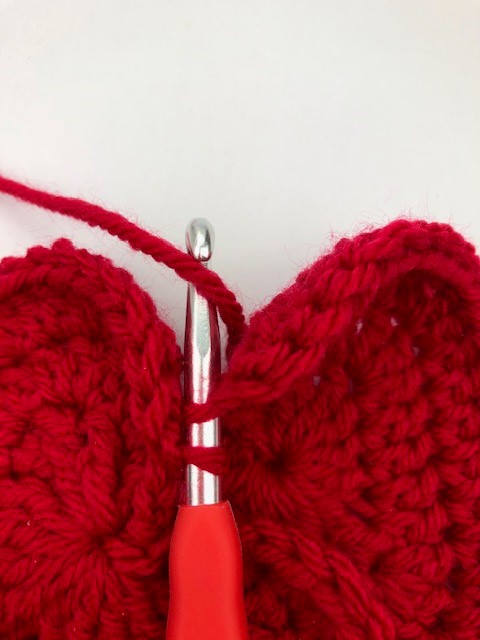
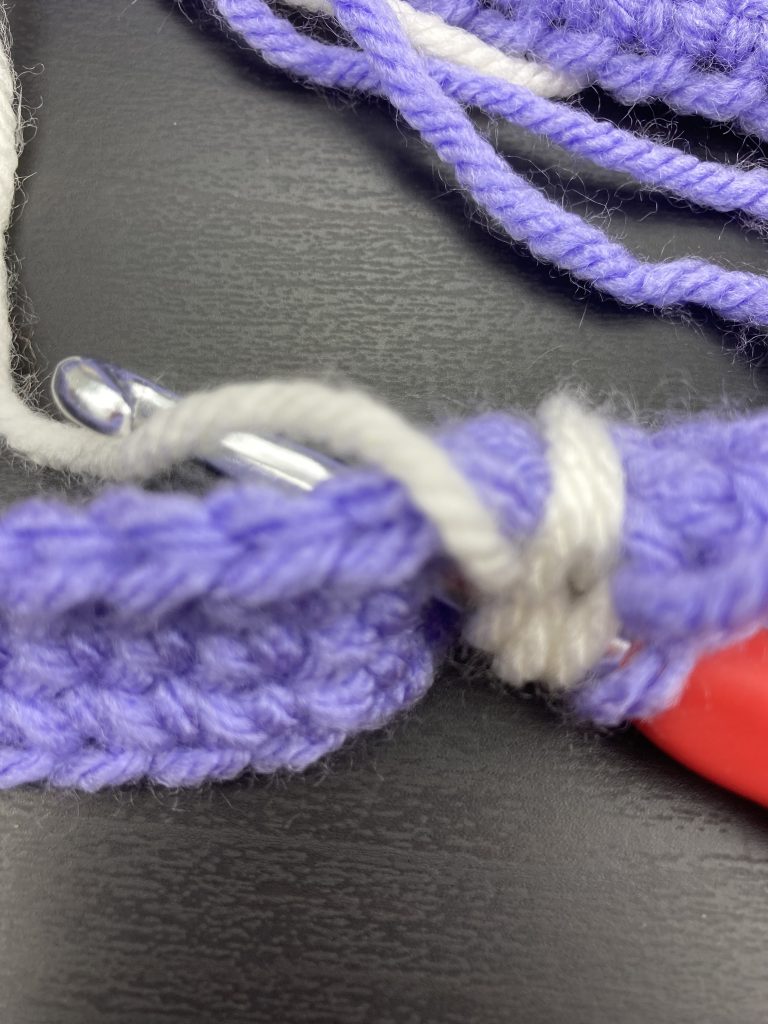
Hold yarn A against the top of the work then wrap yarn B around your hook. Insert your hook into the stitch two rows down and one stitch behind the position of your last stitch.
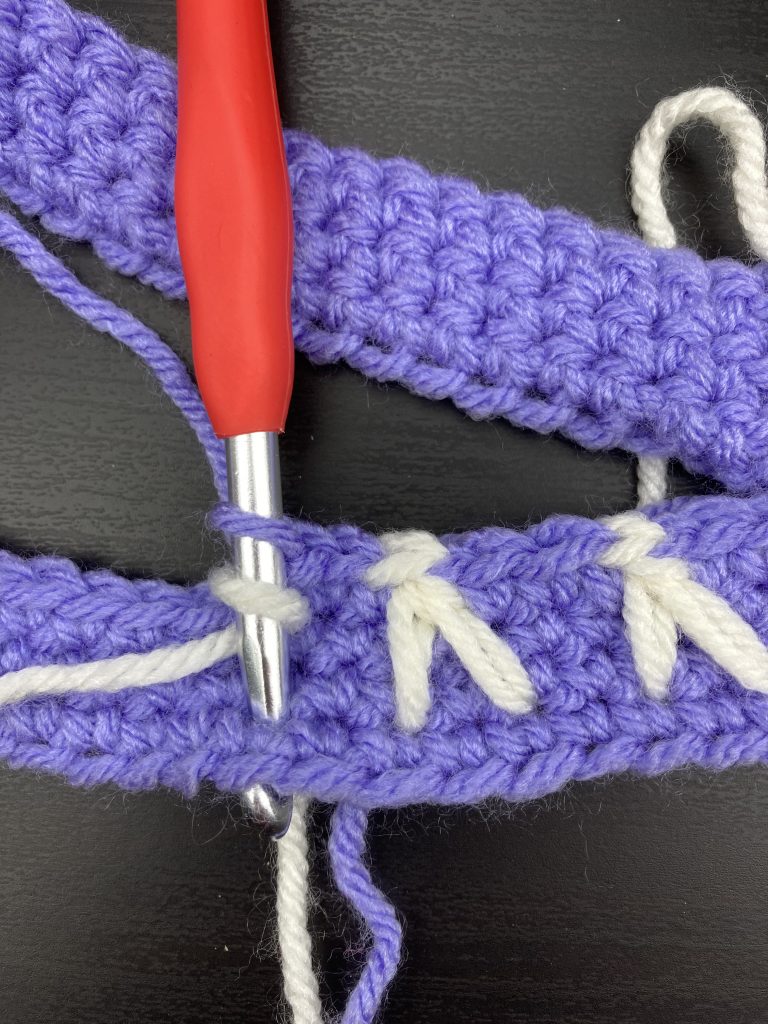
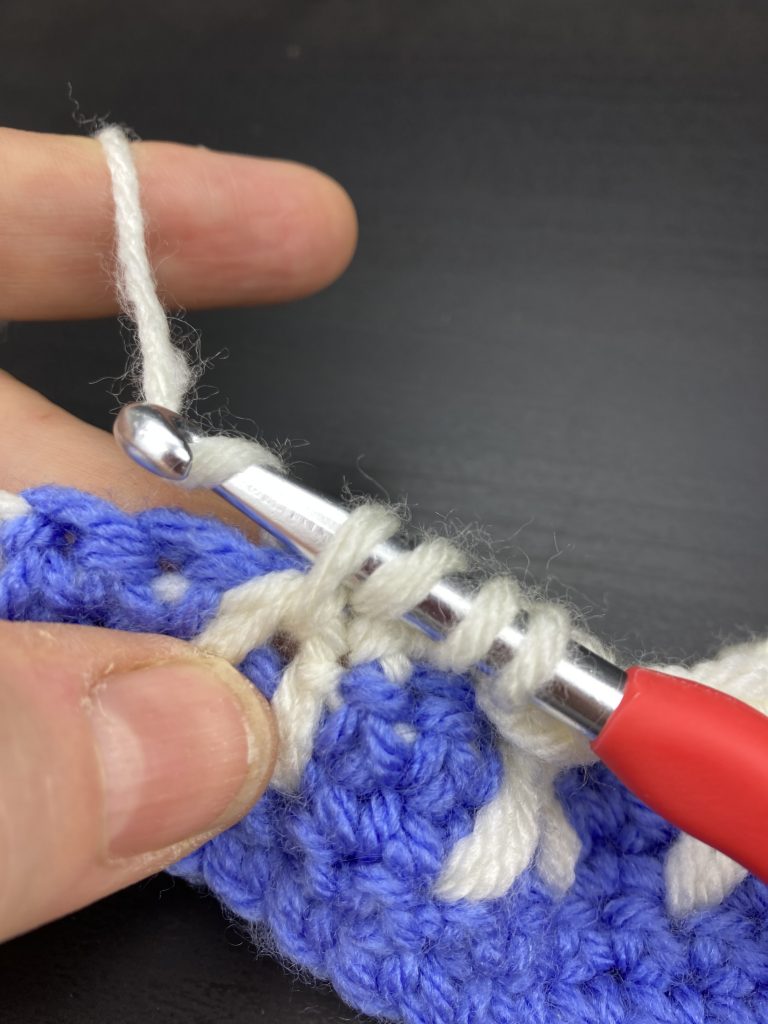
With your hook through to the back of the work, wrap yarn B round the hook and pull back through to the front.
You should have three loops on the hook, one in yarn A and two in yarn B.
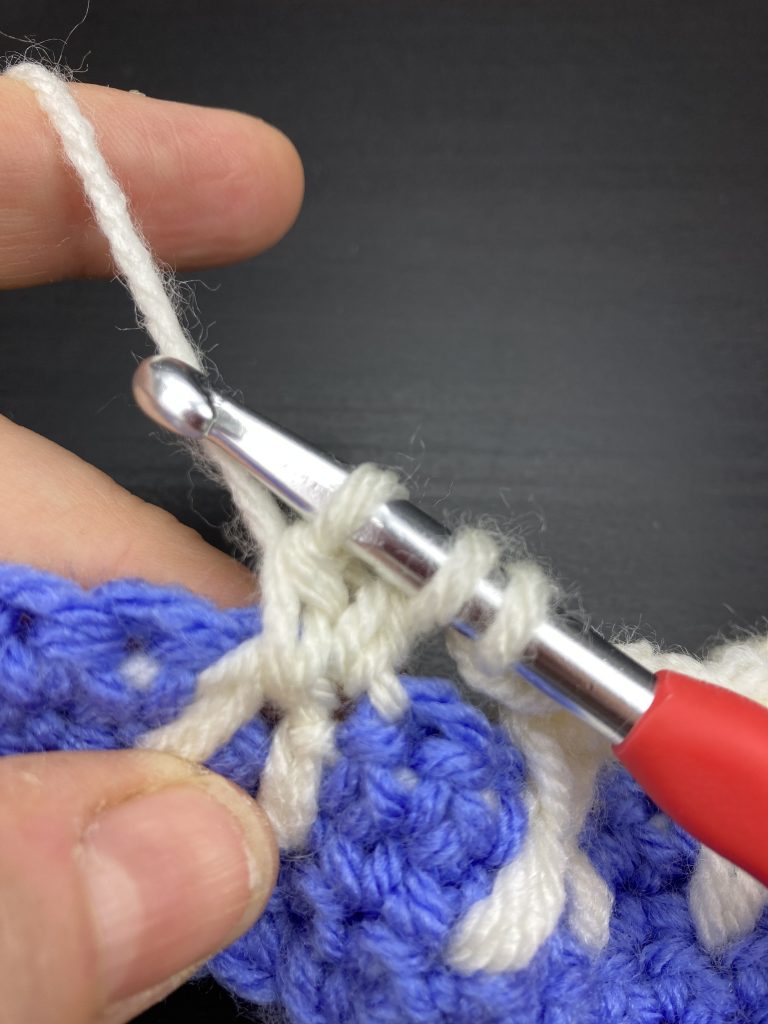
Second Ear coming up!
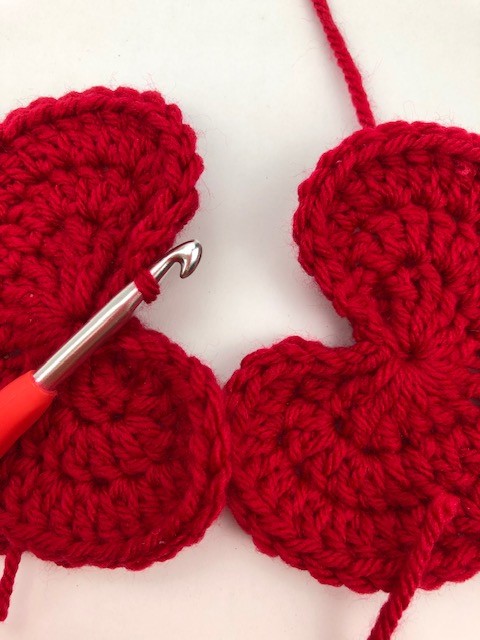
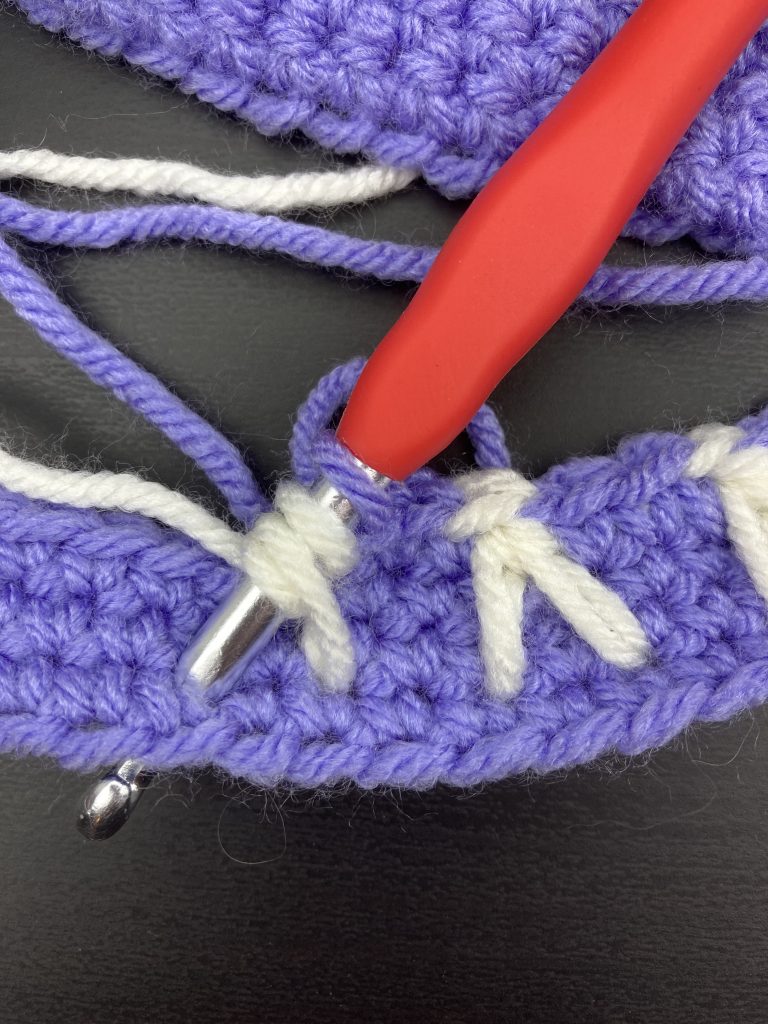
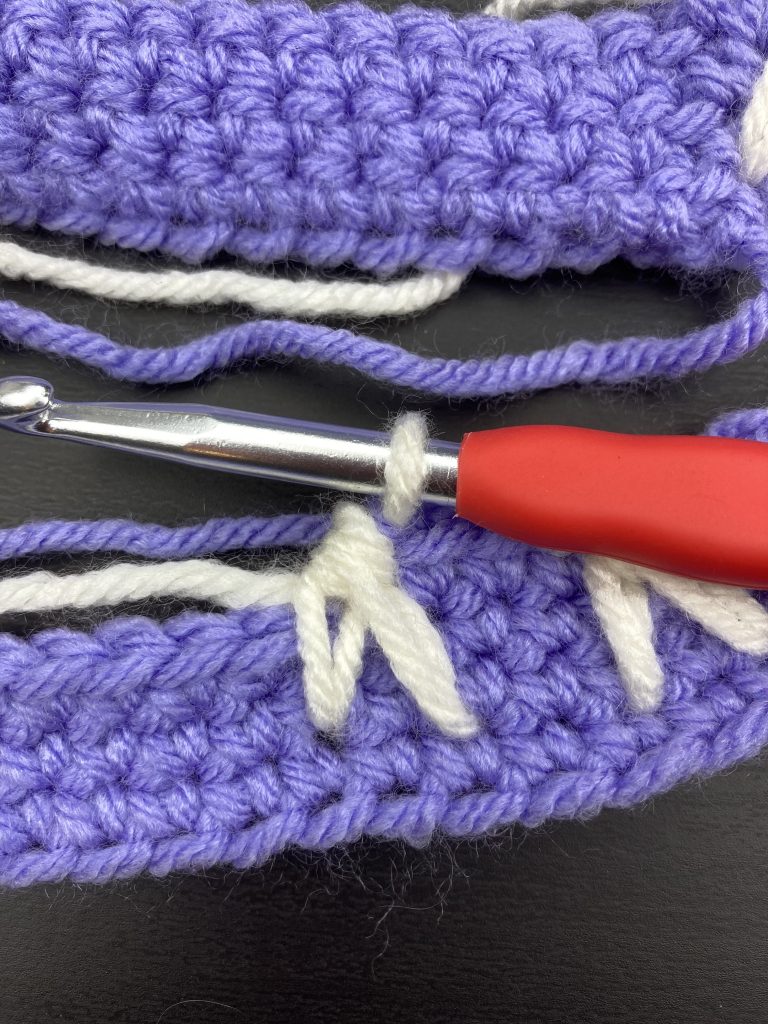
Now wrap yarn B around the hook again and insert the hook into the stitch two rows down and two in front of the position of your first ear stitch. Note this will be two along from the one you worked into in the first part of this stitch. This part is the second ear and you should see one clear stitch between the ears as shown below.
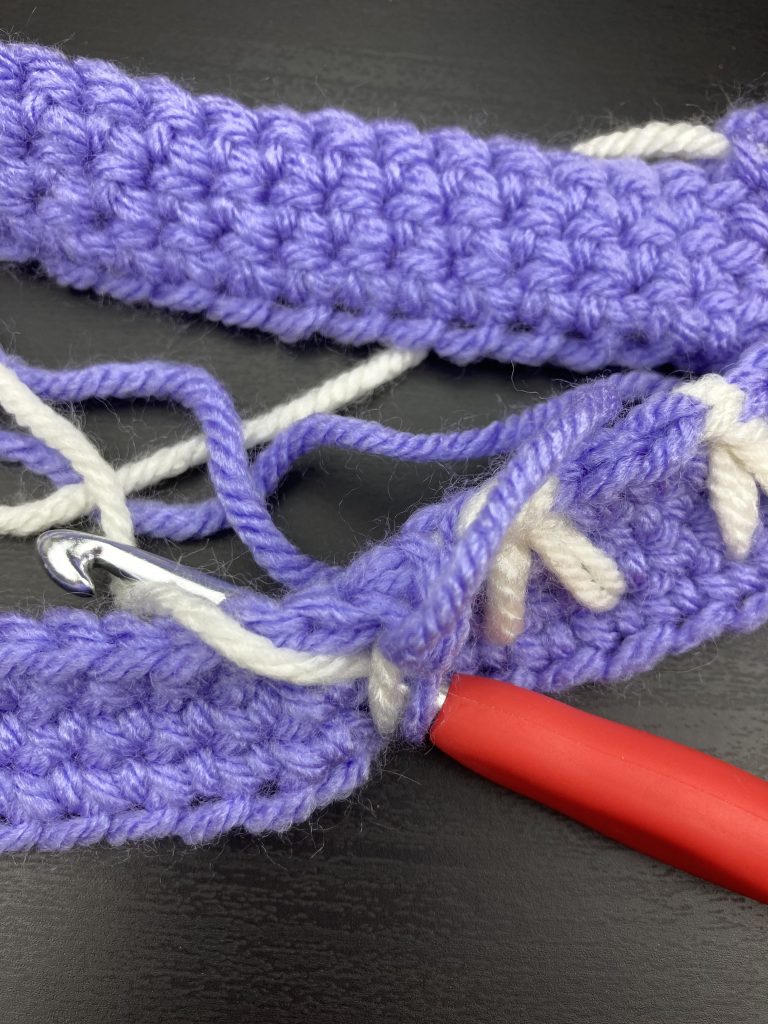
With your hook through to the back of the work, wrap yarn B round the hook and pull back through to the front. You should now have five loops on the hook, one in yarn A and four in yarn B.
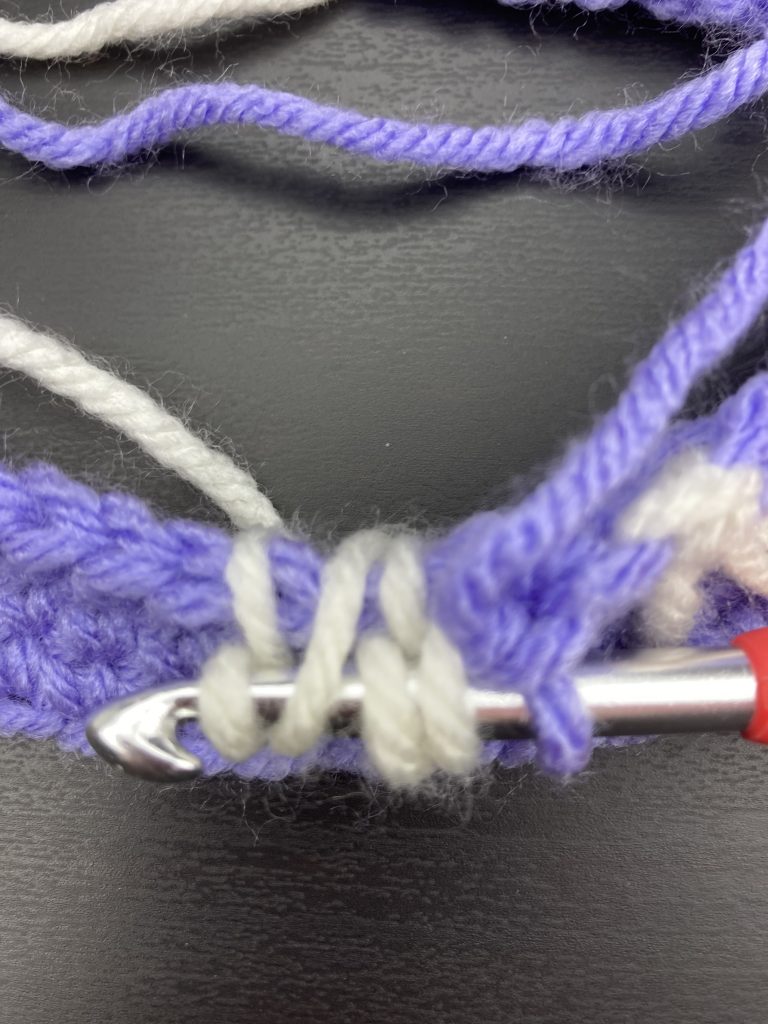
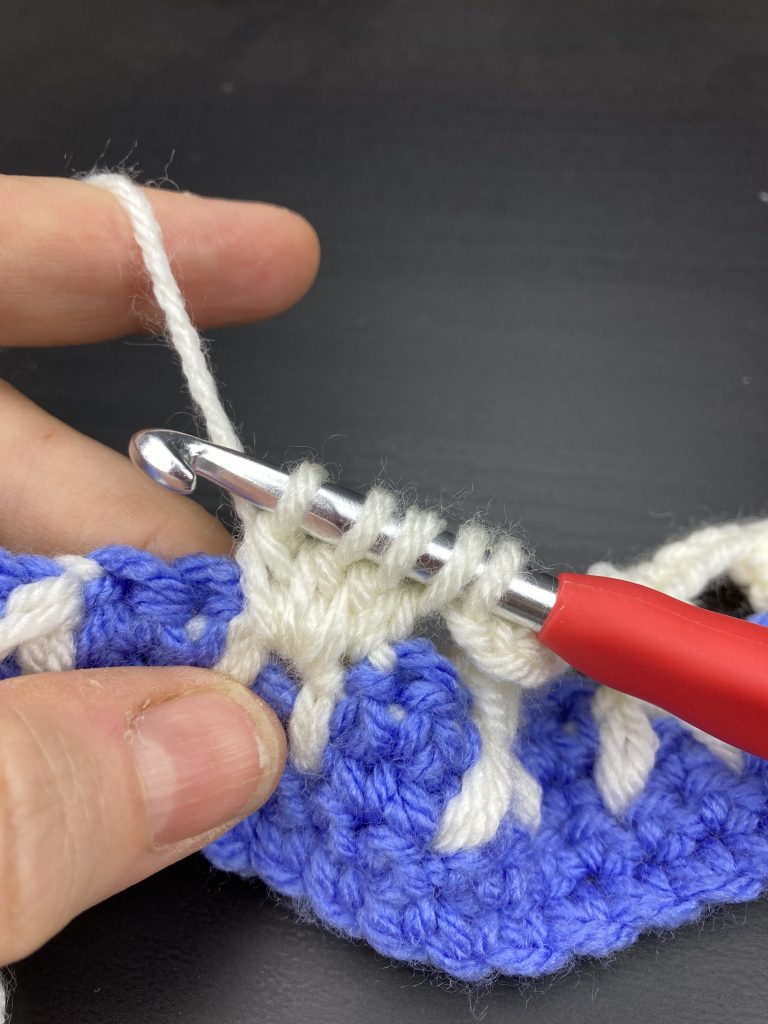
Wrap yarn B around the hook and pull back through all the loops on the hook to leave one loop and complete the ear stitch.
Hold yarn B against the top of the work and work 3 DC in yarn A, carrying yarn B along as shown below.
These four stitches form the bunny ears. Remember to keep an even tension by pulling the yarn gently each time you change colour. When you work your second pair of ears you should leave a gap of one stitch from the previous ear :-). Repeat another 14 times then work one more set of bunny ears. This time do not carry yarn B along, leave it at the back of the final set of ears. Work 1DC in yarn A and slip stitch to join to the top of the starting chain. Break off yarn A.
Round 14 – Child
This round is the only one we will work from the wrong side of the piece. Turn your work inside out and pick up yarn B which should be positioned at the end of the last pair of ears you added. Each bunny is a four treble cluster stitch with the first treble being worked into the stitch in yarn B on the previous row. The remaining three Trebles are worked into the row below just between the ears. Don’t worry if this sounds complicated it is described in stages below with pictures.
To start the first bunny, CH3 in yarn B then treating this chain as the first Tr in a 4Tr cluster, work the remaining three Trs of the cluster into the space below and between the bunny ears. Pull the yarn through to leave one loop on the hook after this first bunny. Chain 3 and continue with a four Tr cluster into the next bunny ear stitch. Detailed steps with photos below.
Lets give the rest of your bunnies a body!
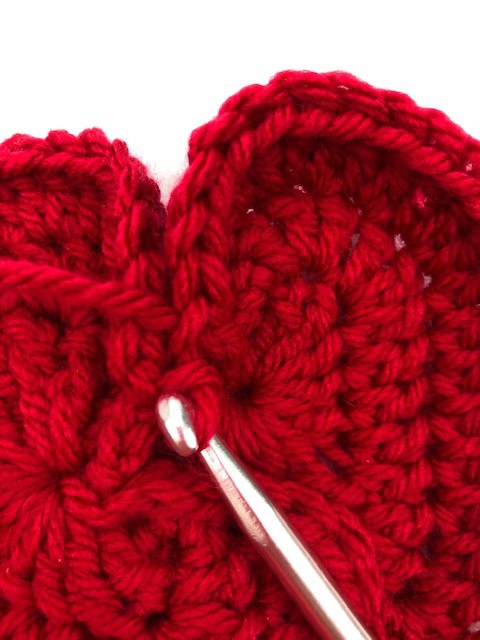
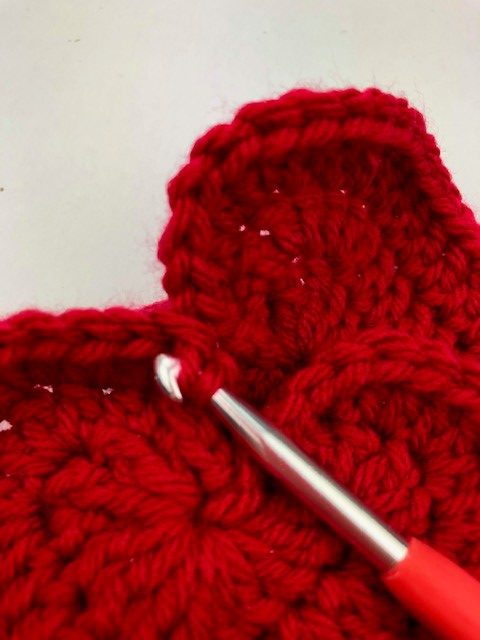
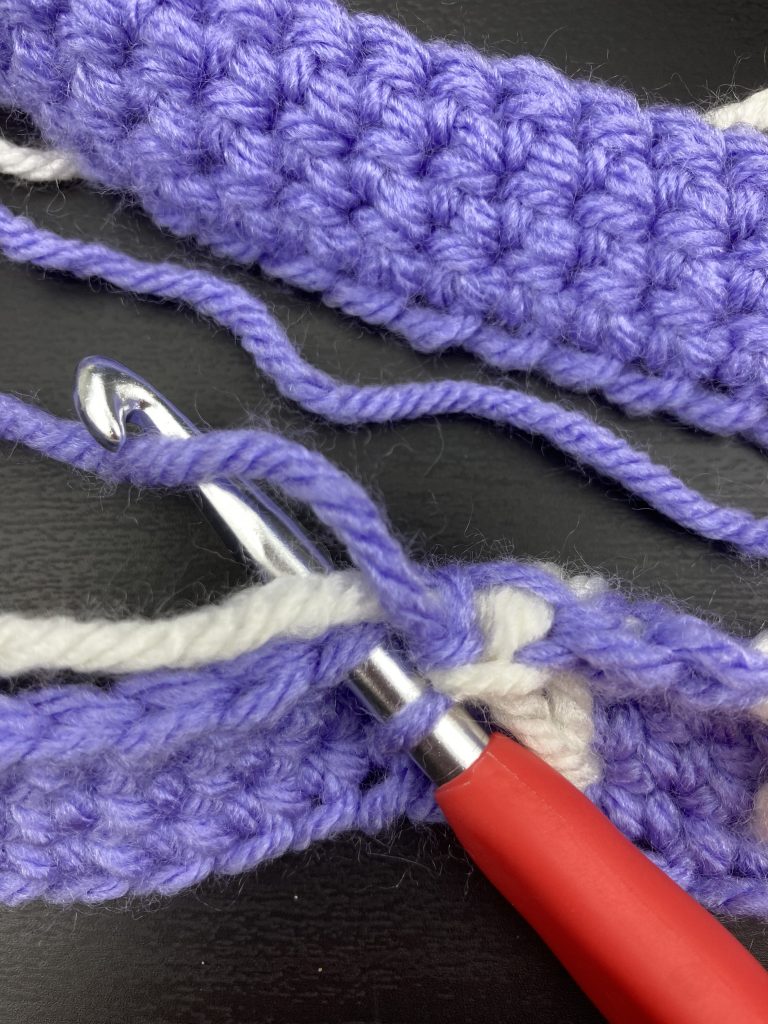
To work a cluster of trebles * start by wrapping your yarn round the hook and pushing it into the stitch in yarn B on the previous row.

Complete half of the treble leaving two loops on the hook.
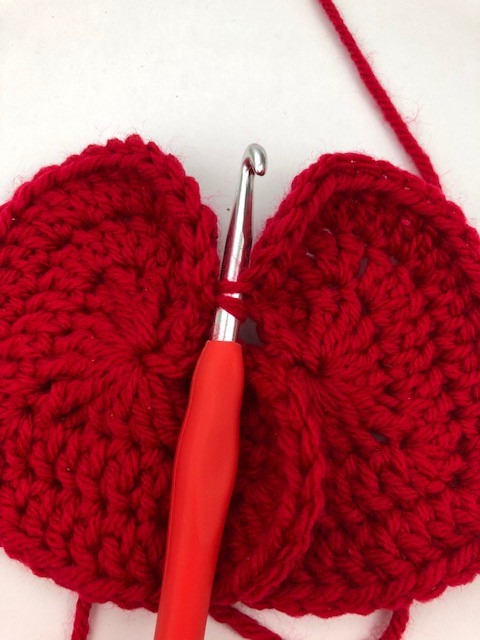
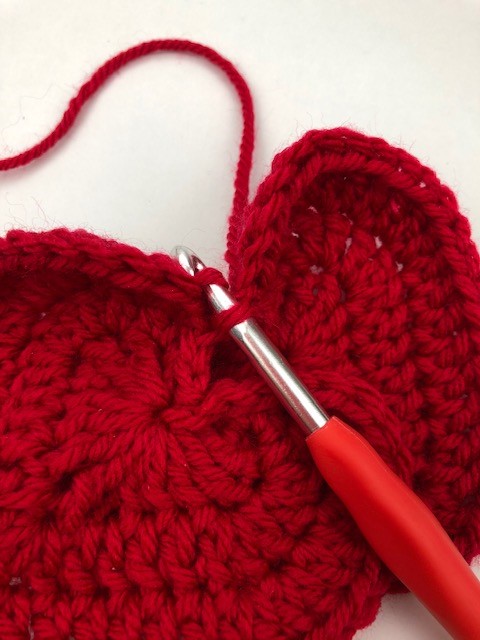
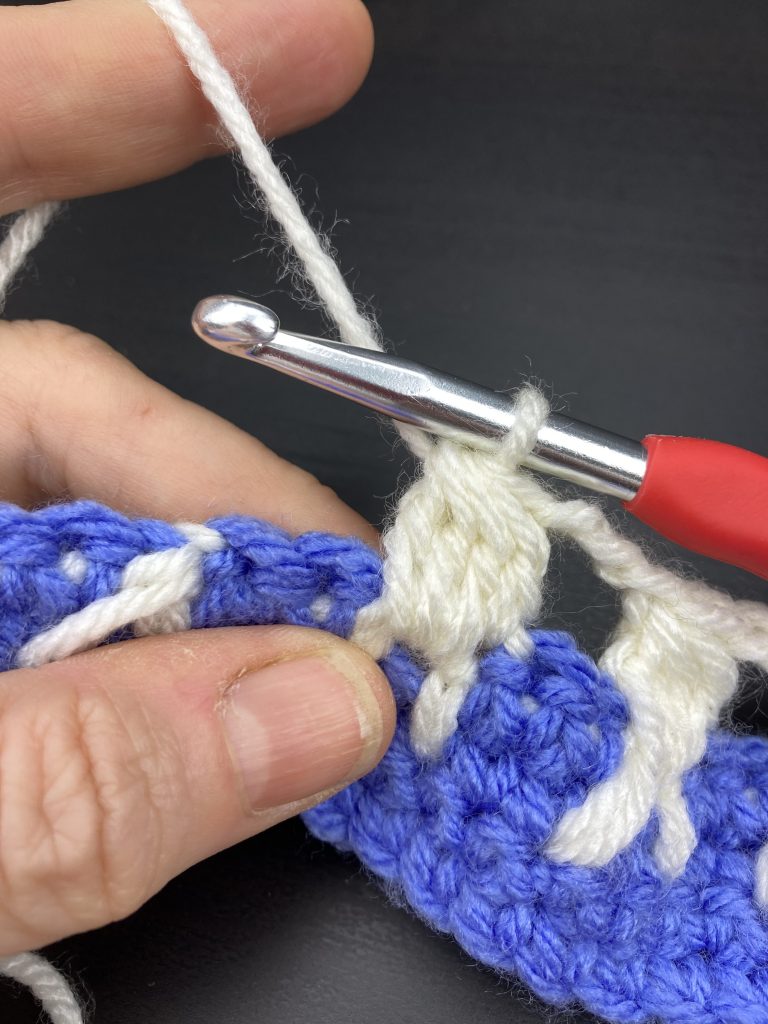
Now start your second treble of the cluster by wrapping the yarn around the hook and inserting it into the row below, between the bunny ears. We are working on the wrong side of the piece on this row. It is important to check that your hook is coming through in the correct place between the ears and remember to check both sides!
Wrap the yarn around the hook and pull back through and you will have four loops on the hook. Wrap the yarn round and pull through two of these to complete half of the second treble and leave three loops on the hook.
Half way there on the bunny body!
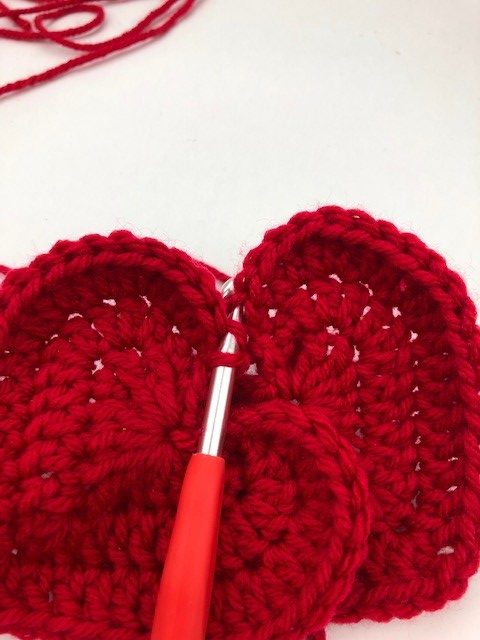
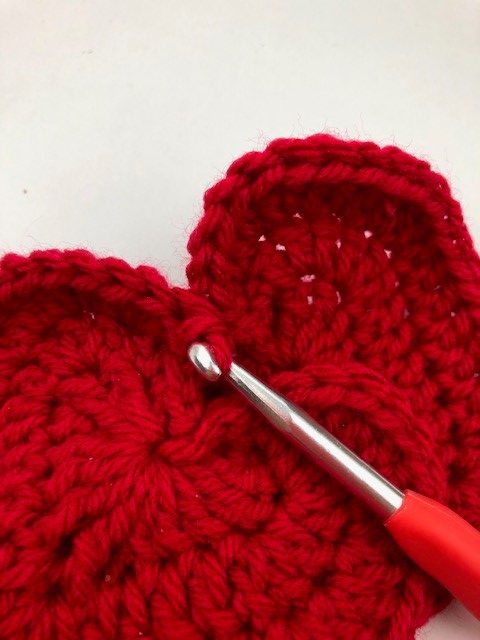
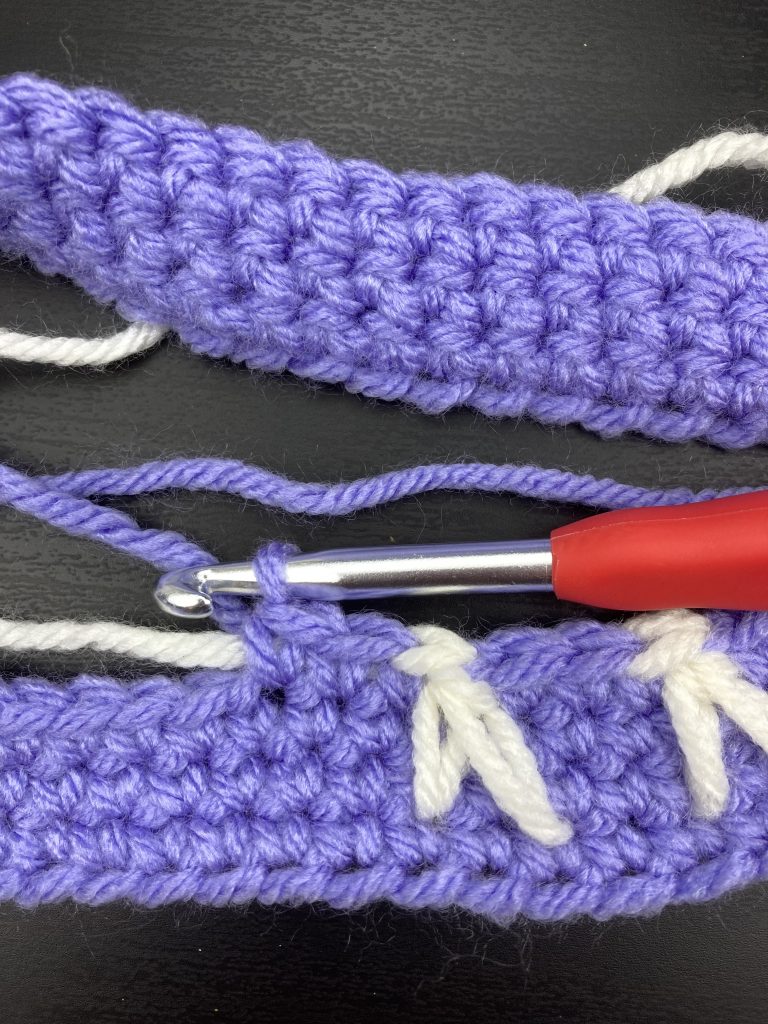
Repeat twice more each time wrapping the yarn around and putting the hook in between the ear stitches. Wrap the yarn round and pull through, wrap the yarn round again and pull through two loops to complete half the third and fourth trebles of the cluster. You should have five loops on the hook.
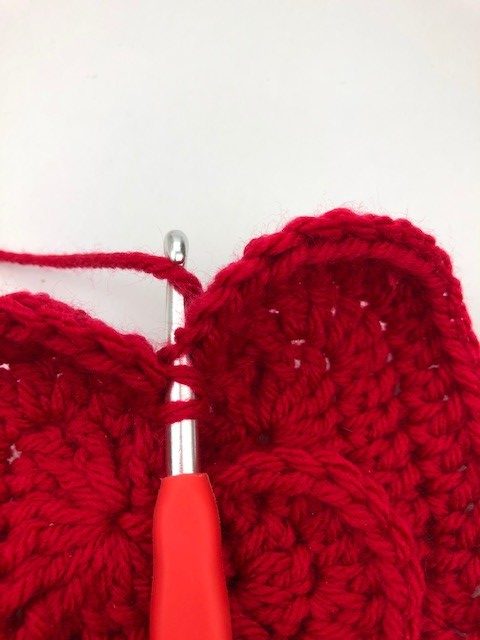
Wrap the yarn around the hook and pull through all five loops and you have completed your bunny.
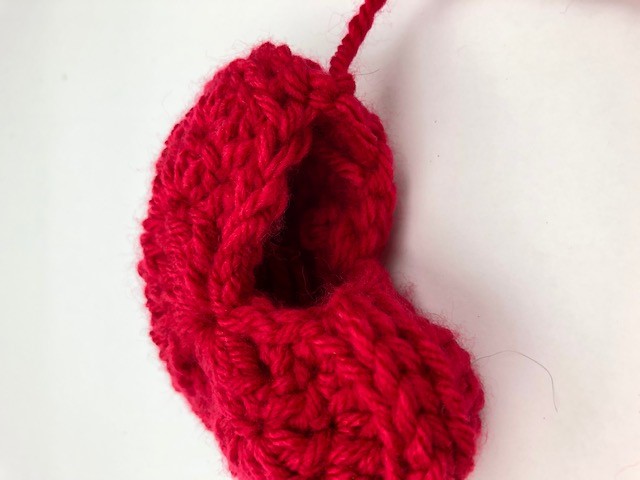
Chain 3 and repeat from * until you get to the end of the row. At the end of the row when you have worked the last bunny, chain 3 and join with a slip stitch to the top of the 3 chain that started the row.
REMEMBER to turn the work back round so that you complete the remaining rows from the right side of the work.
Round 15 – Child
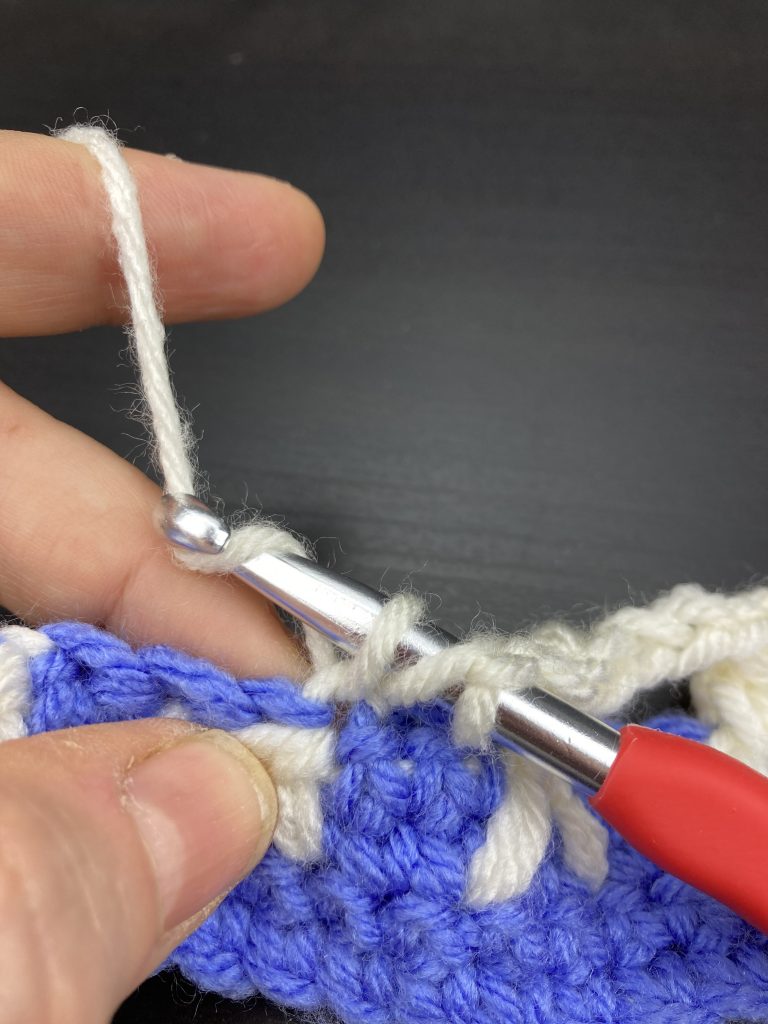
Join in yarn A, CH2 and work 63 DC placing four DC between each of your bunnies by working into the gaps between bunny bodies.
Round 16 – Child
CH3 and work 63 Tr then join with a slip stitch to the top of the starting chain stitches.
Round 17 – Child
CH2 and work 63 DC then join with a slip stitch to the top of the starting chain stitches.
Round 18 – Child
This round forms the edge of the brim. As with the edge of the crown we will be working into half of the stitch as we turn the corner. This time we are working into the front loop of the stitch only.
CH2 then working into the front loop of the stitch only (work 2DC into the next stitch then one DC into the following stitch) repeat the stitches between brackets 31 times then work 2DC into the final stitch and slip stitch to join to the top of the starting chain.
Round 19 – Child
If you are using your contrast colour for the brim then join in yarn B at this point. CH3 and work a round of Tr then slip stitch to join to the top of the starting chain.
Round 20 – Child
CH2 and work a round of DC then slip stitch to join to the top of the starting chain.
Round 21 – Child
CH2 and work (2DC into the next stitch then 1 DC into each of the following three stitches) repeat the stitches between brackets until you reach the end of the round then slip stitch to join to the top of the starting chain.
Round 22 – Child
CH3 and work a round of Tr then join with a slip stitch to the top of the starting chain.
Round 23 – Child
CH2 then work a round of DC and join with a slip stitch to the top of the starting chain.
Round 24 – Child
Final round!! If you have worked the brim in yarn B then rejoin yarn A to add the final round. CH2 and work a round of DC then join with a slip stitch to the top of the starting chain.
Now finish off your ends and you are done!!
Free crochet pattern for a Bunny Sunhat – UK crochet terms ADULT size
Round 8 – Adult
2CH and work (2DC into the next stitch then 1 DC into each of the following four stitches) repeat the stitches between the brackets 11 times then work 2DC into the next stitch and 1DC into each of the next 3 stitches then slip stitch into the top of the starting chain.
Round 9 – Adult
CH3 and work 71 Tr then join with a slip stitch to the top of the starting chain.
Round 10 – Adult
CH2 and work 71 DC then join with a slip stitch to the top of the starting chain.
Round 11 – Adult
This round is the edge of the crown and start of the bunny band. CH2 then work DC into the back of the loops only to leave a ridge at the front of the work. You should have 71DC then join with a slip stitch to the top of the starting chain stitches.
Round 12 – Adult
CH2 and work 71 DC then join with a slip stitch to the top of the starting chain.
Round 13 – Adult
CH2 and work 71 DC then join with a slip stitch to the top of the starting chain.
Round 14 to Round 18 – Adult
Follow the instructions for Round 11 to Round 15 – Child. The Adult size works on CH + 71 stitches where the child size works on CH + 63 stitches. There are two more bunnies on the Adult size 🙂
Round 19 – Adult
CH2 then work 71 DC and join with a slip stitch to the top of the starting chain.
Round 20 – Adult
CH3 and work 71 TR then join with a slip stitch to the top of the starting chain.
Round 21 – Adult
CH2 and work 71DC then join with a slip stitch to the top of the starting chain.
Round 22 – Adult
CH2 and work 71 DC then join with a slip stitch to the top of the starting chain.
Round 23 to Round 29 – Adult
Follow the instructions for Round 18 to Round 24 – Child. These rounds add the brim to complete the sunhat.
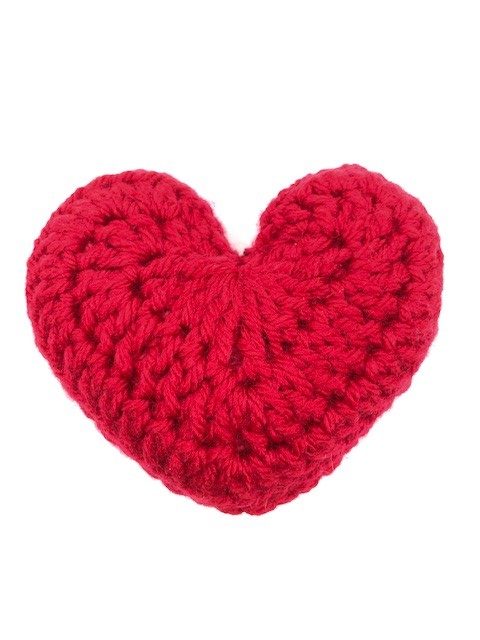
I really hope you love these little hats as much as I do. I have more projects to follow and more free patterns using my bunny stitch so please check back again or join my mailing list if you would like to see these. The first of these patterns is already available here – Free pattern for a crochet bunny headband.
If you would like to put up a link to this free crochet pattern for a bunny sunhat, please feel free. If you would like to make these hats to sell or share the pattern in any other way then please contact me first. It is my long term dream to build this blog by sharing free patterns and crochet love. I am always interested in talking to other bloggers on the same journey. Happy crocheting!
Annie 🙂