• Skip to primary navigation
  • Skip to main content
  • Skip to footer

Stickytapeandstring

Created with WordPress managed by 1&1

  • Craft projects
    • craft business tips
    • craft blog
    • Crochet patterns
    • Upcycling
    • craft with kids
  • Blogging
    • New to blogging
    • Blog diary
  • Bullet Journal
  • About me
  • Welcome!!

stashbuster

Log Cabin Love Blankets

January 31, 2021 by Annie Leave a Comment

In this post I am sharing the love and making my Log Cabin Love crochet blocks into Log Cabin Love Blankets! I have two suggested designs to share with you and some pics of my blanket as it progresses.

Firstly – if you are starting with this post, you need the link to the block pattern which is here

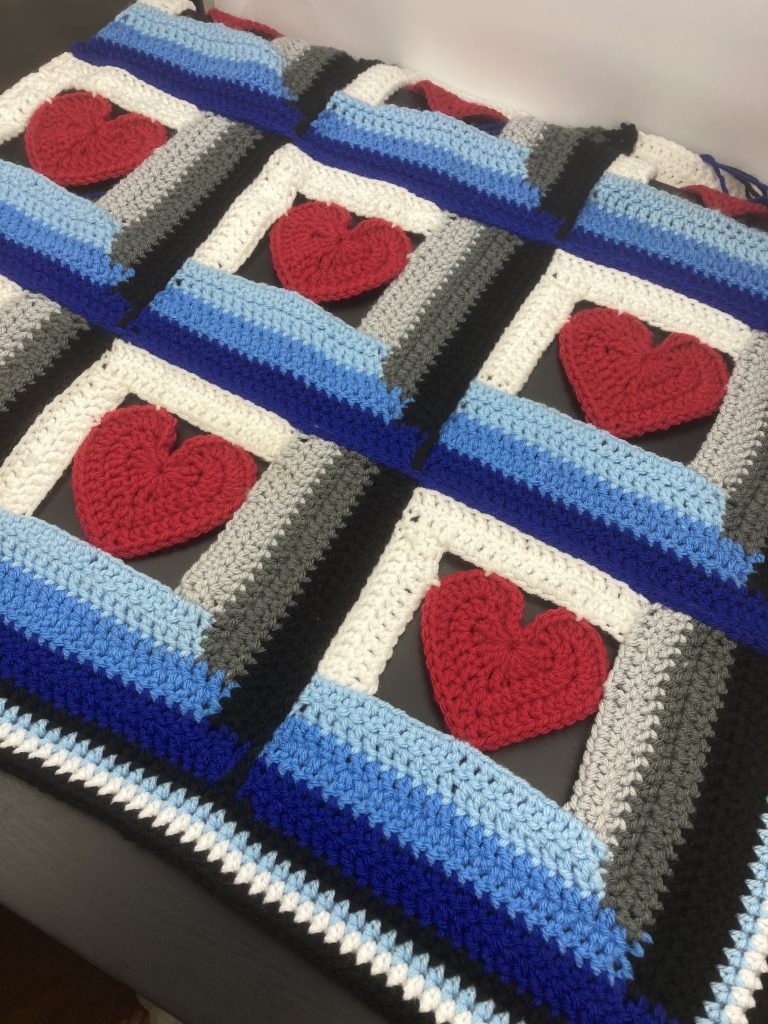
The first blanket design I am sharing is based on the colours in my original block. In this version I have worked the blocks identically. The yarn is my favourite Stylecraft Special Chunky which you can see here at my favourite UK yarn store – Woolwarehouse.

The colours I have used are as follows: Panels 1 and 2 – White 1001, Panel 3 – Silver 1203, Panel 4 – Cloud Blue 1019, Panel 5 – Graphite 1063, Panel 6 – Aster 1003, Panel 7 – Black 1002 and Panel 8 – Royal 1117.

The hearts themselves are worked in Lipstick 1246.
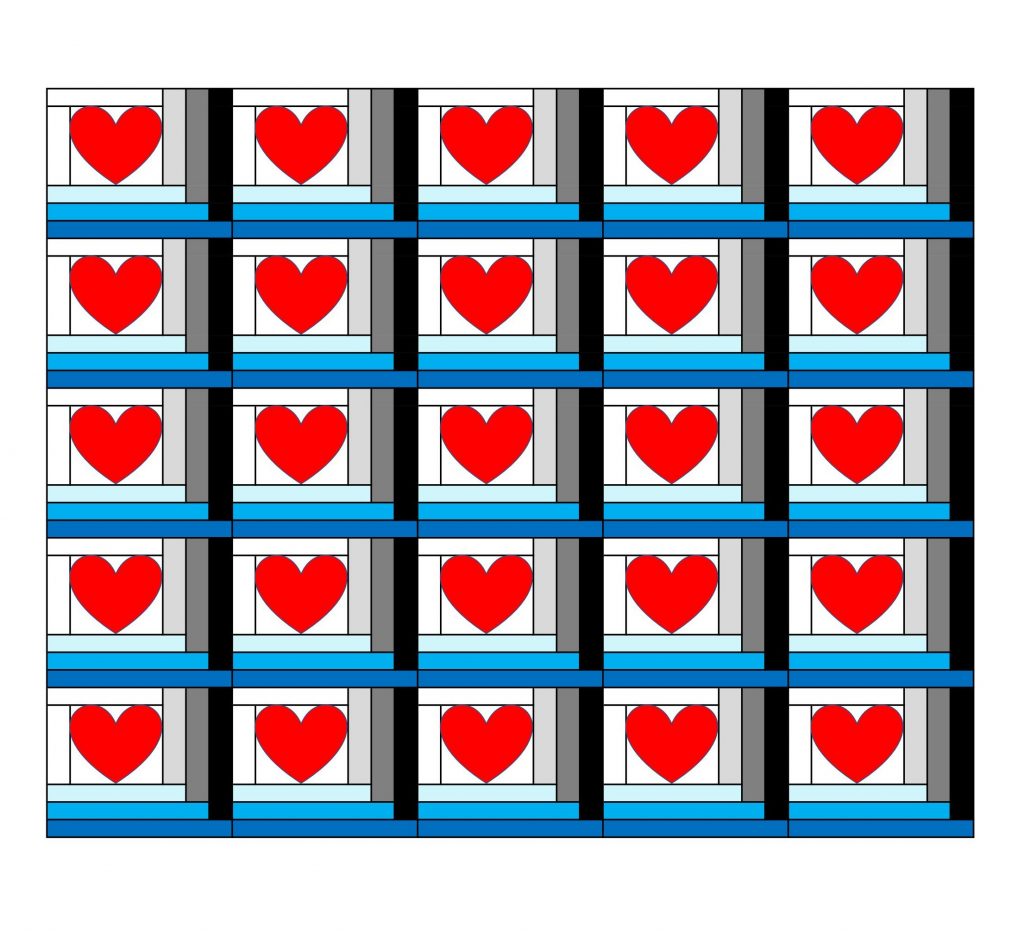
log cabin love blanket
Log Cabin Love blanket

The second layout I have tried requires a flipped version of the block. You can see the effect that that produces in this picture.
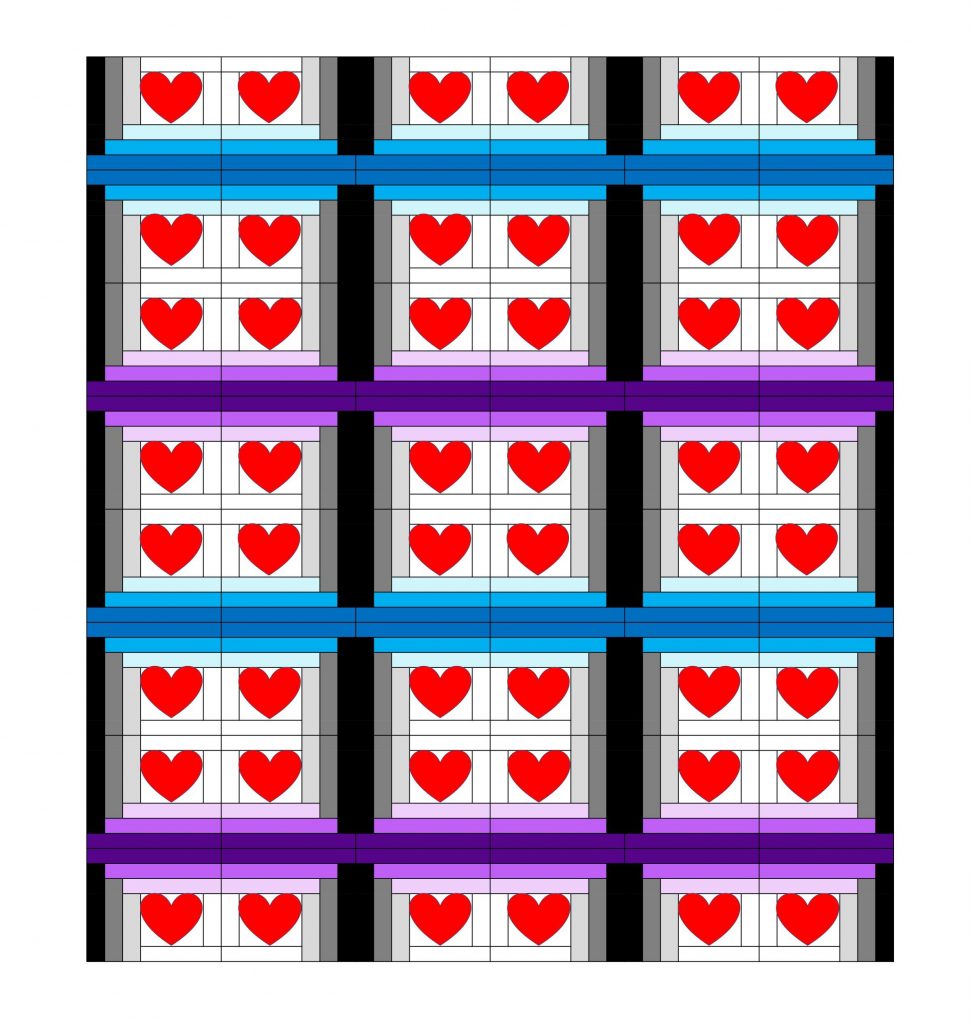
log cabin love blanket v2
log cabin love blanket with flipped squares

If you would like me to share the pattern for the flipped block then please leave a comment and I will put that version up on this blog.

Edging the log cabin love blanket

For the edging I worked four rows of half Trebles (HDc in US terms) in black then pale blue, white and finally black again. As an additional option you could add a row of small hearts. I am planning to try this and will post additional pictures when I have completed the border.
log cabin love blanket
log cabin love blanket – basic edging

I hope you enjoy making these log cabin love blankets. Please share pictures of your work if you do use this pattern. I am happy for anyone to use or share my patterns but please include a link back to this blog if you do. Happy crocheting!

Annie ๐Ÿ™‚

Filed Under: Crochet patterns Tagged With: crochet, crochet afghan, crochet blanket, crochet blocks, crochet lapghan, crochet project, free crochet pattern, Free pattern, log cabin, log cabin love heart, love heart, stashbuster

Hearts and Flowers Scarf

January 31, 2021 by Annie Leave a Comment

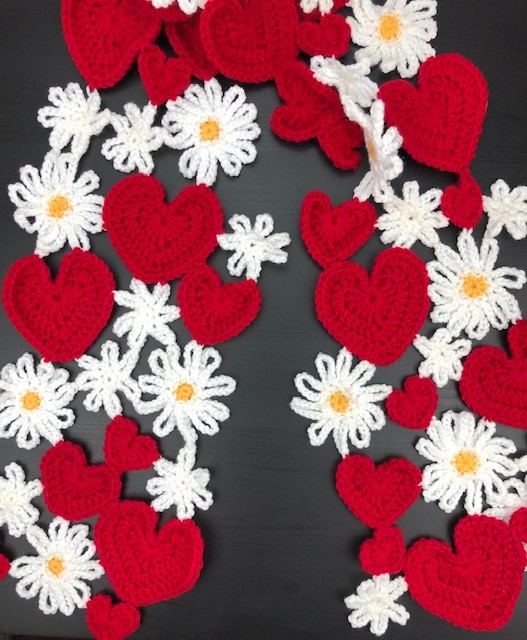
Sharing with you my latest heart based pattern – Hearts and Flowers Scarf. This pattern is based on the new large heart pattern I shared a couple of weeks ago. The pattern uses three sizes of heart but they are actually all the same pattern. To make the different sizes you simply stop after the first, second or third rounds. There are also two sizes of flower ๐Ÿ™‚

hearts and flowers scarf

Materials

The scarf pictured here is made from Stylecraft Special Chunky yarn. The shades used are Lipstick – 1246, Saffron – 1081 and White – 1001. I buy all my yarn from woolwarehouse here in the UK. The flowers and hearts are made using a 6mm crochet hook. TIP – have a smaller sized hook available to use for fiddly bits – more later on this!

You could make this scarf using oddments of any weight of yarn. It would be a great stash busting pattern if you did just use up any scraps you have. You could use a complete mix of colours but I think it would be most effective if you keep one pallet of colours for the hearts and a different pallet of colours for the flowers.

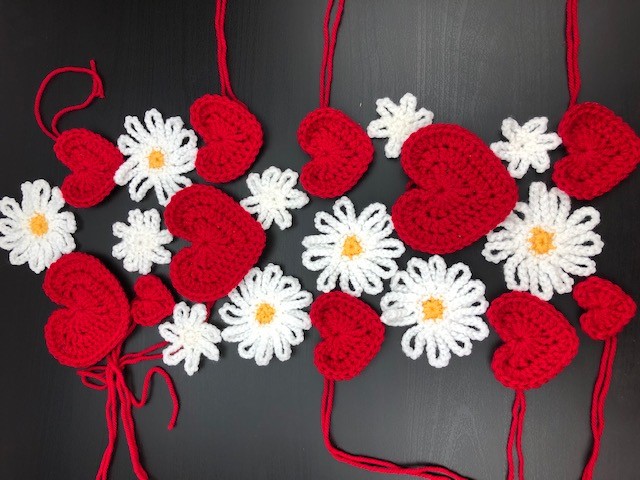
This pattern is ‘free form’ rather than being a specific layout. This means you make lots of hearts and flowers then lay them out as you like them before joining them together to make the scarf.

Start your own Hearts and Flowers Scarf

‘Free Form’ is all very well but you have to know what you are aiming for! There are two options for this. The first option is very simple if you have a scarf you already like the length and width of. Lay that scarf out on a flat surface. Second option, if you don’t have a suitable scarf to base your hearts and flowers scarf on then as a rough guide, a scarf is normally between six and eight inches wide and about as long as you are tall. Cut a template out of newspaper or tape together scrap paper till you have something the size and shape of the scarf you are making.

Whichever your base, the next step is to place on the hearts and flowers in a design you like. Bear in mind that you will need to join them up with a couple of stitches so aim for each shape to touch another in a couple of places without being bent or forced to do so. If you have to bend or stretch a shape to make it fit then you will end up with unwanted bumps and lumps in your scarf.

You could make the hearts and flowers and build the design up as you make them. Or, you could use paper templates to design the scarf first which then tells you how many of each shape you need to make.

Here is a free download which contains outlines of the hearts and flowers in all sizes. You can cut these out and play with shapes until you get the design you want. Note these sizes are representative of the space required only and not accurate versions of the flowers. They are based on my own tension using Stylecraft Special chunky and a 6mm hook. If you are using scraps of different yarns you will need to use your own shapes to make templates.

Hearts and Flowers template (79 downloads)
hearts and flowers scarf layout
laying out the hearts and flowers to design the scarf

Heart and flower patterns

The heart pattern can be found here. To make the three sizes simply finish off after the first, second or third round!

Large flower pattern

First round – in first yarn, make a magic loop, Chain 2 and work six DC (SC in US terms) into the loop. Pull closed and slip stitch into the top of the two chains to form a small disc.

Second round – join a contrast yarn, Chain 2 work a round of DC (Sc in US terms) work 2Dc (Sc in US terms) into the second and 5th stitch and slip stitch to join back to the start point.

Third round – with the wrong side of the disc facing you work 12 Chain then slip stitch into the next stitch. Work 12 chain and slip stitch into the following stitch. Proceed like this until you get back to the start of the round. This should give you 10 ‘petals’ but to be honest, if it gives you 11 or 9 it really doesn’t matter!

Small flower pattern

First round – make a magic loop, Chain 2 and work six DC (SC in US terms) into the loop. Pull closed and slip stitch into the top of the two chains to form a small disc.

Second round – with wrong side facing, chain 9 then slip stitch into the next stitch. Work 9 chain and slip stitch into the following stitch. Proceed like this until you get back to the start of the round. This should give you 7 ‘petals’ but again, if it gives you 6 or 8 it really doesn’t matter!

Finish off all the ends on the flower centres. Leave the ends on the petals and hearts and use these to join the hearts and flowers.

Making up your Hearts and Flowers Scarf

You can start anywhere when you make this scarf up. I started at one end adding each element as I went. I think if I was making this with scraps, I would start in the middle and keep each side more or less even with the colours.

Pick up your first heart. Using one of the ends that you left without finishing, thread a wool needle and work the end through the heart to the point where it touches the next element in your layout. Join to this next element with a couple of stitches then continue to finish off the end by weaving it into the heart as normal.

Lay the two joined elements back into your design. Pick up the next element that touches these and again join using the other unfinished end. If you have too many joins and not enough unfinished ends then you can thread your needle with a yarn scrap to form the join but I tried to get away without doing this!

One final point on the layout. Pushing the hearts and flowers together closely to minimise the gaps and spaces, will make the scarf more substantial and warmer. Spreading the hearts and flowers out, leaving larger gaps, will make the scarf more decorative than warm!

If you use this pattern please share your results – it would be lovely to see them. I am happy for anyone to use these or any of my patterns to make things to sell or share but please include a link back to my blog if you do.

I have one more heart based pattern to come for this years Valentines day so watch this space. Hope to be posting that one in the coming week. Happy crocheting!

Annie ๐Ÿ™‚

Filed Under: Crochet patterns Tagged With: crochet, crochet design, crochet project, flowers, free crochet pattern, hearts, hearts and flowers, scarf, stash busting, stashbuster

New Large Heart Pattern

December 28, 2020 by Annie Leave a Comment

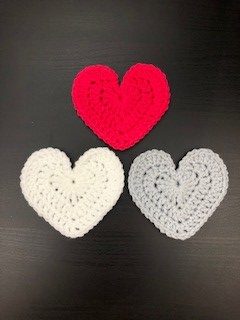
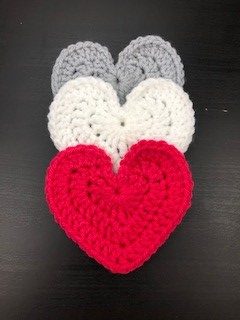
My heart patterns go down so well with you all that I have decided to create a new one! I am actually working on a new blanket design that needed a larger version. Hoping to release that blanket pattern in the coming weeks. I am sharing the new large heart pattern now in case you want to use it for Valentines day ๐Ÿ™‚

I am using Stylecraft Special chunky yarn which is my current favourite. It is really good values and comes in a great range of colours. I get all my yarn from Woolwarehouse here in the UK. The pattern will work in any yarn. However, you might find the proportions are slightly different if you use a yarn of different tension.

three hearts  - new large heart pattern

New Large Heart Pattern – UK terms

First round

Make a magic loop and work into the loop as follows: 3CH, 3DTr, 3Tr, CH, DTr, CH, 3Tr, 3Dtr, 3CH, slip stitch into the loop to finish the round. Pull the magic loop closed to form the heart.

Second round

Working up the left side of the top of the heart, one slip stitch and one chain. Into the next stitch work 1DC, 1Htr. Crochet 3Tr into the next stitch and 3Tr into the following stitch. Work 1Tr into the next four stitches which should bring you to the bottom point of the heart. Crochet 3Tr into the bottom point. Working up the right hand side of the heart work 1Tr into each of the next four stitches. Now work 3Tr into the next stitch and 3Tr into the following stitch. Finally work 1HTr, 1Dc into the next stitch and chain 1 and slip stitch into the final stitch on the right hand side of the centre of the heart. You should be back to the start point of the round. Put your hook into the centre of the heart and pull the yarn through to complete the round.

Third Round

This round follows the same lines as the previous round. Starting with the left hand side of the centre of the heart work two slip stitches then chain 1. Into the next stitch work 1Dc, 1Htr. Work 2Tr into the next stitch then 3Tr into the following stitch. Crochet 2Tr into each of the next three stitches then work 1Tr into the following six stitches. This should bring you to the bottom point of the heart.

Into the bottom of the heart work 1Tr, 1Ch, 1Tr, 1CH, 1Tr. Next work one Tr into each of the next six stitches then work 2Tr into each of the following three stitches. Work 3Tr into the next stitch and 2Tr into the following stitch. Finally work 1Htr, 1Dc into the next stitch at the top of the right hand side of the centre of the heart. Chain1 and slip stitch to finish the round. Again I like to put my hook through the centre of the heart and slip stitch to that point to complete the heart.

new large heart pattern
New large heart pattern

New Large Heart Pattern – US terms

First round

Make a magic loop and work into the loop as follows: 3CH, 3Tr, 3DC, CH, Tr, CH, 3DC, 3Tr, 3CH, slip stitch into the loop to finish the round. Pull the magic loop closed to form the heart.

Second round

Working up the left side of the top of the heart, one slip stitch and one chain. Into the next stitch work 1SC, 1HDc. Crochet 3Dc into the next stitch and 3Dc into the following stitch. Work 1Dc into the next four stitches which should bring you to the bottom point of the heart. Crochet 3Dc into the bottom point. Working up the right hand side of the heart work 1Dc into each of the next four stitches. Now work 3Dc into the next stitch and 3Dc into the following stitch. Finally work 1HDc, 1Sc into the next stitch and chain 1 and slip stitch into the final stitch on the right hand side of the centre of the heart. You should be back to the start point of the round. Put your hook into the centre of the heart and pull the yarn through to complete the round.

Third Round

This round follows the same lines as the previous round. Starting with the left hand side of the centre of the heart work two slip stitches then chain 1. Into the next stitch work 1Sc, 1HDc. Work 2Dc into the next stitch then 3Dc into the following stitch. Crochet 2Dc into each of the next three stitches then work 1Dc into the following six stitches. This should bring you to the bottom point of the heart.

Into the bottom of the heart work 1Dc, 1Ch, 1Dc, 1CH, 1Dc. Next work one Dc into each of the next six stitches then work 2Dc into each of the following three stitches. Work 3Dc into the next stitch and 2Dc into the following stitch. Finally work 1HDc, 1Sc into the next stitch at the top of the right hand side of the centre of the heart. Chain1 and slip stitch to finish the round. Again I like to put my hook through the centre of the heart and slip stitch to that point to complete the heart.

three large hearts
three hearts ๐Ÿ™‚

I would like to get this pattern out quickly so I am putting it up without detailed photographs but I will add those over the coming days. The first round of this heart mirrors my original heart pattern which you can find here. I hope you love this new large heart pattern and would love to hear from you if you find the pattern useful. Happy crocheting!

Annie ๐Ÿ™‚

Filed Under: Crochet patterns Tagged With: crochet heart, crochet hearts, free crochet pattern, Free pattern, heart, hearts, stashbuster

Twinkling star decoration

November 29, 2020 by Annie Leave a Comment

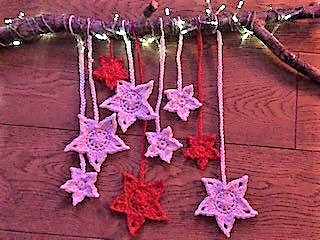
I don’t know how you are feeling but for me, this year, Christmas cannot come soon enough! I have already started to get decorations together and some are sneaking their way around the house ๐Ÿ™‚ This twinkling star decoration is a new one I have just made. It uses the pattern I put out in my Stars in Three Sizes post earlier this year.

One of the few pleasures we are allowed at the moment is a daily walk. My hubby found a small broken branch for me on one of his walks with our three dogs. Whilst I was working on the project I had to defend the branch from the dogs. For some reason they were not convinced it was an essential piece of craft supplies. They thought it was just a stick. They love sticks. Most of all they love turning sticks into chewed up fragments of wood!

Make your own Twinkling Star Decoration

First step – find a fallen branch or stick. If you don’t have access to the outside or cannot find something that works you could use pretty much any straight object – something from your kitchen perhaps. You could use an old wire coat-hanger. I managed to make this work with a knitting needle!

Next – you will need to make your stars. Following this link will take you to the Star patterns. The pattern should open in a new tab so you don’t lose this post. Choose your colours – will you go for a theme to match the colours of your decorations or will you go for a riot of colours.

This is a great stash buster project in that you can use tiny oddments of yarn – they don’t have to be the same weight or type. I chose to make mine in red and white yarn. The white is left over from my lock down lapghan project which I will be posting on here soon! The red is some of the left over cotton yarn from my sunshine flower blanket. I doubled this cotton, using two strands at a time to make the stars a similar size to the white ones which are made of chunky yarn.

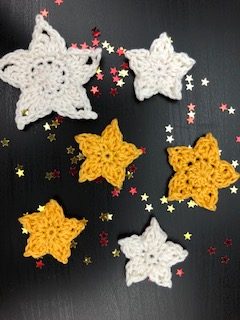
The picture below shows a group of yellow/gold themed stars I made for a second twinkling star decoration, not yet completed!

Making the stars

Consider how many stars you need to make along with the sizes of star you want to use. You could have one large star as a central point with smaller ones surrounding it. You could make the stars into a pattern, alternating colours or a rainbow.

As you finish each star work a long chain before cutting off the yarn. You will use these to hang the Stars from the support/branch. It doesn’t matter if you don’t know exactly where you want the stars to be positioned at this point. Make the chains as long as the longest drop you want to see to your stars then you can adjust the length when you hang them.

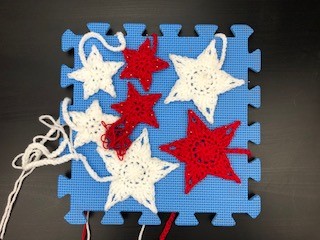
You can see the chains on my stars in this photo below which shows them being blocked. Blocking the stars when you have completed them makes a big difference to the way they hang. I really recommend you block yours for the best finish.

Blocking stars on a child’s foam play tile

If you want to increase the size of your stars you could double the yarn as I did. Another option you might want to consider if you are using particularly fine yarn is doubling the thickness of your stars by making two of each size/type and stitching them together.

Finish off the starting thread of each star neatly. TIP – You will not be able to control which side of this work is visible at all times so make as neat a job as possible!

Assembling the Twinkling Star Decoration

Start with the lights! There are lots of sets of small LED lights available on the market. What matters most for this project is that the battery pack is SMALL!! That said, you can hide the battery pack behind the support when you hang the decoration. You will also find that your eye is not drawn to the battery pack but to the stars and lights.

Work out where you want to place the battery pack. Working from the opposite end of the support, wrap the lights around the branch/support. Try to space out the lights evenly along the support. You might need to secure the end of the lights with tape.

Adding the Stars to the Twinkling Star Decoration

Lay the branch or support on the table in front of you. Next, lay out the Stars you have made below the branch/support. Play with the positioning of the stars until you are happy with the overall look. Lengthen or shorten the chains to fit with your design. Pull the final loop through so that you have a big loop to attach the star to the branch or support.

If your branch or support has two ends that are equally easy to work with then I suggest you start with the stars in the middle of your layout. Slide each one onto the support. Once you have each star where you want pull the loop tight and tie it off with a knot. Using a wool needle thread the end of the yarn back through the chain to tidy up the work.

Finished twinkling stars decoration

I hope you like the result! If not, you can keep playing with the positioning of the stars. You could even built it up over the festive season, adding a new star each day!

Happy crocheting ๐Ÿ™‚

Annie

Filed Under: Quick makes Tagged With: Christmas decoration, crochet, crochet christmas, decorations, festive, Free pattern, stars, stashbuster

Footer

Newsletter

Copyright © 2022 ยท Genesis Sample on Genesis Framework ยท WordPress ยท Log in