• Skip to primary navigation
  • Skip to main content
  • Skip to footer

Stickytapeandstring

Created with WordPress managed by 1&1

  • Craft projects
    • craft business tips
    • craft blog
    • Crochet patterns
    • Upcycling
    • craft with kids
  • Blogging
    • New to blogging
    • Blog diary
  • Bullet Journal
  • About me
  • Welcome!!

Quick makes

Crochet Parcel Decorations

November 29, 2020 by Annie Leave a Comment

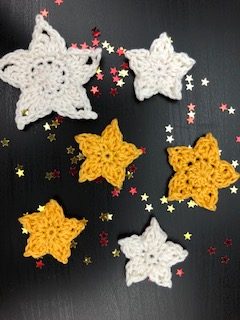
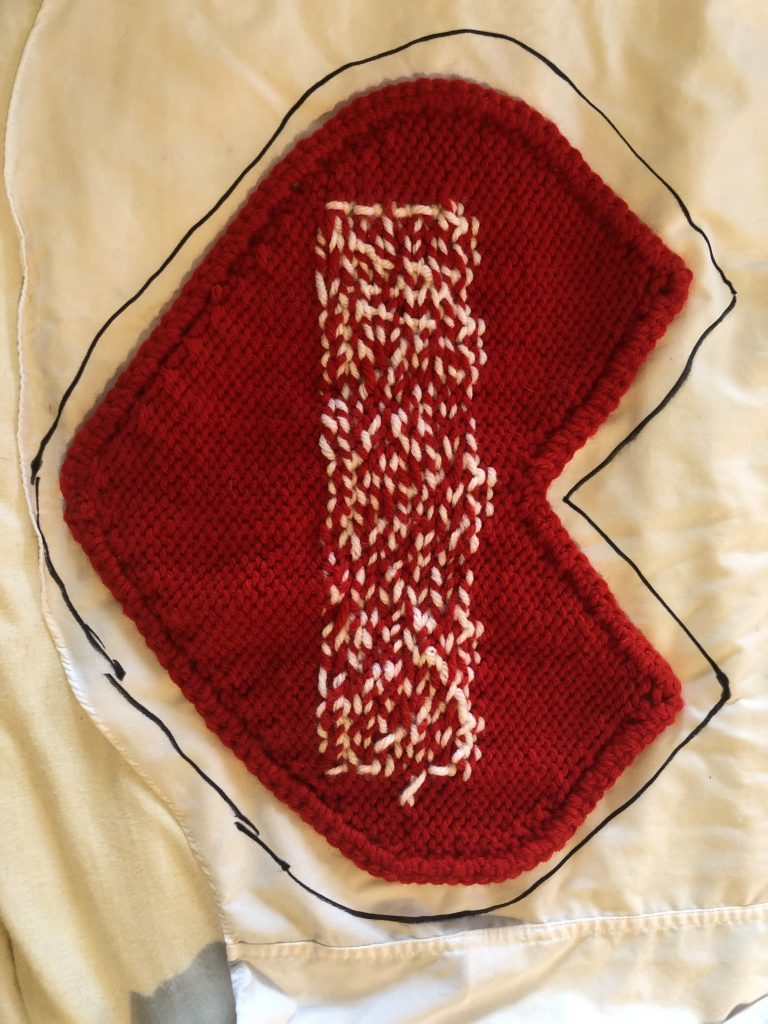
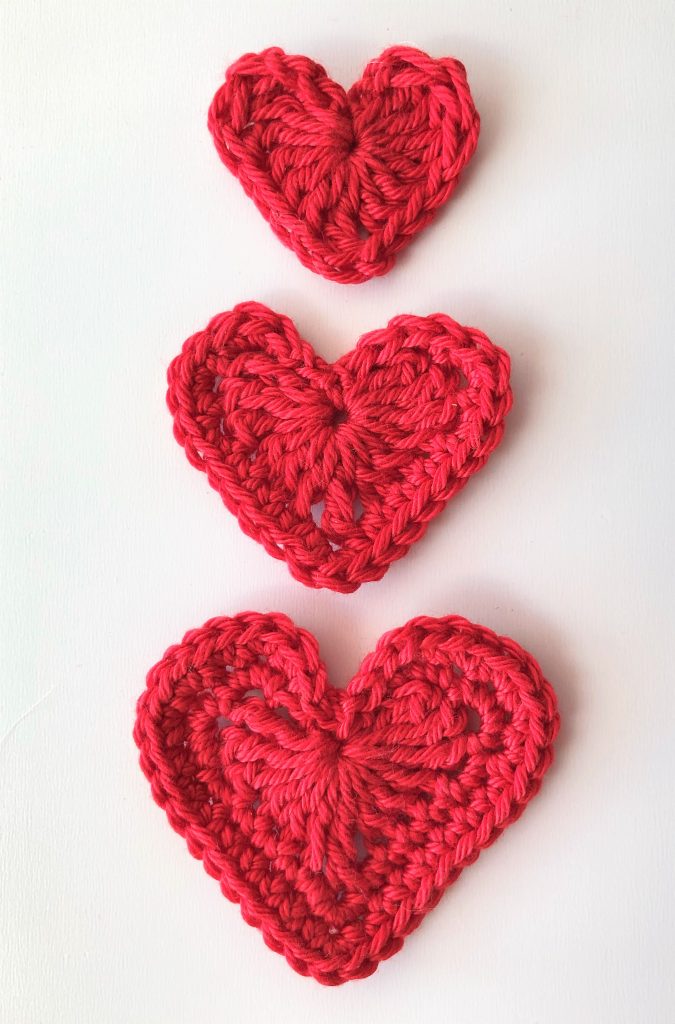
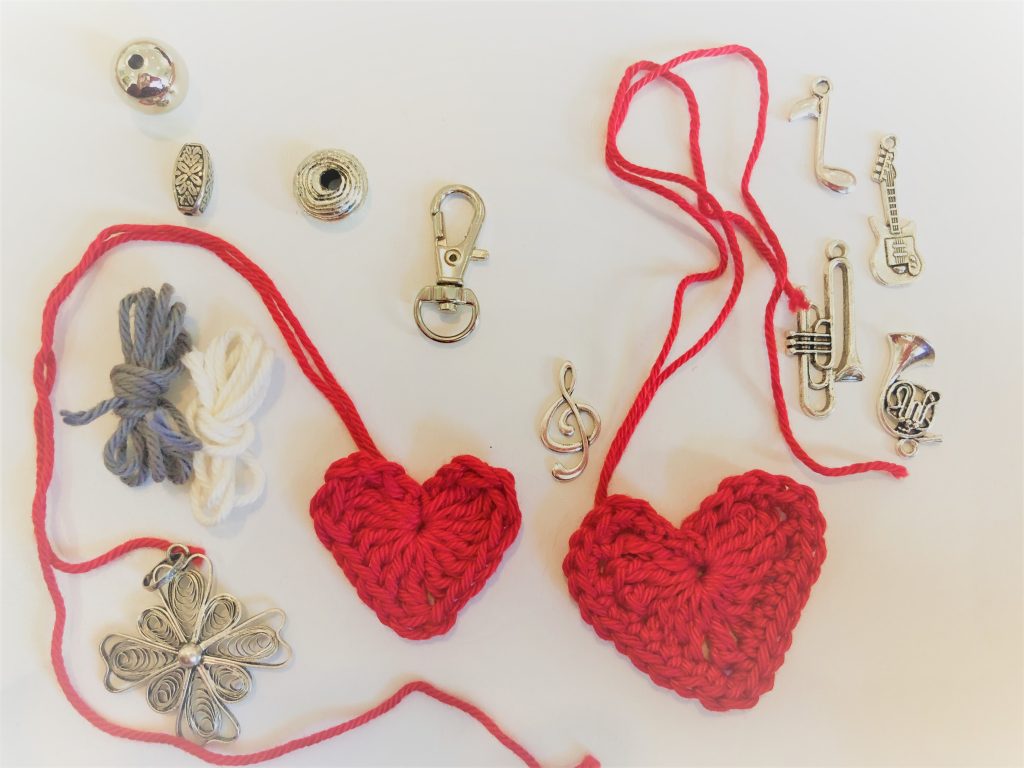
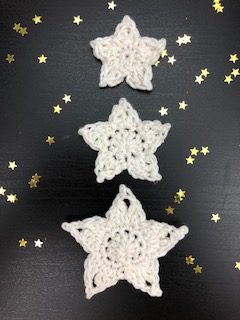
The wrapping season is upon us! I am trying to reduce my plastic waste which means no glittery plasticised ribbons or paper. I still want my gifts to look special so I am experimenting with crochet parcel decorations. These hearts parcel decorations use my pattern for hearts in three sizes. You could also use star motifs in the same way, or you could use a combination! Here is a link to my stars in three sizes patterns.

https://stickytapeandstring.co.uk/crochet-stars-in-three-sizes

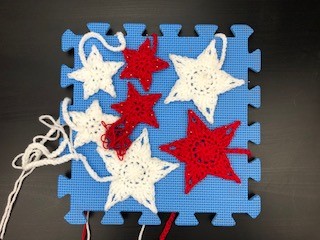
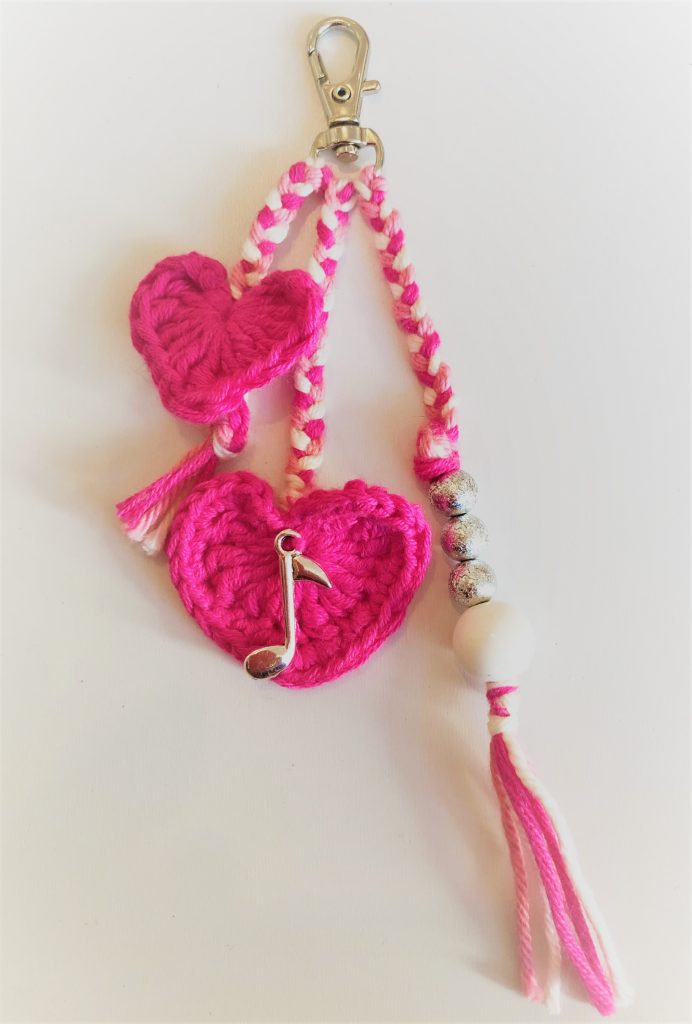
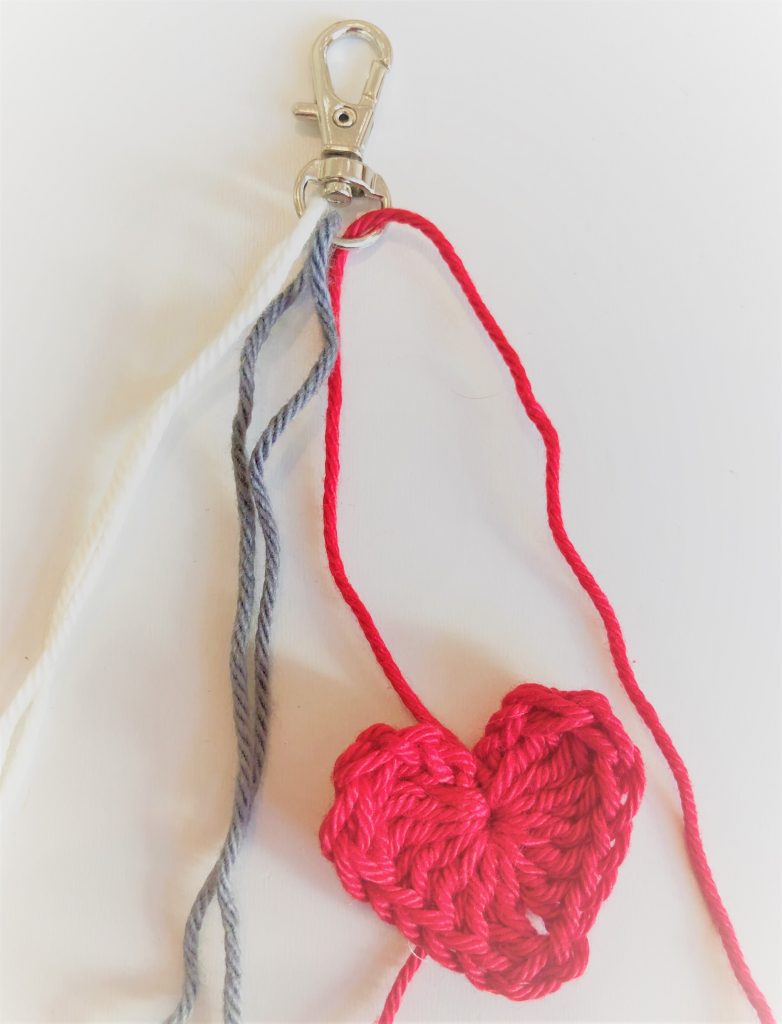
The stars and hearts are very quick to make. To use them for parcel decorations you simply make a chain rather than fastening off the yarn when you complete the motif. For the white strand in the picture below I put a heart on each end of the chain. The length of chain you will need obviously varies with the weight of yarn and the size of parcel you are wrapping. The good thing about chain is that it is very easy to adjust as you work either pull out any excess or make some more if it isn’t long enough.

crochet hearts parcel decoration

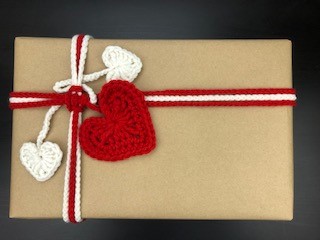
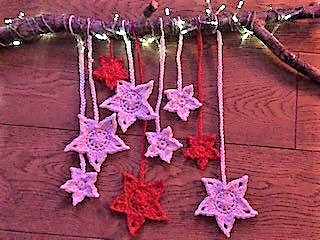
This is a great way to use up scraps of yarn and I hope you agree that the finished look is pretty. I found that it worked best in a chunky yarn for larger gifts but you could use very fine yarn for tiny presents. You could jazz up your crochet parcel decorations by adding tassels or pompoms. The sky is the limit – let your imagination run wild.

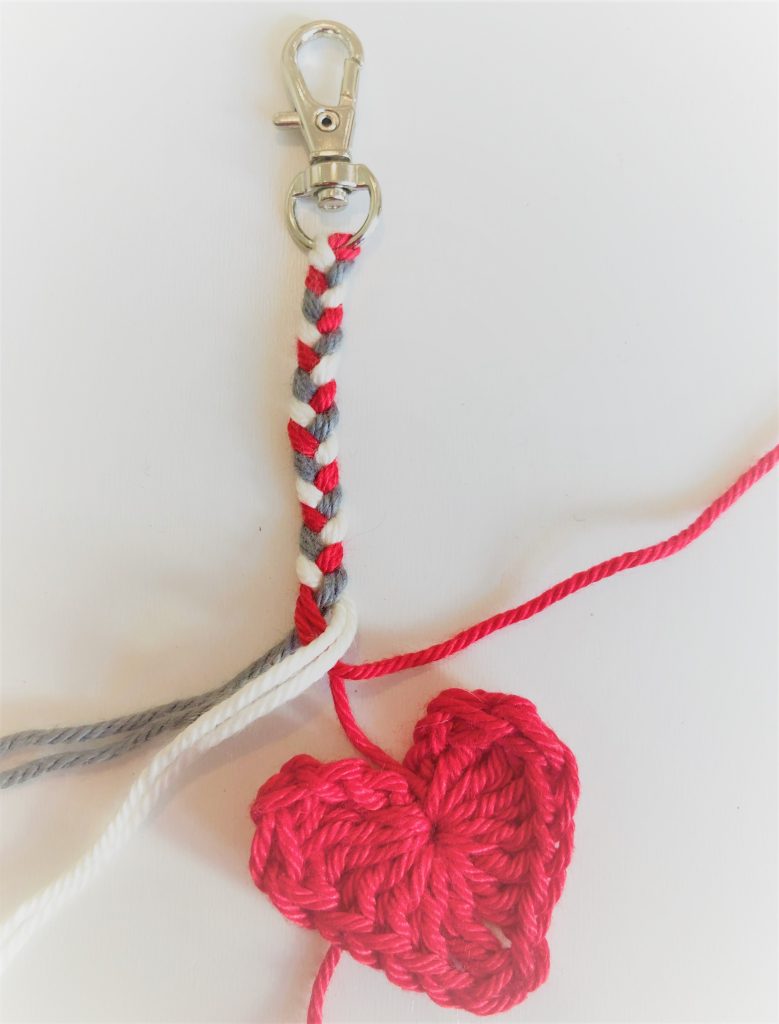
If you have time you could make more fancy braiding than this simple chain. I don’t know whether I will have enough spare time for that this Christmas. I have a long list of unfinished Christmas makes! Maybe next year ๐Ÿ™‚ Happy crocheting!

Annie ๐Ÿ™‚

Filed Under: Craft projects, Quick makes Tagged With: christmas make, crochet, crochet embellishment, free crochet pattern, Free pattern, parcel wrapping, sustainable decorations, valentine, valentine idea, valentine wrapping

Twinkling star decoration

November 29, 2020 by Annie Leave a Comment

I don’t know how you are feeling but for me, this year, Christmas cannot come soon enough! I have already started to get decorations together and some are sneaking their way around the house ๐Ÿ™‚ This twinkling star decoration is a new one I have just made. It uses the pattern I put out in my Stars in Three Sizes post earlier this year.

One of the few pleasures we are allowed at the moment is a daily walk. My hubby found a small broken branch for me on one of his walks with our three dogs. Whilst I was working on the project I had to defend the branch from the dogs. For some reason they were not convinced it was an essential piece of craft supplies. They thought it was just a stick. They love sticks. Most of all they love turning sticks into chewed up fragments of wood!

Make your own Twinkling Star Decoration

First step – find a fallen branch or stick. If you don’t have access to the outside or cannot find something that works you could use pretty much any straight object – something from your kitchen perhaps. You could use an old wire coat-hanger. I managed to make this work with a knitting needle!

Next – you will need to make your stars. Following this link will take you to the Star patterns. The pattern should open in a new tab so you don’t lose this post. Choose your colours – will you go for a theme to match the colours of your decorations or will you go for a riot of colours.

This is a great stash buster project in that you can use tiny oddments of yarn – they don’t have to be the same weight or type. I chose to make mine in red and white yarn. The white is left over from my lock down lapghan project which I will be posting on here soon! The red is some of the left over cotton yarn from my sunshine flower blanket. I doubled this cotton, using two strands at a time to make the stars a similar size to the white ones which are made of chunky yarn.

The picture below shows a group of yellow/gold themed stars I made for a second twinkling star decoration, not yet completed!

Making the stars

Consider how many stars you need to make along with the sizes of star you want to use. You could have one large star as a central point with smaller ones surrounding it. You could make the stars into a pattern, alternating colours or a rainbow.

As you finish each star work a long chain before cutting off the yarn. You will use these to hang the Stars from the support/branch. It doesn’t matter if you don’t know exactly where you want the stars to be positioned at this point. Make the chains as long as the longest drop you want to see to your stars then you can adjust the length when you hang them.

You can see the chains on my stars in this photo below which shows them being blocked. Blocking the stars when you have completed them makes a big difference to the way they hang. I really recommend you block yours for the best finish.

Blocking stars on a child’s foam play tile

If you want to increase the size of your stars you could double the yarn as I did. Another option you might want to consider if you are using particularly fine yarn is doubling the thickness of your stars by making two of each size/type and stitching them together.

Finish off the starting thread of each star neatly. TIP – You will not be able to control which side of this work is visible at all times so make as neat a job as possible!

Assembling the Twinkling Star Decoration

Start with the lights! There are lots of sets of small LED lights available on the market. What matters most for this project is that the battery pack is SMALL!! That said, you can hide the battery pack behind the support when you hang the decoration. You will also find that your eye is not drawn to the battery pack but to the stars and lights.

Work out where you want to place the battery pack. Working from the opposite end of the support, wrap the lights around the branch/support. Try to space out the lights evenly along the support. You might need to secure the end of the lights with tape.

Adding the Stars to the Twinkling Star Decoration

Lay the branch or support on the table in front of you. Next, lay out the Stars you have made below the branch/support. Play with the positioning of the stars until you are happy with the overall look. Lengthen or shorten the chains to fit with your design. Pull the final loop through so that you have a big loop to attach the star to the branch or support.

If your branch or support has two ends that are equally easy to work with then I suggest you start with the stars in the middle of your layout. Slide each one onto the support. Once you have each star where you want pull the loop tight and tie it off with a knot. Using a wool needle thread the end of the yarn back through the chain to tidy up the work.

Finished twinkling stars decoration

I hope you like the result! If not, you can keep playing with the positioning of the stars. You could even built it up over the festive season, adding a new star each day!

Happy crocheting ๐Ÿ™‚

Annie

Filed Under: Quick makes Tagged With: Christmas decoration, crochet, crochet christmas, decorations, festive, Free pattern, stars, stashbuster

Making a Cushion Pad

May 27, 2020 by Annie Leave a Comment

A quick post on making a cushion pad! I have put together a couple of heart cushion patterns. My favourite is this one – heart full of rainbows cushion. But cushion patterns aren’t much use unless you have a cushion to put inside them!

This post describes how you can make a quick cushion pad to fit inside your work. The method I use should give you a perfect fit and it uses up any old scraps of fabric you have. I used an old shirt to make mine!

Cutting out

First lay out the fabric you want to use on a nice flat surface. Make sure there is nothing underneath the fabric that you can damage or cut into!

Take one side of your cushion shape. Ideally you will have already blocked your work. This makes the shape more stable and easier to work with. Place the cushion shape onto the fabric. Try to be economical with the placing of the work – put it up against an edge or corner. You will need to two of these. You can fold the fabric if you are using a large enough piece and cut two at once. If you are using scraps (or a shirt like me) you will need to cut one then move it to a new place on the fabric.

This is going to be hidden inside your cushion so you can draw around the shape without worrying about the lines you make. If you want the cushion to be well filled and firm then the cushion pad needs to be a tiny bit larger than the cover. You will be stitching the cushion pad together which means there also needs to be a seam allowance.

Draw around your shape with a sharpie or other permanent pen. I drew around mine just a little outside the edge of the shape.

Cut out the shape adding the seam allowance so cut 1.5 cm OUTSIDE the line you have drawn. This should give you a shape which is a bit bigger than your cushion cover. Cut a second shape identical to the first.

Making up the cushion pad

Stitch round the shape leaving the seam allowance you added. Remember to leave an opening for the stuffing! Trim the seam allowance back to half a centimeter. Snip into the seam allowance on any curves. This allows the seams of the cushion to sit flat.

Turn the cushion outside in by pulling it through the opening you have left for stuffing.

Next, stuff the cushion!!! I used old stockings ๐Ÿ™‚ Stitch up the opening you left to put the stuffing in โ€ฆ.. and you are done!

I wrote this because I had made a couple of heart shaped cushion covers and needed a cushion pad. You could use this method to make any shape of cushion. If you are making a cover in fabric the same method would work for that too. I hope it works for you.

Happy crafting!

Annie ๐Ÿ™‚

Filed Under: craft with kids, Quick makes

Crochet Hearts – three sizes

February 12, 2020 by Annie 6 Comments

Here is an update to my crochet hearts pattern which gives you three sizes of heart to make. These lovely little motifs are super quick to make.

Crochet heart in three sizes - free pattern on my blog

You can use the hearts as card toppers or to decorate any craft project. If you add a safety pin to the back you could use these as a simple pin or broach. You could even turn them into earings! I recently used them to make charms as you can see below and read here. I also plan to sell them on my Etsy store if you would like some ready made!

Crochet Heart charm - quick make

The pattern will work in any yarn thickness or type. The ones shown here are in cotton DK and 4 ply but I have also made these in super chunky and used them in a block to make a blanket which you can see here.

Just before I share the pattern I want to share something else! I have decided 2023 will be the year I stop drinking alcohol. If you are interested in my journey and/or considering something similar you can read about it here.

Crochet Heart – UK terms

Size 1 – smallest heart (UK terms)

Make a magic loop, chain 3 and working into the magic loop, 3 dtr, 3tr, chain 1, 1dtr, chain 1, 3tr, 3dtr, chain 2, slip stitch into magic loop and pull the thread to close the centre of the heart. And you are done!

Size 2 – medium heart (UK terms)

Make a small heart as above then…..

Second round – 2 sl stitch into the gap behind the three chain from the first round.  3dc into the next stitch (top of the left side of the heart), 3 dc into the next stitch and 2 dc into the following stitch.   Work 4 dc to take you to the bottom loop of the heart.  3dc into the bottom stitch of the heart, 4 dc, work 2dc, 3dc, 3dc into the next three stitches, 2 sl stitches and one final slip stitch into the centre of the heart. You should have a medium heart!

Size 3 – largest heart (UK terms)

Make a medium heart as above then…..

Third round – 2 slip stitches then 2dc into the next five stitches (around the top of the left side of the heart) 7 dc, 3dc into the bottom stitch of the heart, 7dc, 2dc into the next five stitches, 2 slip stitches and finish off to complete the largest heart.

Crochet Heart – US terms

Size 1 – smallest heart (US terms)

Make a magic loop, chain 3 and working into the magic loop, 3TRC, 3DC, chain 1, 1TRC, chain 1, 3DC, 3TRC, chain 2, slip stitch into magic loop and pull the thread to close the centre of the heart. Your small heart is complete!

Size 2 – medium heart (US terms)

Make a small heart as above then…..

Second round – 2 sl stitch into the gap behind the three chain from the first round.  3SC into the next stitch (top of the left side of the heart), 3 SC into the next stitch and 2SC into the following stitch.   Work 4SC to take you to the bottom loop of the heart.  3SC into the bottom stitch of the heart, 4SC, work 2SC, 3SC, 3SC into the next three stitches, 2 sl stitches and one final slip stitch into the centre of the heart. Stop here if you wanted to make a medium heart – you are done!

Size 3 – largest heart (US terms)

Make a medium heart as above then…..

Third round – 2 slip stitches then 2SC into the next five stitches (around the top of the left side of the heart) 7 SC, 3SC into the bottom stitch of the heart, 7SC, 2SC into the next five stitches, 2 slip stitches and finish off to complete the large heart.

I hope you enjoy this quick make. Let me know what you use yours for. I am always on the look out for ideas!!

HOT off the press – Just added a new heart to the family. This one is a bigger version which works up to 10cm across in a chunky yarn. You can find the pattern here. Hope you like it ๐Ÿ™‚

happy crocheting!

Annie ๐Ÿ™‚

Filed Under: Quick makes Tagged With: card topper, crochet, crochet hearts, crochet motif, Free pattern, heart, heart card topper, hearts, quick crochet, quick makes

Quick Make – Heart Charm

February 12, 2020 by Annie Leave a Comment

Here is a quick make for you, a heart charm to decorate a bag or belt. You can use any motif or charm to make these. I have chosen hearts and music as those are two of my favourite themes.

The elements I have used are cheap to source and you can include recycled items, buttons or ribbon. I have lots of offcuts and remnants from other projects and these charms are great for using those.

I bought a job lot of key chain hooks on Amazon. These were very cheap (ยฃ7 for 50 at the time of purchase) and offer the flexibility of using either the small loop on the carabiner clip or using a larger ring which comes with the clip. I also bought a pack of musical charms (ยฃ4 for 24 at time of purchase).

Design your Charm

The fun bit is in deciding which crochet motifs and colours to use when putting the charm together. I called this quick make – Heart Charm as it is close to valentines day. My finished charm has pink hearts based on my heart pattern which you can get here. I made one small and one medium sized heart in pink. You don’t have to stick with the heart theme. There are lots of crochet motif patterns available. I have a board for these on Pinterest.

Consider the yarn carefully. These charms might rub against the bag or clothing. If you use a fluffy yarn it might start to look worn very quickly. I chose to use mercerised cotton as it is hardwearing and doesn’t bobble. I also happened to have some oddments in my stash!

If crochet isn’t your thing you could make little hearts out of fabric, stuffing them to make them look full. If sewing isn’t your thing you could cut shapes out of felt. Felt is wonderful for craft as it doesn’t fray so does not require stitching.

You can attach the elements of your charm to the ring or clip direct. I hung my charms by plaiting the cotton through the ring on the clip – hiding the ends as neatly as I could. Making the ends of the plait into tassels is a good way of finishing off. This makes the ends secure without stitching. You could glue bits together – especially if you are using felt. However, do consider how hardwearing your charm needs to be. If it is going to be on a belt or heavily used bag it will need pretty robust.

Making your Charm

First, make your motif and remember to leave plenty of thread or yarn so that you can use it to join the motif to the clip. To attach with a plait, take one of the ends of the cotton used to make the heart. Thread the end through the ring of the clip and double the thread back. Position the heart so that the length of thread between clip and heart is slightly longer than the finished length you would like. Add two other threads through the ring of the clip. Each thread should be folded over so you have six coming from the clip.

Pair the threads up and plait!

When you get to the heart, tie a knot in the threads to secure. You can also finish off by binding one of the threads around the others if you prefer. Repeat this method with other motifs. I added some beads as they provide weight which helps the charm hang well.

The only limit to these charms is your own imagination. You could add buttons or bows. You could make pompoms or tassels to add. Make them for your friends or as party favours ๐Ÿ™‚

Here is a picture of one of my finished charms. I will put these up for sale on my Etsy store but I expect people would rather make their own than buy mine!

Happy crafting!

Annie ๐Ÿ™‚

Filed Under: Quick makes Tagged With: charm, charms, Craft, craft with children, craft with kids, crafts, creativity, family activities, quick makes, small crafts

Footer

Newsletter

Copyright © 2025 ยท Genesis Sample on Genesis Framework ยท WordPress ยท Log in