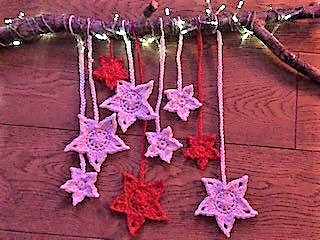
I don’t know how you are feeling but for me, this year, Christmas cannot come soon enough! I have already started to get decorations together and some are sneaking their way around the house 🙂 This twinkling star decoration is a new one I have just made. It uses the pattern I put out in my Stars in Three Sizes post earlier this year.
One of the few pleasures we are allowed at the moment is a daily walk. My hubby found a small broken branch for me on one of his walks with our three dogs. Whilst I was working on the project I had to defend the branch from the dogs. For some reason they were not convinced it was an essential piece of craft supplies. They thought it was just a stick. They love sticks. Most of all they love turning sticks into chewed up fragments of wood!
Make your own Twinkling Star Decoration
First step – find a fallen branch or stick. If you don’t have access to the outside or cannot find something that works you could use pretty much any straight object – something from your kitchen perhaps. You could use an old wire coat-hanger. I managed to make this work with a knitting needle!
Next – you will need to make your stars. Following this link will take you to the Star patterns. The pattern should open in a new tab so you don’t lose this post. Choose your colours – will you go for a theme to match the colours of your decorations or will you go for a riot of colours.
This is a great stash buster project in that you can use tiny oddments of yarn – they don’t have to be the same weight or type. I chose to make mine in red and white yarn. The white is left over from my lock down lapghan project which I will be posting on here soon! The red is some of the left over cotton yarn from my sunshine flower blanket. I doubled this cotton, using two strands at a time to make the stars a similar size to the white ones which are made of chunky yarn.
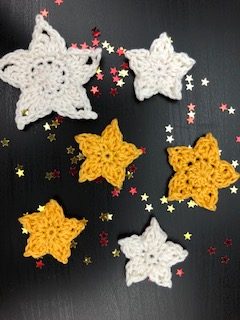
The picture below shows a group of yellow/gold themed stars I made for a second twinkling star decoration, not yet completed!

Making the stars
Consider how many stars you need to make along with the sizes of star you want to use. You could have one large star as a central point with smaller ones surrounding it. You could make the stars into a pattern, alternating colours or a rainbow.
As you finish each star work a long chain before cutting off the yarn. You will use these to hang the Stars from the support/branch. It doesn’t matter if you don’t know exactly where you want the stars to be positioned at this point. Make the chains as long as the longest drop you want to see to your stars then you can adjust the length when you hang them.
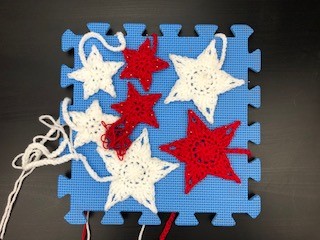
You can see the chains on my stars in this photo below which shows them being blocked. Blocking the stars when you have completed them makes a big difference to the way they hang. I really recommend you block yours for the best finish.

If you want to increase the size of your stars you could double the yarn as I did. Another option you might want to consider if you are using particularly fine yarn is doubling the thickness of your stars by making two of each size/type and stitching them together.
Finish off the starting thread of each star neatly. TIP – You will not be able to control which side of this work is visible at all times so make as neat a job as possible!
Assembling the Twinkling Star Decoration
Start with the lights! There are lots of sets of small LED lights available on the market. What matters most for this project is that the battery pack is SMALL!! That said, you can hide the battery pack behind the support when you hang the decoration. You will also find that your eye is not drawn to the battery pack but to the stars and lights.
Work out where you want to place the battery pack. Working from the opposite end of the support, wrap the lights around the branch/support. Try to space out the lights evenly along the support. You might need to secure the end of the lights with tape.
Adding the Stars to the Twinkling Star Decoration
Lay the branch or support on the table in front of you. Next, lay out the Stars you have made below the branch/support. Play with the positioning of the stars until you are happy with the overall look. Lengthen or shorten the chains to fit with your design. Pull the final loop through so that you have a big loop to attach the star to the branch or support.
If your branch or support has two ends that are equally easy to work with then I suggest you start with the stars in the middle of your layout. Slide each one onto the support. Once you have each star where you want pull the loop tight and tie it off with a knot. Using a wool needle thread the end of the yarn back through the chain to tidy up the work.

I hope you like the result! If not, you can keep playing with the positioning of the stars. You could even built it up over the festive season, adding a new star each day!
Happy crocheting 🙂
Annie