• Skip to primary navigation
  • Skip to main content
  • Skip to footer

Stickytapeandstring

Created with WordPress managed by 1&1

  • Craft projects
    • craft business tips
    • craft blog
    • Crochet patterns
    • Upcycling
    • craft with kids
  • Blogging
    • New to blogging
    • Blog diary
  • Bullet Journal
  • About me
  • Welcome!!

sustainable decorations

Crochet Parcel Decorations

November 29, 2020 by Annie Leave a Comment

The wrapping season is upon us! I am trying to reduce my plastic waste which means no glittery plasticised ribbons or paper. I still want my gifts to look special so I am experimenting with crochet parcel decorations. These hearts parcel decorations use my pattern for hearts in three sizes. You could also use star motifs in the same way, or you could use a combination! Here is a link to my stars in three sizes patterns.
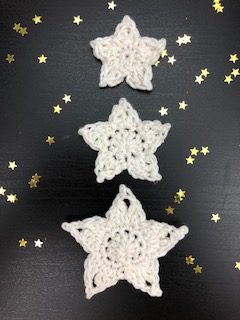
https://stickytapeandstring.co.uk/crochet-stars-in-three-sizes

The stars and hearts are very quick to make. To use them for parcel decorations you simply make a chain rather than fastening off the yarn when you complete the motif. For the white strand in the picture below I put a heart on each end of the chain. The length of chain you will need obviously varies with the weight of yarn and the size of parcel you are wrapping. The good thing about chain is that it is very easy to adjust as you work either pull out any excess or make some more if it isn’t long enough.

crochet hearts parcel decoration

This is a great way to use up scraps of yarn and I hope you agree that the finished look is pretty. I found that it worked best in a chunky yarn for larger gifts but you could use very fine yarn for tiny presents. You could jazz up your crochet parcel decorations by adding tassels or pompoms. The sky is the limit – let your imagination run wild.

If you have time you could make more fancy braiding than this simple chain. I don’t know whether I will have enough spare time for that this Christmas. I have a long list of unfinished Christmas makes! Maybe next year ๐Ÿ™‚ Happy crocheting!

Annie ๐Ÿ™‚

Filed Under: Craft projects, Quick makes Tagged With: christmas make, crochet, crochet embellishment, free crochet pattern, Free pattern, parcel wrapping, sustainable decorations, valentine, valentine idea, valentine wrapping

Crochet Chain Garland

May 31, 2020 by Annie Leave a Comment

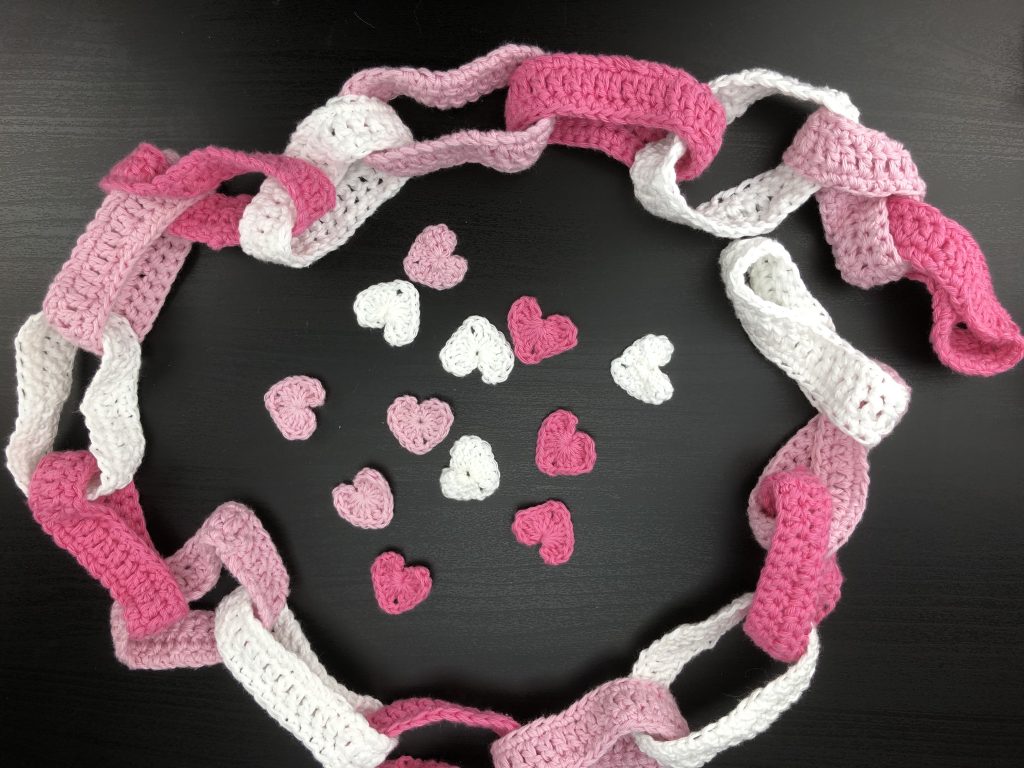
In an attempt to help reduce plastic pollution, I have been making sustainable decorations including this crochet chain garland. This is another fun, quick, easy make. I made the example here in sustainable cotton as part of a set of decorations I designed with weddings or girls bedrooms in mind.

Crochet Chain Garland with ‘table confetti’ hearts

If you like the little ‘table confetti’ hearts, the pattern for those is here.

This idea would also work with bright colours and different weights of yarn. The pattern is a fab stash buster as you can mix and match any colours you have. Each link in the chain requires only a small amount of yarn. I plan to make a super chunky version with the left over yarn from all my rainbow projects which you can see here

Crochet Chain Garland Pattern

Note – this pattern uses DK weight yarn and a four mm hook. However it can be adjusted to any yarn weight – instructions at the bottom.

For the first link.

Chain 35 and join to the first chain with a slip stitch.

First round – chain two. Work DC into the each chain (SC in US terms). Finish the round with a slip stitch to join to the top of the first stitch.

Second round – chain three. Work TR (DC in US terms) into each of the DC on the previous row. (SC in US terms). Again finish the round with a slip stitch.

Third and final round – work a round of DC (SC in US terms) as round 1. Finish with a slip stitch and tie off the yarn. You have made your first link.

Second and all subsequent links

Start with a chain the same length as your first link. If you are using the same weight yarn as I used that means a chain of 35. The only difference between this and the first link is that we need to join to the rest of the garland. To do this, thread the chain through the first link before you make the slip stitch into the first chain to form the loop.

Continue to form this link in the same way as you made the first. Each link in the chain is free to move through its neighbours. They are not attached – just threaded together.

And that is it! Continue for as many links as you like. Make patterns with the colours or make them happily random with any remnants from your stash!

Changing the pattern to suit different weights of yarn.

Consider what size of link will work best for the yarn weight. I find that links work well when the length of the link is eight to ten times the height. You can work out how many stitches it takes to make the size you require based on the tension square instructions on the ball band.

Example – Super Chunky – Lion Brand Yarns – Hometown USA. The ball band has a 10cm tension square of 12 rows x 9 stitches. The pattern gives the equivalent of four rows so the links would be c 3.3 cm high.

I want each link to be 8 to 10 times as long as they are tall so I need them to be 27cms which means 30 stitches. This is super chunky yarn so these chains will be HUGE – but I hope that gives you the method to use to adjust the pattern.

Hope you enjoy making these happy garlands!

Annie. ๐Ÿ™‚

Filed Under: Crochet patterns, Uncategorized Tagged With: bunting, crochet, crochet design, crochet garland, free crochet pattern, Free pattern, handmade, sustainable decorations, sustainable wedding, wedding

Footer

Newsletter

Copyright © 2025 ยท Genesis Sample on Genesis Framework ยท WordPress ยท Log in