• Skip to primary navigation
  • Skip to main content
  • Skip to footer

Stickytapeandstring

Created with WordPress managed by 1&1

  • Craft projects
    • craft business tips
    • craft blog
    • Crochet patterns
    • Upcycling
    • craft with kids
  • Blogging
    • New to blogging
    • Blog diary
  • Bullet Journal
  • About me
  • Welcome!!

quick makes

Heart full of Rainbows Cushion

May 25, 2020 by Annie Leave a Comment

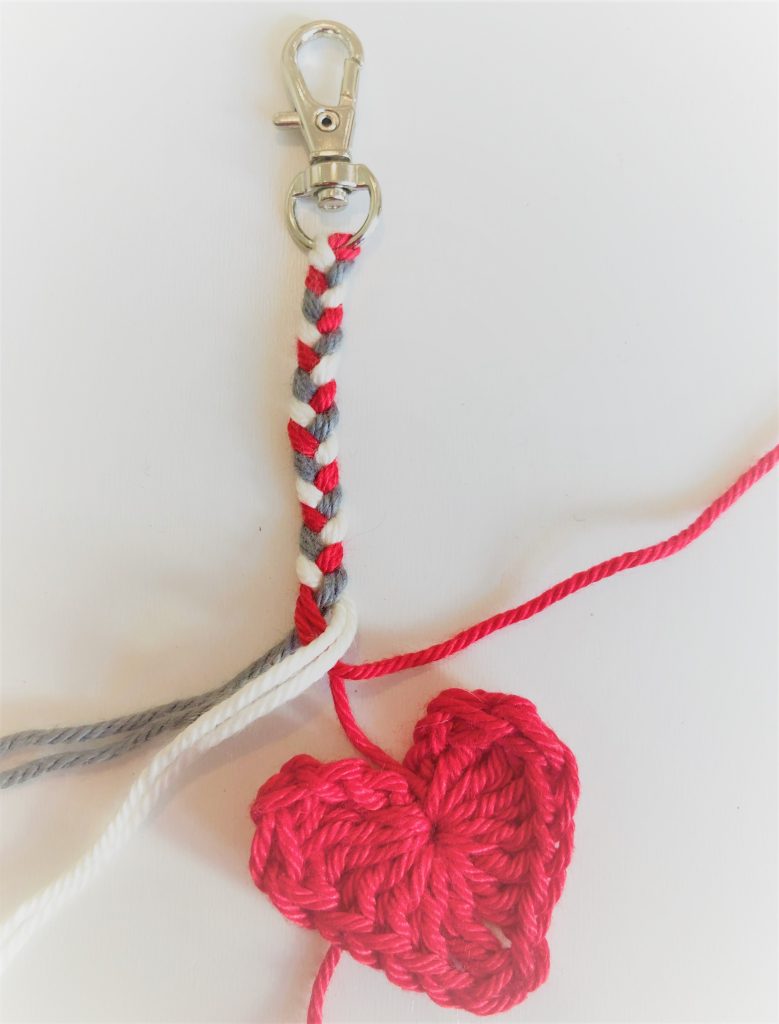
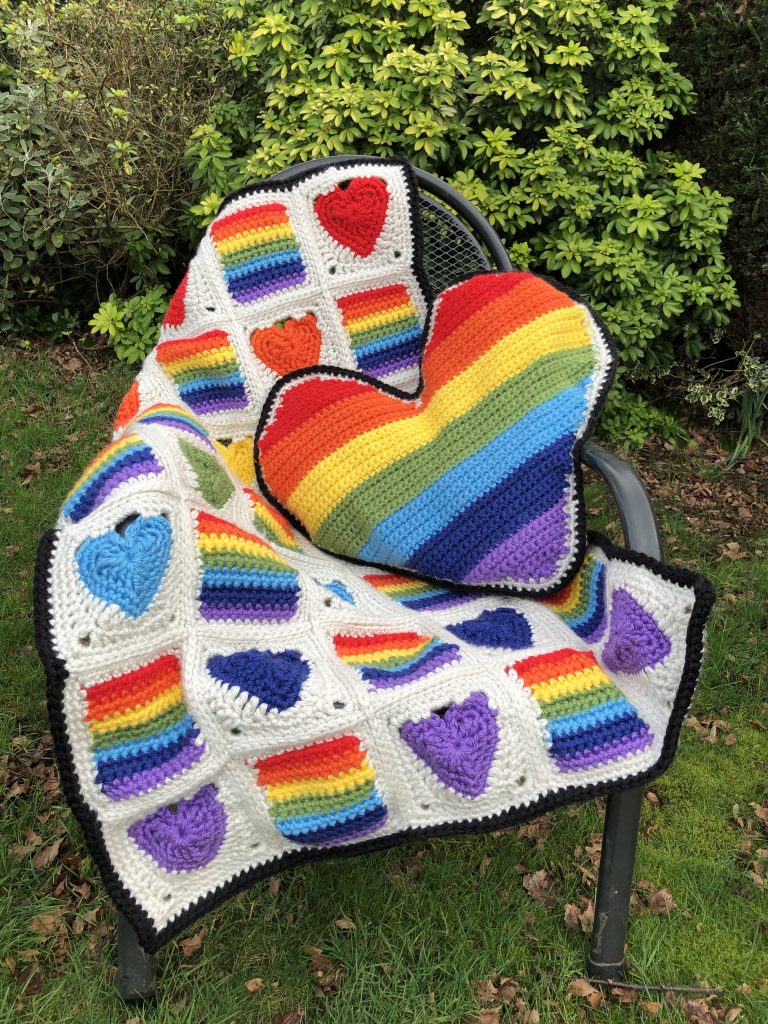
This heart full of rainbows cushion is a companion project to my hearts and rainbows blanket. You will be working entirely in DC (UK terms) or SC (US terms). It is a simple project. However you will need to understand how to increase/decrease your stitches. I have suggested a method below but you might have one you prefer. The making-up instructions might be a bit tricky if you are new to crochet. I will put my instructions here and in the final PDF version of the pattern which will be available on Etsy. You can see the hearts and rainbows blanket here.

heart full of rainbows cushion and blanket
free pattern for hearts and rainbows blanket, heart full of rainbows cushion available on my blog

First things first. The yarn used to make the Heart Full of Rainbows Cushion is Lion Brand Yarns, Hometown USA yarn. This is a super chunky yarn which means the work grows really quickly! ๐Ÿ™‚ I love this yarn for that reason and because it has lovely bright colours and is good value for the price. In the UK I buy all my yarn from Wool Warehouse. Note – at this point these are not affiliate links so I am not paid to promote either brand – I just love them!

To make the cushion you will need one ball of each of the colours of the rainbow. For the edging I used White and Black but if you wanted to keep the cost down you could edge the cushion in one of the other colours. You will also need a 9mm crochet hook.

I created a chart for this pattern which I like to print out and mark off as I go. I will write out the instructions long hand in the PDF pattern but if you want to get started, the free download is here:

Heart Full of Rainbows Chart (14729 downloads )

Making the Heart full of Rainbows Cushion

Start at the bottom of the chart by making a chain of 4 using the violet yarn. Turn and work two DC (SC for US terms) starting in the third stitch from the hook. Chain four and turn the work.

Second row – work one DC (SC for US terms) into the third and fourth stitches from the hook. work 2 DC (SC for US terms) into the next two stitches. Chain 2 and turn the work.

Third row – work two DC (SC for US terms) into the first stitch. Work 4 DC (SC for US terms). Work 2 DC (SC for US terms) into the next stitch then chain two and turn the work.

Continue in this manner, increasing the number of stitches on each row to match the chart. Remember to change colour when the chart changes!!

When you get to the decrease rows again there are many methods you can use to decrease. To get a neater edge you can miss the second stitch of the row. You might find it easier to miss the first – this gives a stepped edge but as you are going to be edging the heart that should not be visible. When you chain two and turn at the end of the row simply miss the first stitch and work DC (SC in US terms) into the second. If the decrease is at the end of a row then stop one stitch short chain two and turn.

As you decrease follow the chart again and you will see that at the top of the heart you need to turn the work in the middle of the row. This allows you to complete one side of the top of the heart. You will need to rejoin the yarn in the middle of the work to complete the second side of the heart.

The final stage of each side of the cushion is to edge the heart. I did this in white but you could use whichever colour you like. This step gives you a neat edge to use when you join the two hearts together. Count the stitches you use on each side so that you can match front and back. The edging is entirely DC again (SC in US terms). Try to space your stitches so that the work lies flat without being stretched or pulled. I used the following number of stitches:

Working up the bottom side of the heart violet to Green – 27 stitches

For the straight section, part of the green, yellow and the start of the Orange, I used 10 stitches.

From the start of the decrease and up to the top of the heart I worked 15 stitches.

Work the six stitches across the top of the heart and from the top down to the centre I worked 14 stitches.

In the very centre of the heart where you have two stitches (number 26/27 on the orange row of the chart) work these two together.

Complete the second half of the edging to match the first. Work one round of DC (SC in US terms). At the centre of the heart again where you worked two stitches together, work three together on this round.

When you have finished one heart you will need to start all over again on the second side. I made two matching rainbow hearts but if you are using up scraps you could make the back of the cushion out of a single colour or just use whatever you have!

Making up the Heart Cushion

Now you should have two completed, edged hearts. I suggest you tie in the ends at this point but bear in mind that the back of this work is the inside of a cushion which nobody should ever see so there is no real need to make these ends disappear. The thickness of the yarn makes tying in ends neatly quite difficult. All you really need to do is secure them and make sure that nothing is visible from the front.

To finish the cushion you need to join the two hearts together. I used black for this – if your edging is neat this is a really quick job! Put the two hearts back to back ie with the sides you want to see on the outside. Join in black yarn (or your choice) and work DC (SC in US terms) all the way round putting your hook through the white edge stitches on both sides of the cushion. As you form your DC (SC in US terms) you will see that you are joining front to back.

Don’t join all the way round until you have put your cushion pad into the heart! I have done this – it made me feel very silly but it is easy to forget when you are on the downhill slopes towards a finished project!!

I have a separate post on creating the cushion pad which you can read here. If you want to be able to take your cushion cover off to wash it then you should leave an opening in the side which will need a separate fastening. I would recommend leaving a section of the bottom of one side of the heart. When you are edging just drop the back for a section so that you are only working into the white edge stitches on one heart.

My cushion has washable insides so I didn’t leave any openings to remove the cover.

I hope you like this heart cushion – the rainbow motif has come to stand for thank you to our nurses since I made mine! I have changed my social media image to this heart as my own small thank you. How our world has changed these last few weeks. Here’s hoping we get back to happier times soon.

Happy crocheting!

Annie ๐Ÿ™‚

Filed Under: Crochet patterns Tagged With: crochet, crochet design, cushion, design, free crochet pattern, handmade, heart, quick crochet, quick makes, rainbow, rainbow heart chart

Crochet Hearts – three sizes

February 12, 2020 by Annie 6 Comments

Here is an update to my crochet hearts pattern which gives you three sizes of heart to make. These lovely little motifs are super quick to make.

Crochet heart in three sizes - free pattern on my blog

You can use the hearts as card toppers or to decorate any craft project. If you add a safety pin to the back you could use these as a simple pin or broach. You could even turn them into earings! I recently used them to make charms as you can see below and read here. I also plan to sell them on my Etsy store if you would like some ready made!

Crochet Heart charm - quick make

The pattern will work in any yarn thickness or type. The ones shown here are in cotton DK and 4 ply but I have also made these in super chunky and used them in a block to make a blanket which you can see here.

Just before I share the pattern I want to share something else! I have decided 2023 will be the year I stop drinking alcohol. If you are interested in my journey and/or considering something similar you can read about it here.

Crochet Heart – UK terms

Size 1 – smallest heart (UK terms)

Make a magic loop, chain 3 and working into the magic loop, 3 dtr, 3tr, chain 1, 1dtr, chain 1, 3tr, 3dtr, chain 2, slip stitch into magic loop and pull the thread to close the centre of the heart. And you are done!

Size 2 – medium heart (UK terms)

Make a small heart as above then…..

Second round – 2 sl stitch into the gap behind the three chain from the first round.  3dc into the next stitch (top of the left side of the heart), 3 dc into the next stitch and 2 dc into the following stitch.   Work 4 dc to take you to the bottom loop of the heart.  3dc into the bottom stitch of the heart, 4 dc, work 2dc, 3dc, 3dc into the next three stitches, 2 sl stitches and one final slip stitch into the centre of the heart. You should have a medium heart!

Size 3 – largest heart (UK terms)

Make a medium heart as above then…..

Third round – 2 slip stitches then 2dc into the next five stitches (around the top of the left side of the heart) 7 dc, 3dc into the bottom stitch of the heart, 7dc, 2dc into the next five stitches, 2 slip stitches and finish off to complete the largest heart.

Crochet Heart – US terms

Size 1 – smallest heart (US terms)

Make a magic loop, chain 3 and working into the magic loop, 3TRC, 3DC, chain 1, 1TRC, chain 1, 3DC, 3TRC, chain 2, slip stitch into magic loop and pull the thread to close the centre of the heart. Your small heart is complete!

Size 2 – medium heart (US terms)

Make a small heart as above then…..

Second round – 2 sl stitch into the gap behind the three chain from the first round.  3SC into the next stitch (top of the left side of the heart), 3 SC into the next stitch and 2SC into the following stitch.   Work 4SC to take you to the bottom loop of the heart.  3SC into the bottom stitch of the heart, 4SC, work 2SC, 3SC, 3SC into the next three stitches, 2 sl stitches and one final slip stitch into the centre of the heart. Stop here if you wanted to make a medium heart – you are done!

Size 3 – largest heart (US terms)

Make a medium heart as above then…..

Third round – 2 slip stitches then 2SC into the next five stitches (around the top of the left side of the heart) 7 SC, 3SC into the bottom stitch of the heart, 7SC, 2SC into the next five stitches, 2 slip stitches and finish off to complete the large heart.

I hope you enjoy this quick make. Let me know what you use yours for. I am always on the look out for ideas!!

HOT off the press – Just added a new heart to the family. This one is a bigger version which works up to 10cm across in a chunky yarn. You can find the pattern here. Hope you like it ๐Ÿ™‚

happy crocheting!

Annie ๐Ÿ™‚

Filed Under: Quick makes Tagged With: card topper, crochet, crochet hearts, crochet motif, Free pattern, heart, heart card topper, hearts, quick crochet, quick makes

Quick Make – Heart Charm

February 12, 2020 by Annie Leave a Comment

Here is a quick make for you, a heart charm to decorate a bag or belt. You can use any motif or charm to make these. I have chosen hearts and music as those are two of my favourite themes.

The elements I have used are cheap to source and you can include recycled items, buttons or ribbon. I have lots of offcuts and remnants from other projects and these charms are great for using those.

I bought a job lot of key chain hooks on Amazon. These were very cheap (ยฃ7 for 50 at the time of purchase) and offer the flexibility of using either the small loop on the carabiner clip or using a larger ring which comes with the clip. I also bought a pack of musical charms (ยฃ4 for 24 at time of purchase).

Design your Charm

The fun bit is in deciding which crochet motifs and colours to use when putting the charm together. I called this quick make – Heart Charm as it is close to valentines day. My finished charm has pink hearts based on my heart pattern which you can get here. I made one small and one medium sized heart in pink. You don’t have to stick with the heart theme. There are lots of crochet motif patterns available. I have a board for these on Pinterest.

Consider the yarn carefully. These charms might rub against the bag or clothing. If you use a fluffy yarn it might start to look worn very quickly. I chose to use mercerised cotton as it is hardwearing and doesn’t bobble. I also happened to have some oddments in my stash!

If crochet isn’t your thing you could make little hearts out of fabric, stuffing them to make them look full. If sewing isn’t your thing you could cut shapes out of felt. Felt is wonderful for craft as it doesn’t fray so does not require stitching.

You can attach the elements of your charm to the ring or clip direct. I hung my charms by plaiting the cotton through the ring on the clip – hiding the ends as neatly as I could. Making the ends of the plait into tassels is a good way of finishing off. This makes the ends secure without stitching. You could glue bits together – especially if you are using felt. However, do consider how hardwearing your charm needs to be. If it is going to be on a belt or heavily used bag it will need pretty robust.

Making your Charm

First, make your motif and remember to leave plenty of thread or yarn so that you can use it to join the motif to the clip. To attach with a plait, take one of the ends of the cotton used to make the heart. Thread the end through the ring of the clip and double the thread back. Position the heart so that the length of thread between clip and heart is slightly longer than the finished length you would like. Add two other threads through the ring of the clip. Each thread should be folded over so you have six coming from the clip.

Pair the threads up and plait!

When you get to the heart, tie a knot in the threads to secure. You can also finish off by binding one of the threads around the others if you prefer. Repeat this method with other motifs. I added some beads as they provide weight which helps the charm hang well.

The only limit to these charms is your own imagination. You could add buttons or bows. You could make pompoms or tassels to add. Make them for your friends or as party favours ๐Ÿ™‚

Here is a picture of one of my finished charms. I will put these up for sale on my Etsy store but I expect people would rather make their own than buy mine!

Happy crafting!

Annie ๐Ÿ™‚

Filed Under: Quick makes Tagged With: charm, charms, Craft, craft with children, craft with kids, crafts, creativity, family activities, quick makes, small crafts

Footer

Newsletter

Copyright © 2025 ยท Genesis Sample on Genesis Framework ยท WordPress ยท Log in