• Skip to primary navigation
  • Skip to main content
  • Skip to footer

Stickytapeandstring

Created with WordPress managed by 1&1

  • Craft projects
    • craft business tips
    • craft blog
    • Crochet patterns
    • Upcycling
    • craft with kids
  • Blogging
    • New to blogging
    • Blog diary
  • Bullet Journal
  • About me
  • Welcome!!

Etsy

Stripes Scarf – Blue

May 6, 2018 by Annie 2 Comments

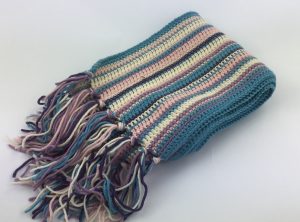
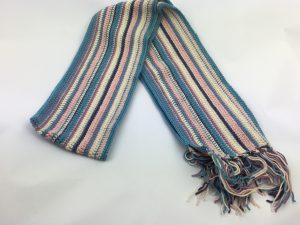
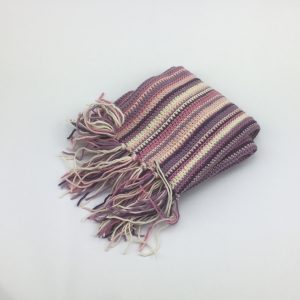
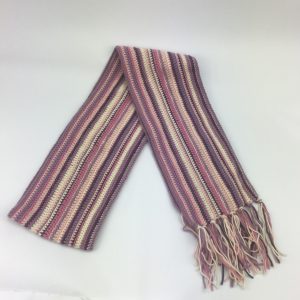
Here is a blue version of my Stash Buster Scarf.   I wrote up the pattern that I created when I made the pink/purple version and realised that I didn’t have yarn quantities so I made it up again in blue so I could get the weight of yarn required.    I also took photos during the making process so that I could add them to the pattern.

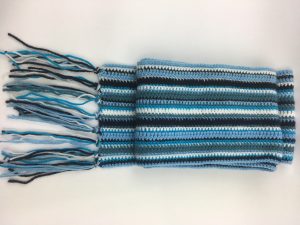
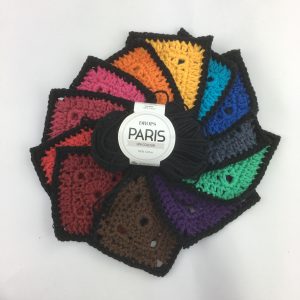
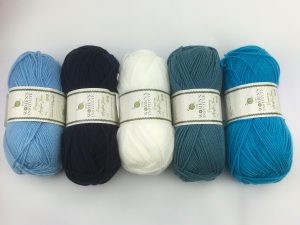
The pattern uses five colours and I happened to have four blue shades in my stash so went with those plus white to make five colours for this design.

I wanted to be able to explain in pictures the way that I finished the scarf off without needing to weave in ends.   I also wanted to show how I added in additional yarn to bulk out the fringing.    The finished pattern is up on my Etsy store which you can reach on the following link.

Stash Buster Scarf Pattern

This pattern is very easy so would suit a beginner and can be made up in whatever colours you choose.   Sounds dreadful to be thinking about Christmas as we are in May currently but I think this would make a lovely handmade gift and you can pick a colourway to suit the person it is for.

I have listed the pattern on Etsy but you can grab it here for free on this download. Stripes scarf (221 downloads)
Happy Crocheting!

Annie 🙂


Filed Under: Craft projects, Crochet patterns Tagged With: Craft, crochet, design, Etsy, handmade, scarf, scarves, stash busting, yarn

Sample Squares

April 15, 2018 by Annie 2 Comments

Last Christmas I asked my husband for what he thought was a very strange present.  I asked him to get me one ball of each colour of a certain type of yarn.     I wanted to be able to play with the colours and to put together a blanket design based on all the colours available.    The yarn I had picked was Drops Paris.   I chose this because I wanted to work in heavy cotton and this yarn is so inexpensive it made the project affordable.     Apparently ordering the yarn one ball at a time was quite a lengthy process so my husband called the online retailer and some very helpful people processed his order by phone!

I designed a pattern for a small square and produced one of every colour except black.    I decided to use black to edge all the squares so didn’t want a black square.   Here is a picture of my finished set of one of every colour sample squares 🙂

I designed the blanket by laying these all out on the kitchen table and moving them around until I saw the design I wanted.   I then worked out how many more squares of each colour I needed and calculated my yarn requirement based on that.   I have placed a yarn order and I am now waiting for delivery.    Whilst waiting for the yarn to arrive, I used the single ball of black yarn that I did have to edge a few of the squares.   I am never sure whether I want to edge in black or white but I do think black is more practical.

When the yarn arrives I will be able to make up the rest of the blanket and will be sharing photos here.   I will put the pattern and the finished product up on my Etsy shop.   I have found this method of designing very quick and easy once I had made all the small squares.   It did take quite a long time to make up the sample squares though and I have ended up with a few that I will not be using.   I wouldn’t want to do this with a more expensive yarn.

This is the final theme for my project.   I have arranged the squares in a rainbow with a pastel, muted and bright row of each colour.   This is only possible because of the large range of colours in this particular yarn.   I hope you like the idea 🙂

If anyone would like the pattern for the coloured square it is available in the patterns section of my blog.     The blanket would be  a great stash busting project if you have a lot of oddments of yarn of similar weight.    I would recommend  using one colour for the edging of each square to pull the blanket into one design.

That’s all from me for now.  On to the next design…..

Happy crocheting!

Annie 🙂

Filed Under: craft blog, Craft projects Tagged With: blankets, cotton, Craft, crochet, design, Etsy, handmade, stash busting, yarn

More Stripes

April 1, 2018 by Annie Leave a Comment

Hello, this week I worked on a second striped scarf.   This one has a lot of the blue colour I used in my flower hats.   The pattern is slightly different although on the same theme as the pink striped scarf I made last week.

The pattern of thin and thick stripes is really interesting and the scarf is fully reversible.   The two sides do look quite different and I love the effect that results from turning the work at each end.

The scarf would be a great project for anyone just beginning to crochet for the first time.    There are only three stitches to master and one of those is chain which is about as easy as it gets.   However, the first row after the chain is very fiddly and I ended up having to do mine twice when I made this second scarf because I managed to get two stitches into one chain loop!

One very satisfying aspect of this pattern is that there are no ends to finish off.   All the ends are ‘hidden’ in the fringing/tassles.   🙂

This has used up the last of the yarn I had left over from my flower hats!    I will be reviewing my stash for the next projects but in the mean time have been out buying more gorgeous yarns.    I will write a post on those later in the week once I have taken some photographs.

That’s all for now – have a go at one of these stash busting scarves – they grow really quickly and the finished item is really  lovely.   If you would like the pattern then it is available on my blog under the patterns section or if you find the ads annoying, visit my Etsy store where I will be listing it for a small charge.

Happy Crocheting!

Annie 🙂

Filed Under: craft blog, Craft projects Tagged With: cashmere, Craft, crochet, design, Etsy, handmade, merino wool, stash busting

Stripes scarf

April 1, 2018 by Annie Leave a Comment

This project is made with the same yarns as my flower hats.    I had quite a bit of each colour left over but not enough to make any more hats in the same design.  I fancied a change anyway so decided to attempt a scarf.

I have collected a lot of images of scarves on my Pinterest boards.   The style I am working here is one of my favourites to wear.    It lends itself to using many colours and as such is perfect for a continuation of my stash busting hats project.  This yarn is a mix of cashmere and merino wool so is beautifully warm to wear.

I began by working a chain to the length of scarf I wanted to produce.    This seemed to go on for ever!    There are 330 stitches in one row of my scarf and the finished scarf measures   160 cm/64 inches long by 15 cm/6 inches.     I made up the stitch pattern and colour banding as I worked the piece but kept careful notes.     I will write up the pattern and put it up on my Etsy store.

This project did not work well on my commute as it grew quite quickly and used several balls of yarn at a time.   I have a separate project worked in parallel so that I could make use of my commuter time!

To finish off the scarf I considered adding more flowers but they didn’t stand out as well as I would like against the stripes so instead I went for fringing.    I have used up all my spare yarn of this type now and listed both the hats and this scarf on Etsy.  I hope you like them 🙂

Happy crocheting!

Annie 🙂

Filed Under: craft blog, Craft projects Tagged With: cashmere, crochet, design, Etsy, handmade, merino wool, scarf, scarves, stash, stash busting, yarn

Sunshine Flower Blanket – edging

March 4, 2018 by Annie 3 Comments

This weekend I tackled the final stage of the design of my Sunshine Flower Blanket, the edging or border.   I wanted to use all three of the flower colours in the edging to bring the blanket together.   I also wanted to end with the red colour as that gives a strong border.   At first I was planning a repeat of the band using the three colours in increasing widths.    However, I didn’t feel that that would give  enough of a statement edge and also would have needed to be blocked in order to make it lie flat.

I couldn’t find a pattern that fitted with the rest of the blanket design in the way I wanted.   Finally, I decided to design my own edging after checking out a lot of different designs on Pinterest and in my various stitch bibles.

I came up with the design you can see in the picture below.   The first round is a simple band of Citrus then I worked a round of petals in Honeysuckle to echo the flower design and behind those, larger petals in red.    It took a few attempts to get the right degree of fullness in the petals whilst ensuring the edge would lie flat.  I am very pleased with the end result.    I would be happy to share the pattern for the edging if anyone is interested – please let me know by sending a comment 🙂

I have now finished the blanket.   I hope you like it.  It has been around six months since I started the project but I have worked on other items in that time.   I will be listing the blanket on Etsy or I might try Amazon Handmade but I will be very sorry to see it go!  I also plan to make two matching pillows as I have a couple of the flower squares left over and I think I have enough yarn too.   I will list the pillows on Etsy but might keep one to remind me of this lovely project 🙂

I have already started planning my next blanket project and will share as soon as I have fixed on a design.   I am also working up sample blocks from each colour in a range of cotton yarn that I was given at Christmas.   I think those sample blocks will end up in a sample colour blanket.   As ever I have far more project ideas than I have time.   A problem we all have I expect….

Bye for now, happy crocheting!!

Annie 🙂


Filed Under: craft blog, Craft projects Tagged With: blankets, Craft, crochet, design, edging, Etsy, handmade, stitches, yarn

Sunshine Flower Blanket – update!

February 25, 2018 by Annie Leave a Comment

Hello – so excited to report the progress on my Sunshine Flower Blanket.

As you can see I now have all the large flowers added and I am working the final vanilla band before adding the edging.    I am going to edge it with the three colours I used for the flowers but I have a few more rows of Vanilla to work before then.

The blanket is getting quite big now – I think it will be around 1.5 meters square when I finish it.   My earlier posts on this project give you the source for the pattern for the large flowers (A Square A Day by Tracey Lord) and the colours I am using.   I will happily make the pattern available for the smaller flowers and the overall design if anyone would like to see it.   Please just leave me a comment (there is a link above and below this post).

I have already started on my next project so focusing on getting this one finished has been a bit of a struggle!  The rounds get so long towards the end so it feels like you are not making progress and the ends take a long time to weave in.   I am so pleased that I wound most of them in as I was working the squares.   I worked a lot of the squares on my daily commute so always made sure I had a needle with me to finish off the ends as I went.   I certainly wouldn’t like to start on all the ends from scratch when I had finished the blanket!

That is all from me for now – the next time I post on this project will be to show you the finished work which I will probably list on Etsy as a one off.  🙂

happy crocheting!

Annie 🙂

Filed Under: craft blog, Craft projects Tagged With: blankets, commuting, Craft, crochet, design, Etsy, handmade, small crafts, yarn

  • Go to page 1
  • Go to page 2
  • Go to Next Page »

Footer

Newsletter

Copyright © 2022 · Genesis Sample on Genesis Framework · WordPress · Log in