• Skip to primary navigation
  • Skip to main content
  • Skip to footer

Stickytapeandstring

Created with WordPress managed by 1&1

  • Craft projects
    • craft business tips
    • craft blog
    • Crochet patterns
    • Upcycling
    • craft with kids
  • Blogging
    • New to blogging
    • Blog diary
  • Bullet Journal
  • About me
  • Welcome!!

uk and us terms

Hearts and Stripes blanket

April 27, 2019 by Annie Leave a Comment

Hello 🙂here is my latest project – Hearts and Stripes Blanket. This pattern is based on the heart motif I created last year. For this project I wanted to produce a solid version of the heart square. To make a heavy duty lap blanket quickly! I used super chunky yarn and a 9mm hook. With this yarn I can easily make one of these blankets in a week or two.

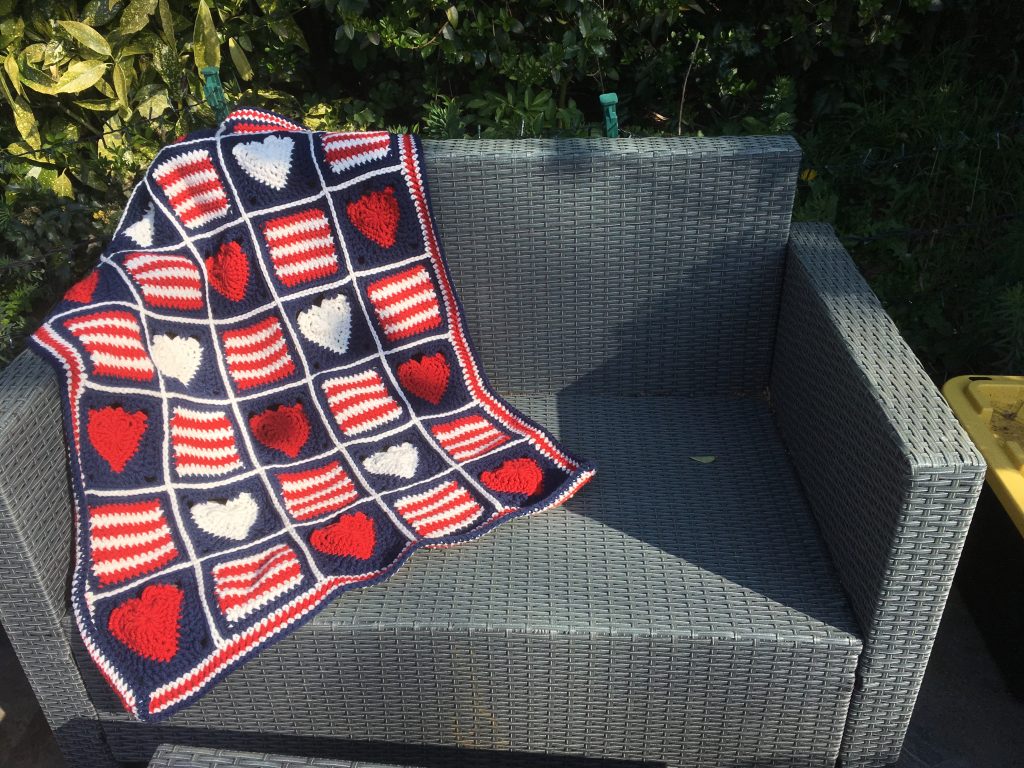
Here is the finished blanket worked up in red white and blue yarn. You can use the blocks to make a blanket of any size. If you use a lighter weight yarn you will probably want to put in more blocks. I went for a seven by five block layout as that worked best for the quantity of yarn I had. The finished blanket measures about 34 inches by 48 inches or 85cm by 125cm in metric.

Hearts and Stripes Blanket

This pattern would also work very well as a stash-buster project. The yarn required for each area of colour is quite small. I salvage quite a lot of yarn and often end up with a large number of smaller balls of yarn. You can read my top tips for yarn salvage here.

The pattern took four 100g balls of the navy and 3 of each of the red and white.

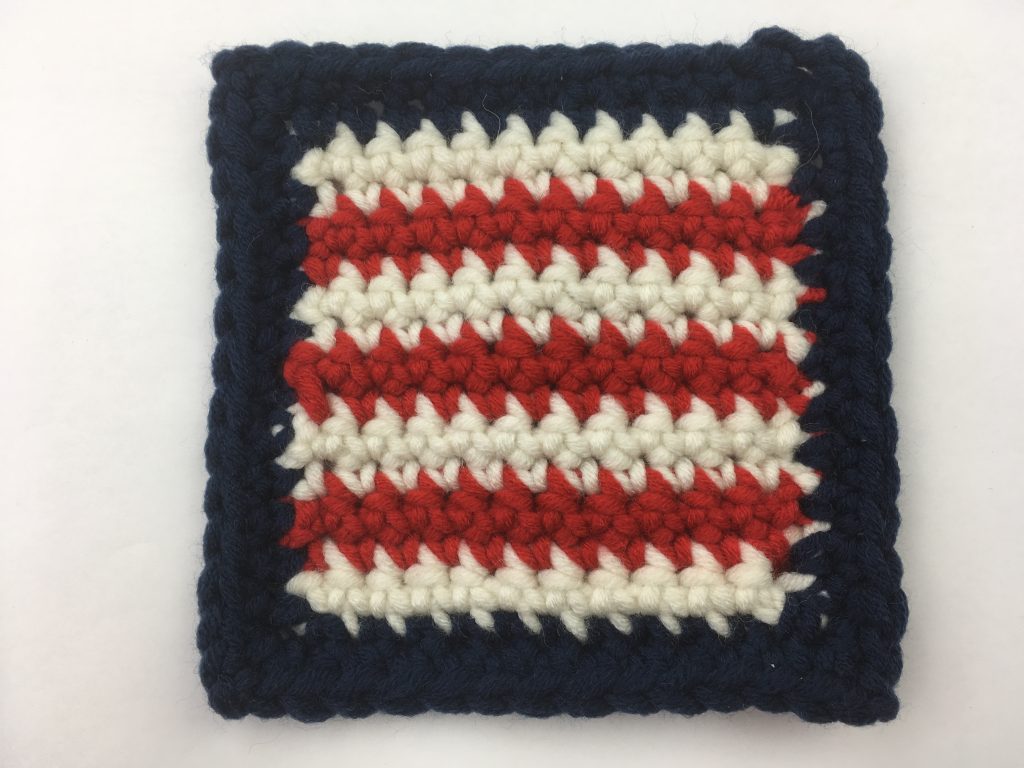
The blanket pattern is made up of striped squares and full heart blocks. The pattern for the heart block in both UK and US terms are available here

The instructions for the striped block are here again in both UK and US terms.

Joining the Blocks to make the blanket

The blanket is made up of these two blocks worked in a seven by five alternating pattern. The join I used for this blanket is one that has minimal finishing off. The technique makes a feature of the joining thread.

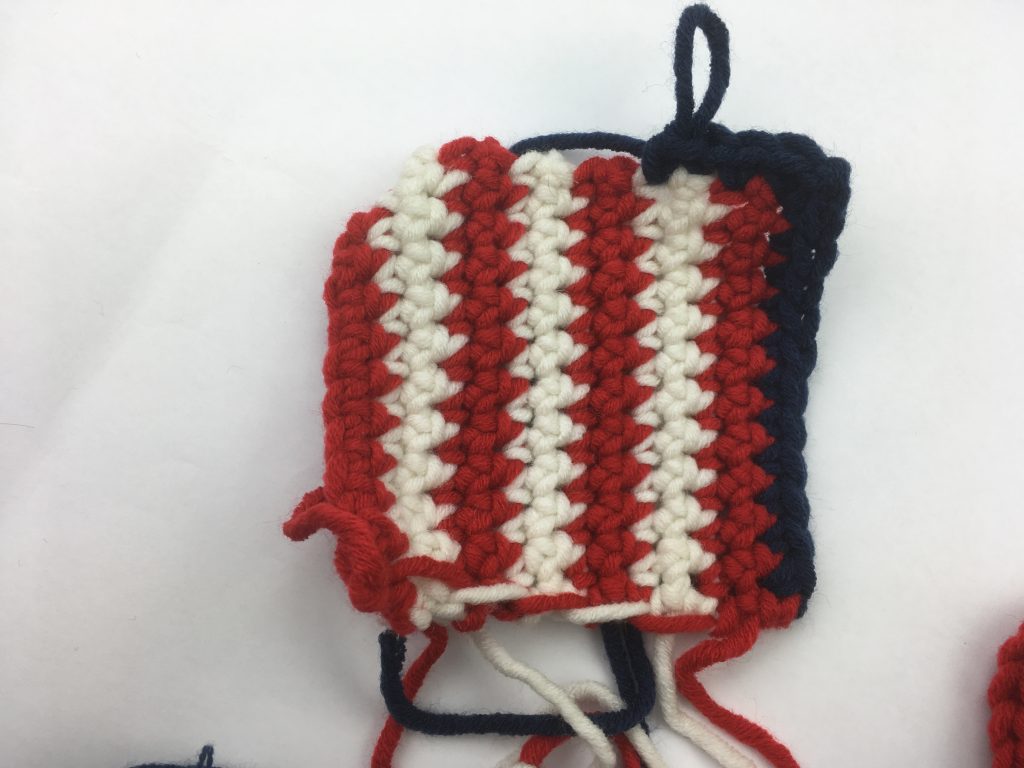
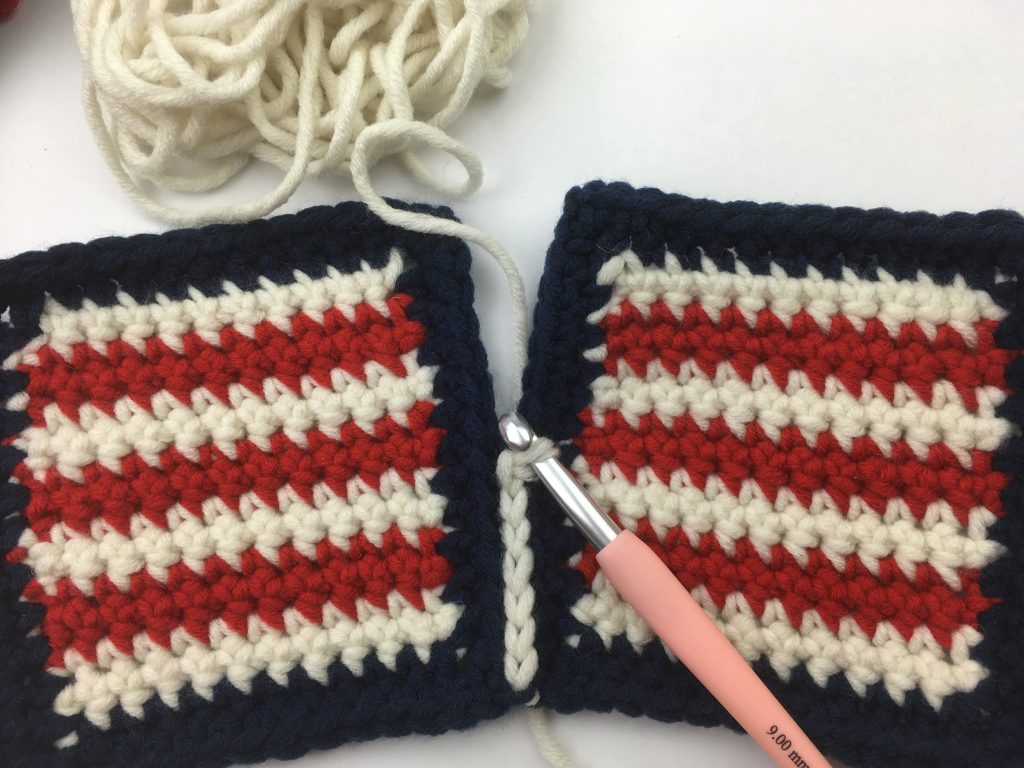
Line up two squares edge to edge with the right side of the work facing up.

Place the yarn you are using for the join behind the work. Always keep the joining yarn behind the squares. Pick up stitches from the back of each of the two edges, as shown below.

Joining instructions 1 - Hearts and Stripes Blanket

Wrap the yarn round the hook working from behind. You need to keep the yarn behind the work at all times.

Joining instructions 2 - Hearts and Stripes Blanket

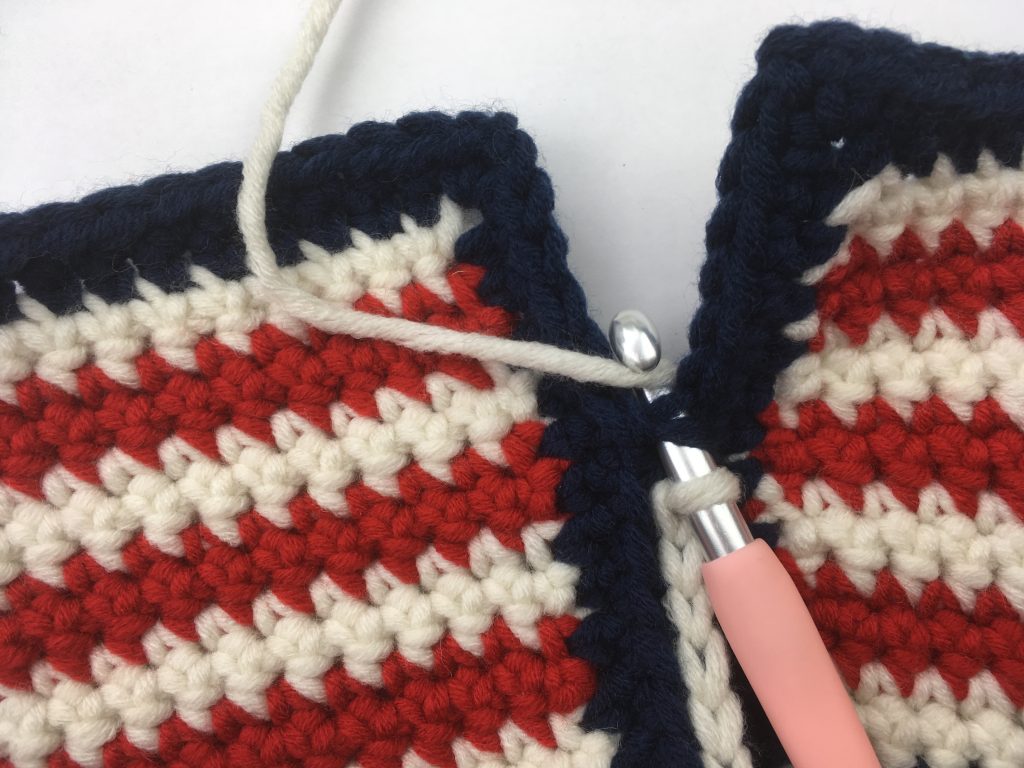
Pull the yarn through the two stitches you picked up to give you two loops on the hook.

Joining instructions 3 - Hearts and Stripes Blanket

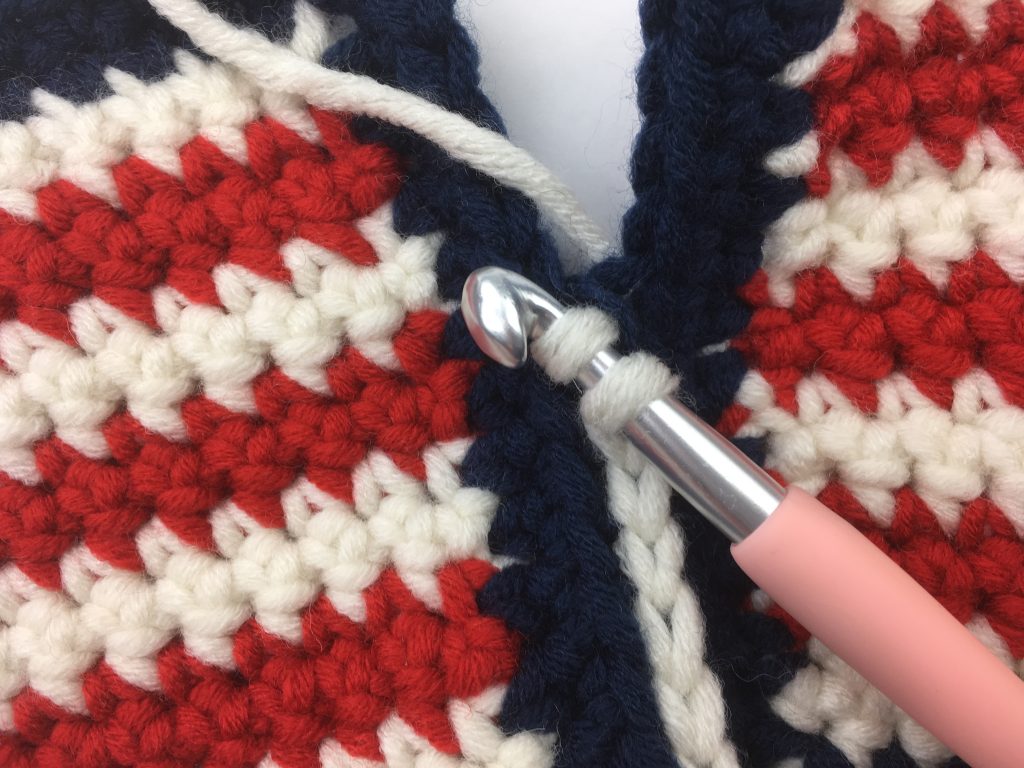
Finally pull the yarn through the loop on the hook to form a slip stitch. From the picture above this means pulling the first loop nearest the end of the hook through the second loop on the hook. The result should look like the picture below.

Design choice – pick a highlight colour for the join and make it a feature. Or use the same colour as the borders of the squares. Using the same colour would make the join less visible.

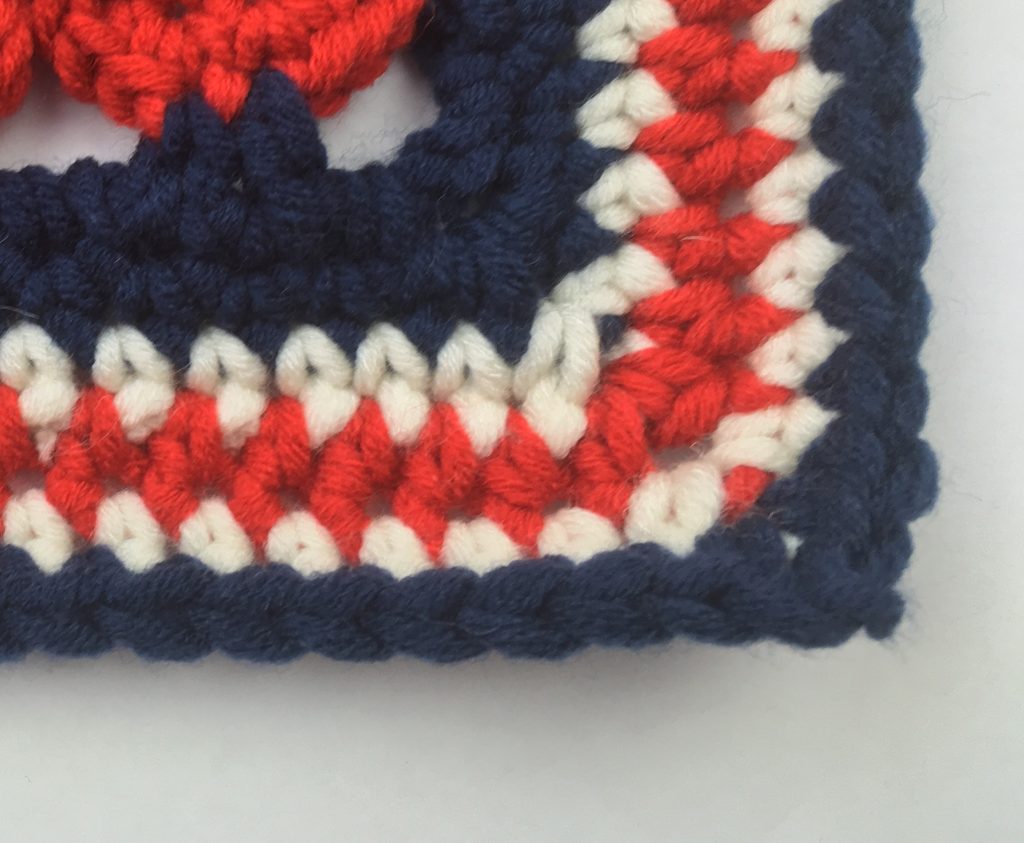
Hearts and Stripes Blanket – Border

The border for this blanket is very simple and echos the stripes in the squares.

Hearts and Stripes Blanket - border

UK terms

First round – Join in yarn in the colour you used to join the blocks and work one round of DC working 1DC, 2CH, 1DC into each corner. For the design shown here yarn colour white.

Second round – Join in yarn A (red for the design shown here) and work a round of HTR working 1HTR, 2CH, 1HTR into each corner.

Third round – Join in the first yarn again (white) and repeat the first round.

Fourth round – for the final round use the border colour (Navy) and again repeat the first round above.

US terms

First round – Join in yarn in the colour you used to join the blocks and work one round of SC working 1SC, 2CH, 1SC into each corner. For the design shown here yarn colour white.

Second round – Join in yarn A (red for the design shown here) and work a round of HDC working 1HDC, 2CH, 1HDC into each corner.

Third round – Join in the first yarn again (white) and repeat the first round.

Fourth round – for the final round use the border colour (Navy) and again repeat the first round above.

Finish off your ends and there you have it – one Hearts and Stripes Blanket. Hope you like it!

Annie 🙂

Filed Under: Crochet patterns Tagged With: afghan, crochet afghan, crochet blanket, crochet throw, free crochet pattern, Free pattern, heart blanket, hearts and stripes blanket, super chunky yarn, thick crochet throw, uk and us terms

Free pattern for Striped Block

April 19, 2019 by Annie Leave a Comment

This post includes a free pattern for a striped block which can be used in a variety of blanket designs. The pattern below makes a crochet block of five inches square when worked up in a super chunky yarn on size 9mm needles. To make a larger square simply increase the number of stitches and rows. You can see how I used this block in one of my blanket designs here.

Striped Block - crochet

The basic pattern below produces seven stripes of two rows each. If you want your block to have broader stripes work more rows before changing colour. When using just two colours and changing colour every two rows you do not need to cut the yarn. Keeping the twists to a minimum you can work the border over the carried yarn and save yourself from a lot of finishing off! The pictures below show the border being worked in this way.

Edging the Striped Block - crochet

UK terms

With yarn A

First row – Chain 12 then turn.

Second row – working into second chain from the hook, 11DC then turn.

Join in yarn B

Third row – chain 2, DC1, turn.

Fourth row – chain 1, DC11, turn.

Change yarn back to A for the two colour stripe block or change to yarn C if you are using multiple colours.

repeat Third and Fourth row until you have seven stripes.

Border round 1 – Join in the border colour Chain 2, DC11, the last of these 11DCs is in the corner of the square. Chain 2, turn the block so that you are working along the side of the square and work a second DC into the corner. Work another 9DC evenly spaced along the side of the block then one DC into the bottom corner as shown below. Chain 2 then work second DC into the corner. Work a further 9DC across the bottom of the square then into the final corner work 1DC, 2CH, 1DC. Work a further 9DC evenly spaced along the final side of the square and finally work one DC into the corner, 2CH and slip stitch to join to the 2CH at the start point of the round.

Border round 2 – CH2 then DC into each of the stitches working 1DC, 2CH, 1DC into each corner. Complete the round then join with a slip stitch to the 2CH at the start point and finish off.

US terms

With yarn A

First row – Chain 12 then turn.

Second row – working into second chain from the hook, 11SC then turn.

Join in yarn B

Third row – chain 2, SC1, turn.

Fourth row – chain 1, SC11, turn.

Change yarn back to A for the two colour stripe block or change to yarn C if you are using multiple colours.

repeat Third and Fourth row until you have seven stripes.

Border round 1 – Join in the border colour Chain 2, SC11, the last of these 11SCs is in the corner of the square. Chain 2, turn the block so that you are working along the side of the square and work a second SC into the corner. Work another 9SC evenly spaced along the side of the block then one SC into the bottom corner as shown below. Chain 2 then work second SC into the corner. Work a further 9SC across the bottom of the square then into the final corner work 1SC, 2CH, 1SC. Work a further 9SC evenly spaced along the final side of the square and finally work one SC into the corner, 2CH and slip stitch to join to the 2CH at the start point of the round.

Border round 2 – CH2 then SC into each of the stitches working 1SC, 2CH, 1SC into each corner. Complete the round then join with a slip stitch to the 2CH at the start point and finish off.

Hope you enjoy making lots of striped squares and striped blankets. This is a great stash buster square and is a great way to use up odds and ends or salvaged yarn which tends to be in small balls! You can read about my yarn salvage tips here.

Please share pictures of your projects and link back to this page if you reuse my pattern. Happy crocheting!

Annie 🙂

Filed Under: Crochet patterns Tagged With: crochet, crochet block, free crochet pattern, Free pattern, striped block, uk and us terms, uk crochet terms, us crochet terms

Footer

Newsletter

Copyright © 2021 · Genesis Sample on Genesis Framework · WordPress · Log in