Hello and thank you for visiting my blog. I am really excited to be sharing with you this new free pattern for crochet bunny stitch using US crochet terms. The stitch is a bit fiddly at first but I promise you that you will speed up once you get into the swing of it. There are lots of photos below to help you follow the instructions and I am planning to provide a video tutorial eventually. I don’t currently know how to do those (sorry!) but I am working on it.
I have a series of posts planned to share free patterns I have designed using the crochet bunny stitch. At the moment these include headbands, cushion covers and two types of hat. I am also working on an Easter blanket pattern and a bunny block which will be available on my blog later in the year. Please keep checking back or sign up to my mailing for these.
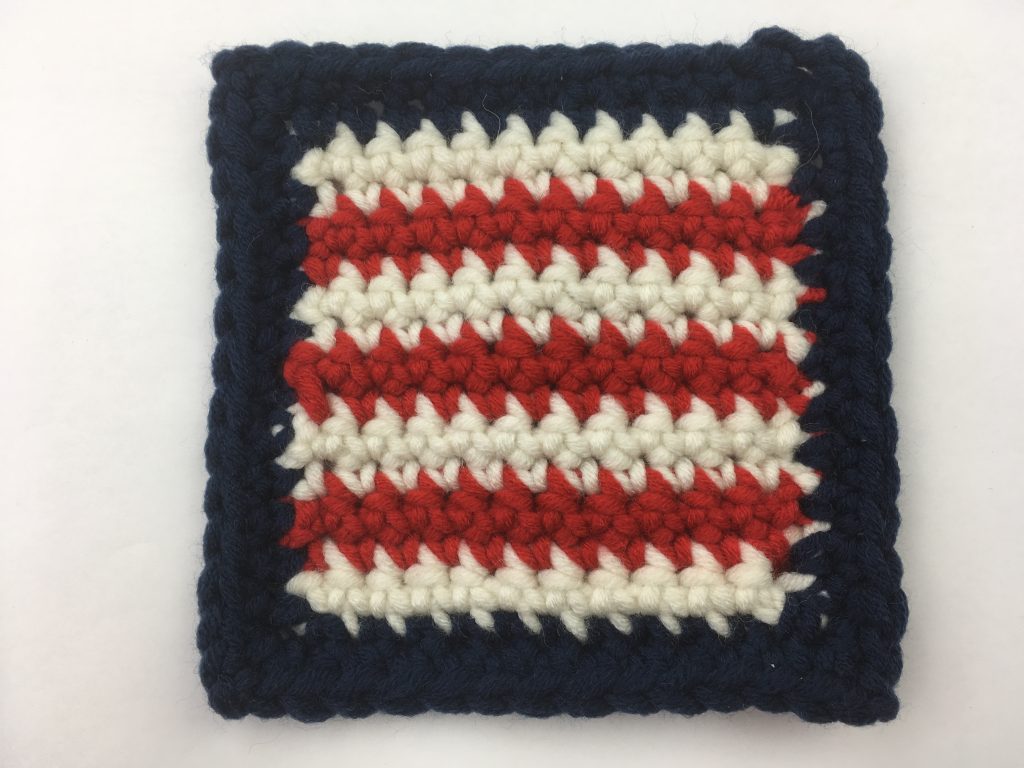
First things first. The pictures here show the stitch being worked in Stylecraft Special Chunky yarn using a 6mm hook. I buy all my yarn from Woolwarehouse because I love love love their website, range and service. You will need two colours for this stitch. One for the background which we will call yarn A and one for the bunnies, yarn B.
Free Pattern for Crochet Bunny Stitch using US crochet terms (for UK terms follow this link)
Foundation row
This stitch uses a repeat of four stitches so make your foundation chain a multiple of four stitches plus a minimum of three. This will allow you to have three plain stitches at either end of the work, after the last bunny! If you want a wider border at either side of your bunnies then add more stitches to your chain. The bunny sits on the third stitch of the repeat and his ears are on stitches two and four.
When you are happy with the length of your foundation chain, chain two more and turn. These two chain stitches form the first stitch on the following row.
First row
Work a row of SC starting by working into the third chain from the hook then at the end of the row chain two and turn.
Second row
Work a row of SC, starting by working into the second stitch on the row below then at the end of the row, chain two and turn.
Third row
Work a row of SC, starting by working into the second stitch on the row below then at the end of the row, join in yarn B by placing it across yarn A as you chain two and turn.
Time to get interesting! On this next row we will add the ears 🙂 We will be alternating yarn A and yarn B. Take your time with this row and make sure that each time you switch yarn the tension is even. Place the yarn that is not being used along the top of the work. This allows your stitches to enclose it and it is carried along but hidden, as you can see in the pictures below.
Fourth row
Work two SC in yarn A, starting into the second stitch of the row. Remember to place yarn B against the top of the work as you work each SC. You can see in the picture that yarn B is carried along the work. The picture below shows the positioning of the yarn as you start the stitch.

Now for the ears!
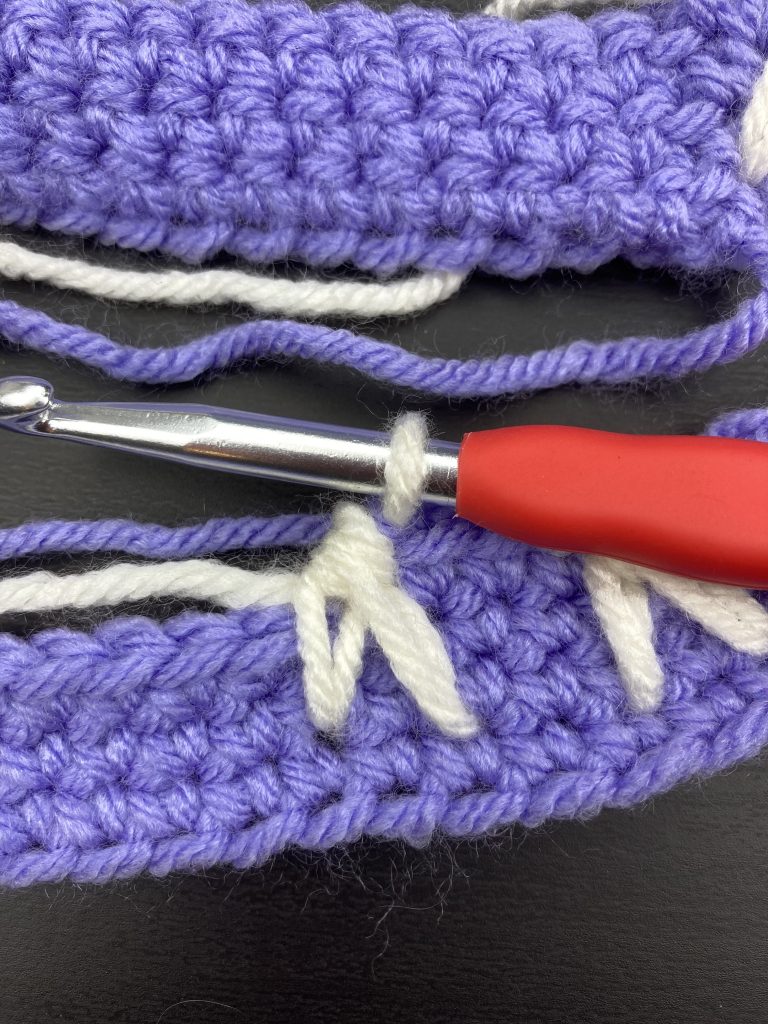
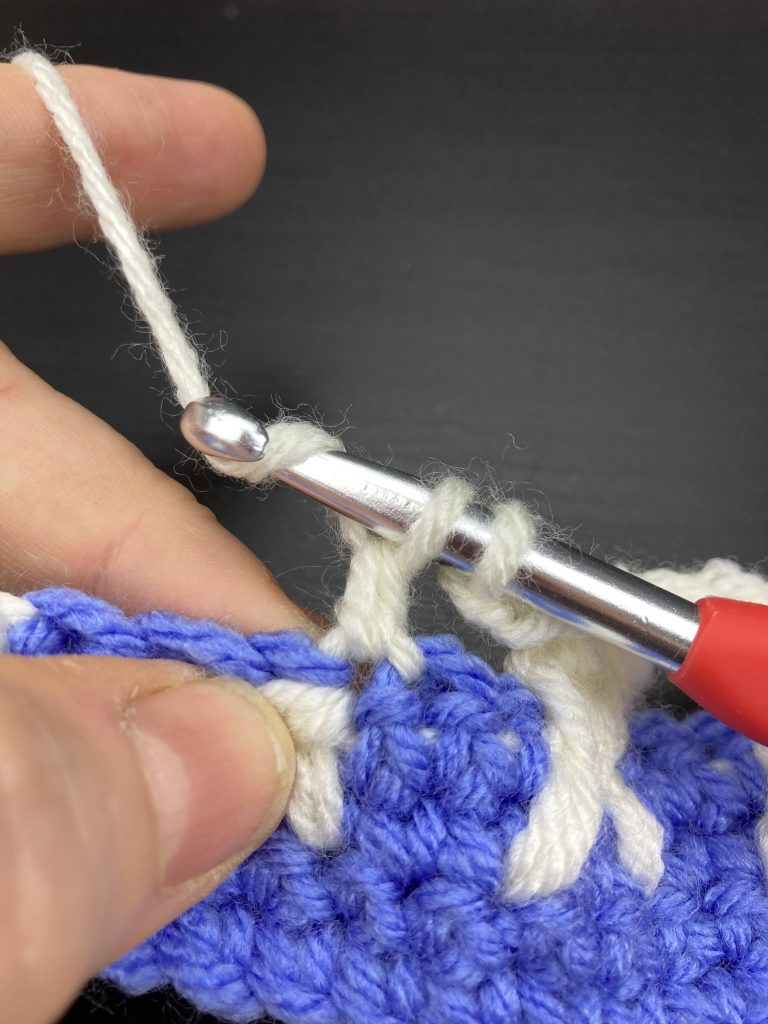
Hold yarn A against the top of the work then wrap yarn B around your hook. Insert your hook into the stitch two rows down and one stitch behind the position of your last stitch.
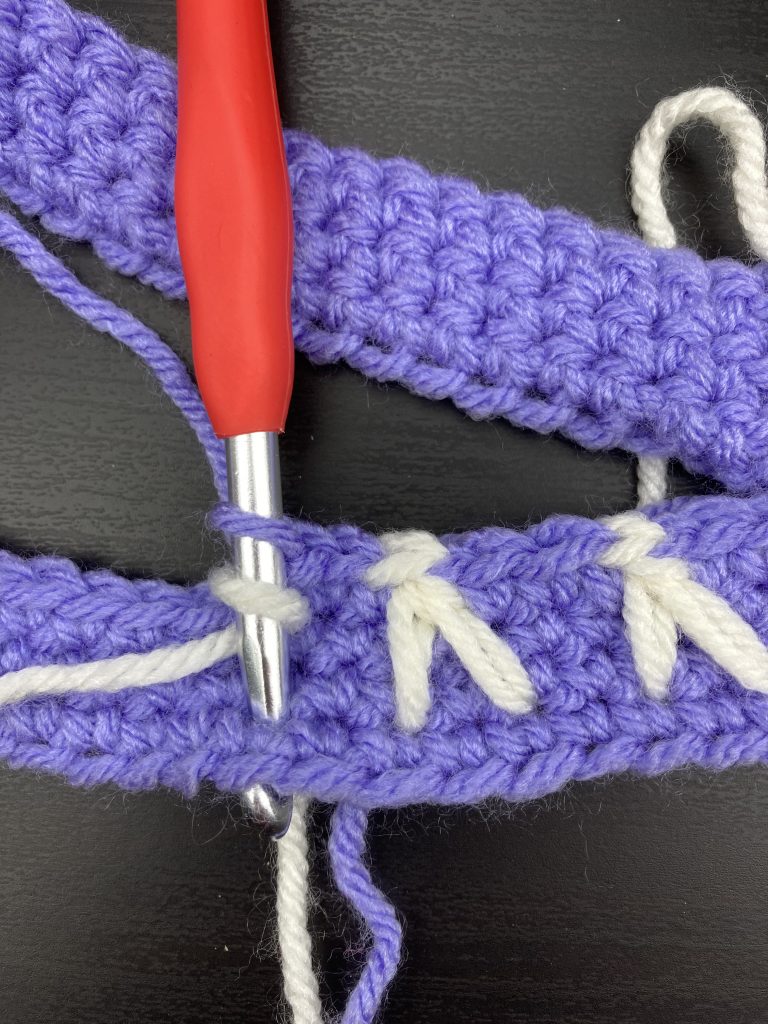
With your hook through to the back of the work, wrap yarn B round the hook then pull back through to the front.
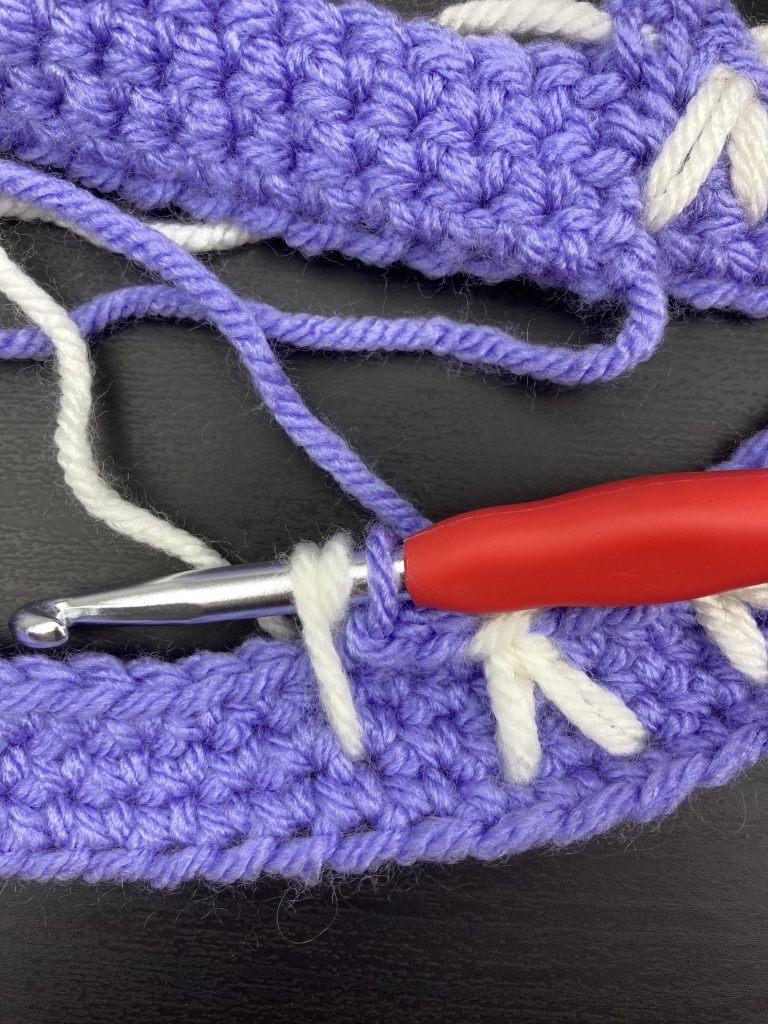
You should have three loops on the hook, one in yarn A and two in yarn B.
Second Ear coming up!
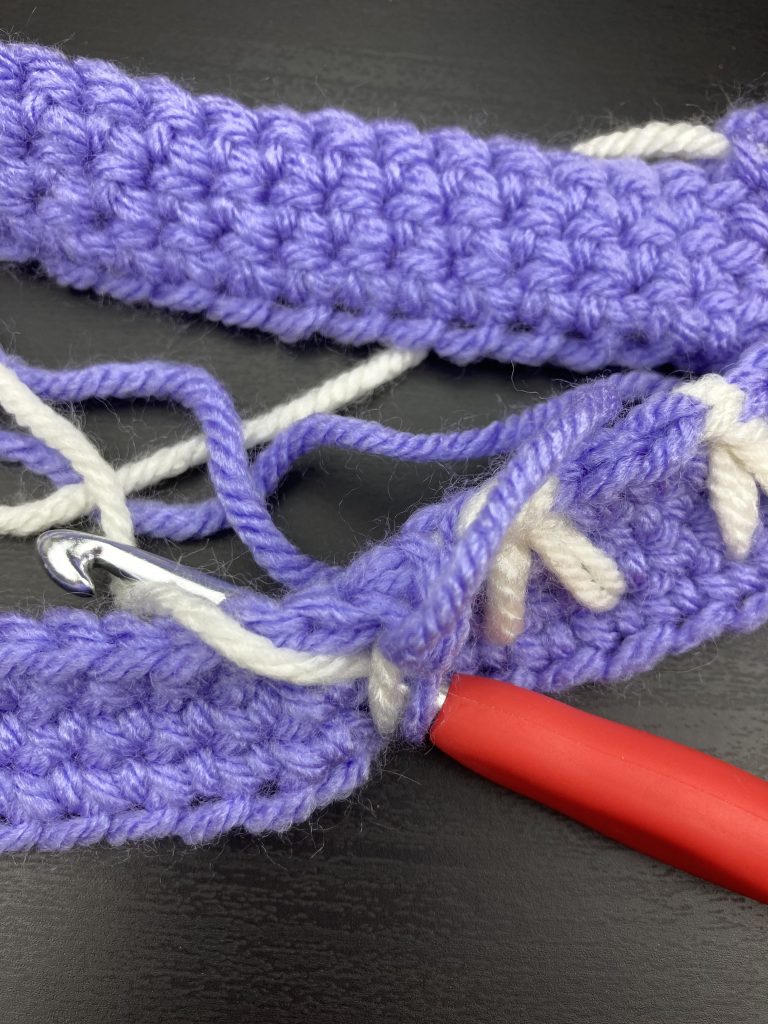
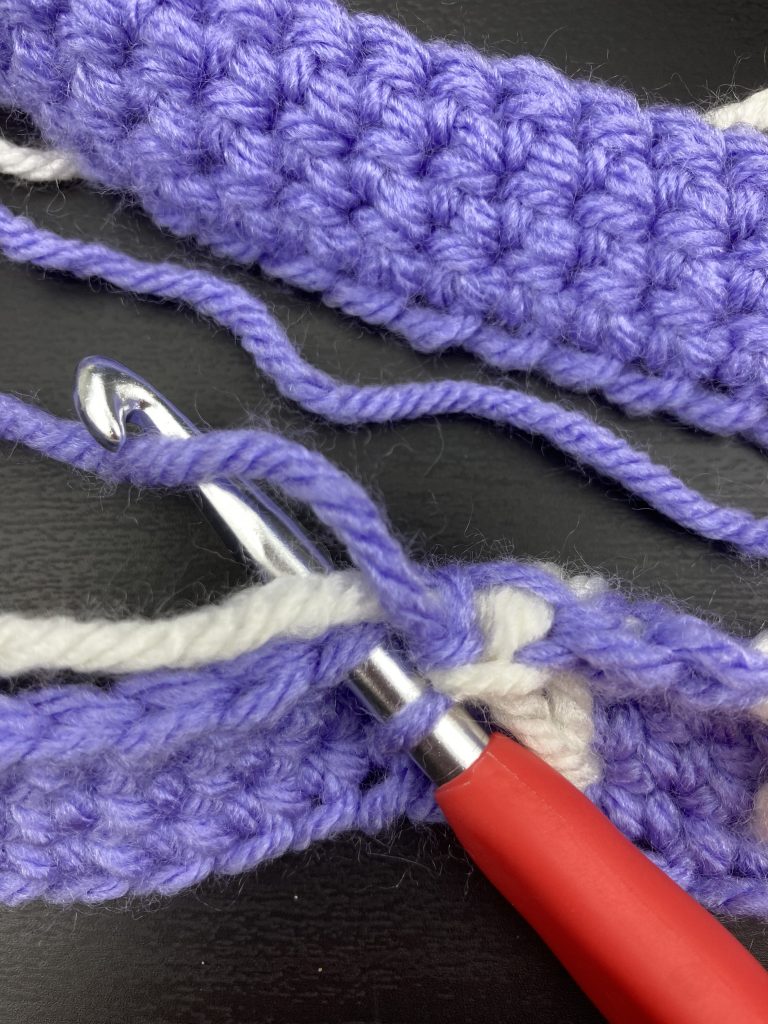
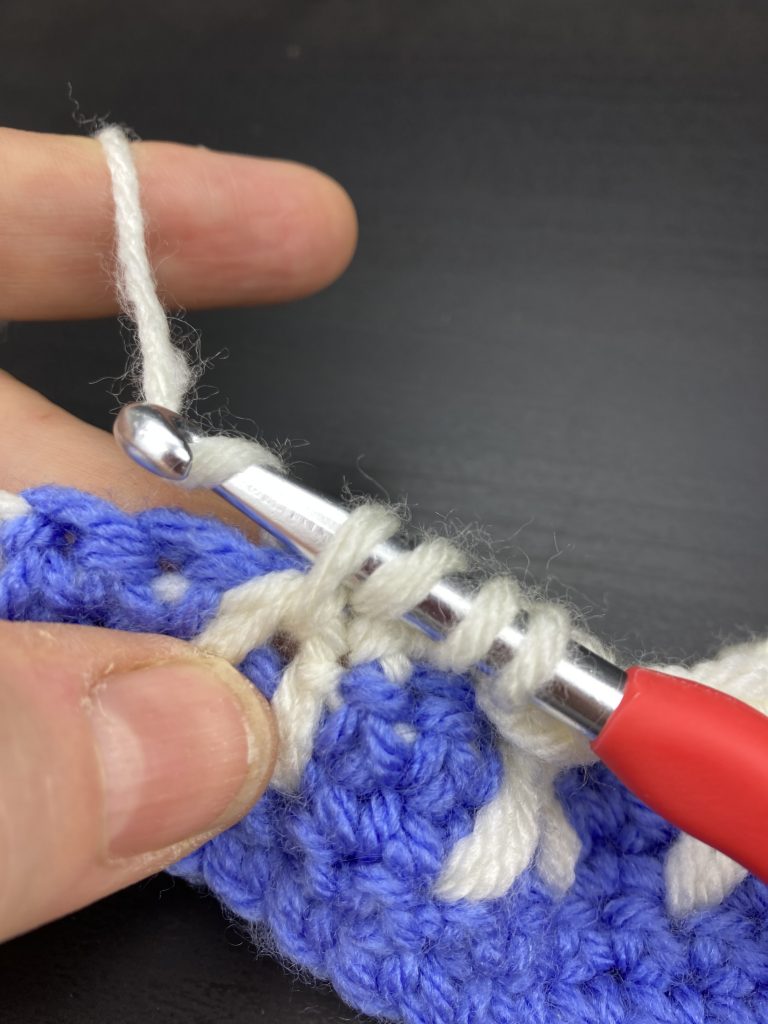
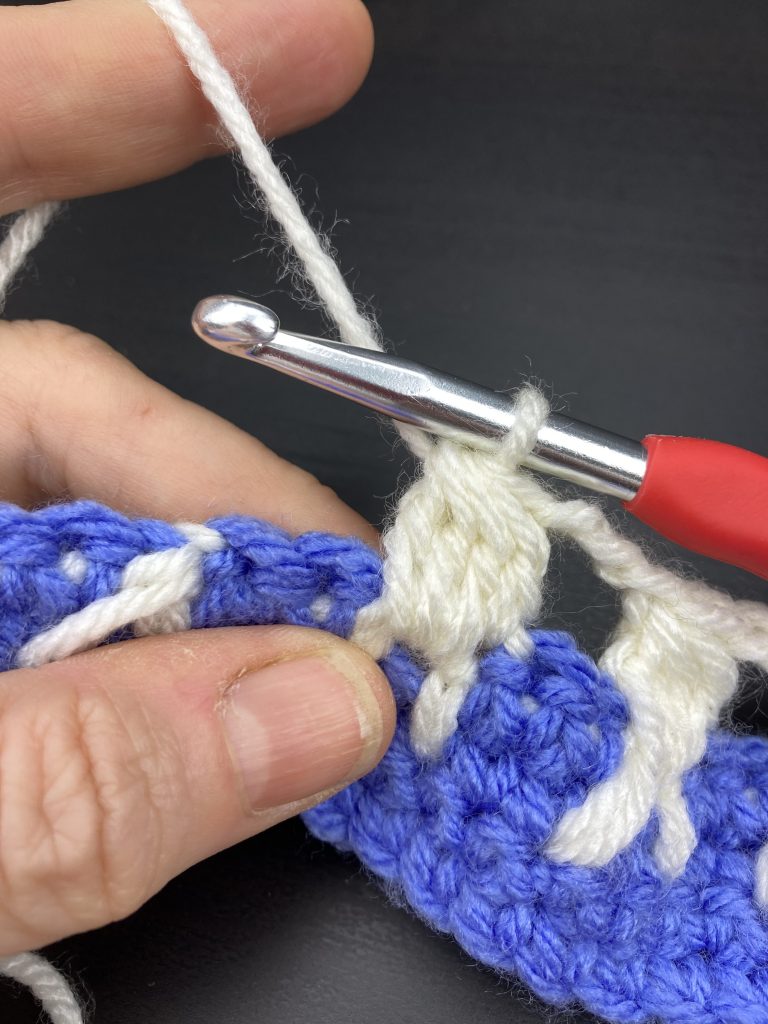
Now wrap yarn B around the hook again then insert the hook into the stitch two rows down and two in front of the position of your first ear stitch. Note this will be two stitches along from the one you worked into in the first part of this stitch. This part is the second ear and you should see one clear stitch between the ears as shown below.
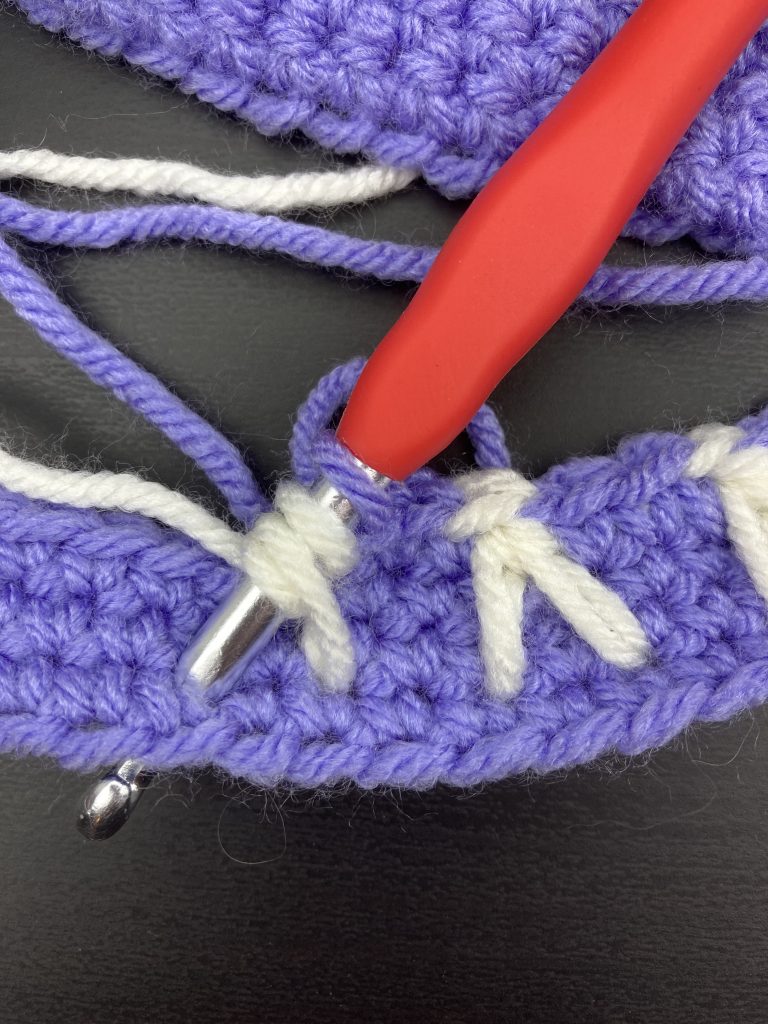
With your hook through to the back of the work, wrap yarn B round the hook and pull back through to the front. You should now have five loops on the hook, one in yarn A and four in yarn B.
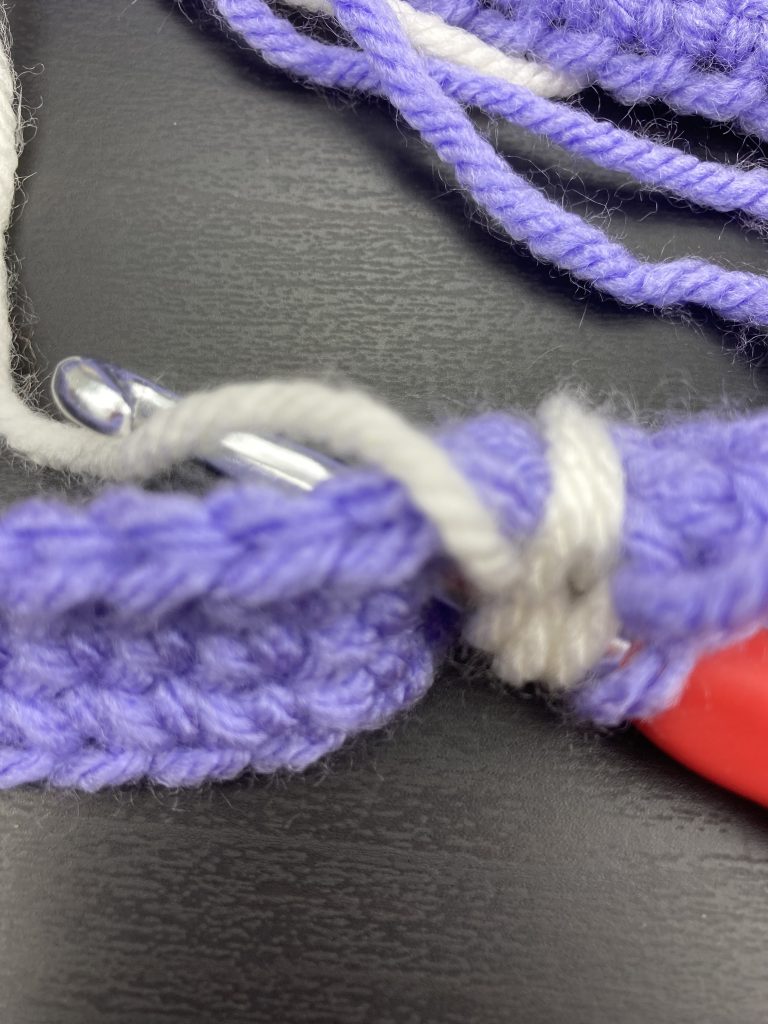
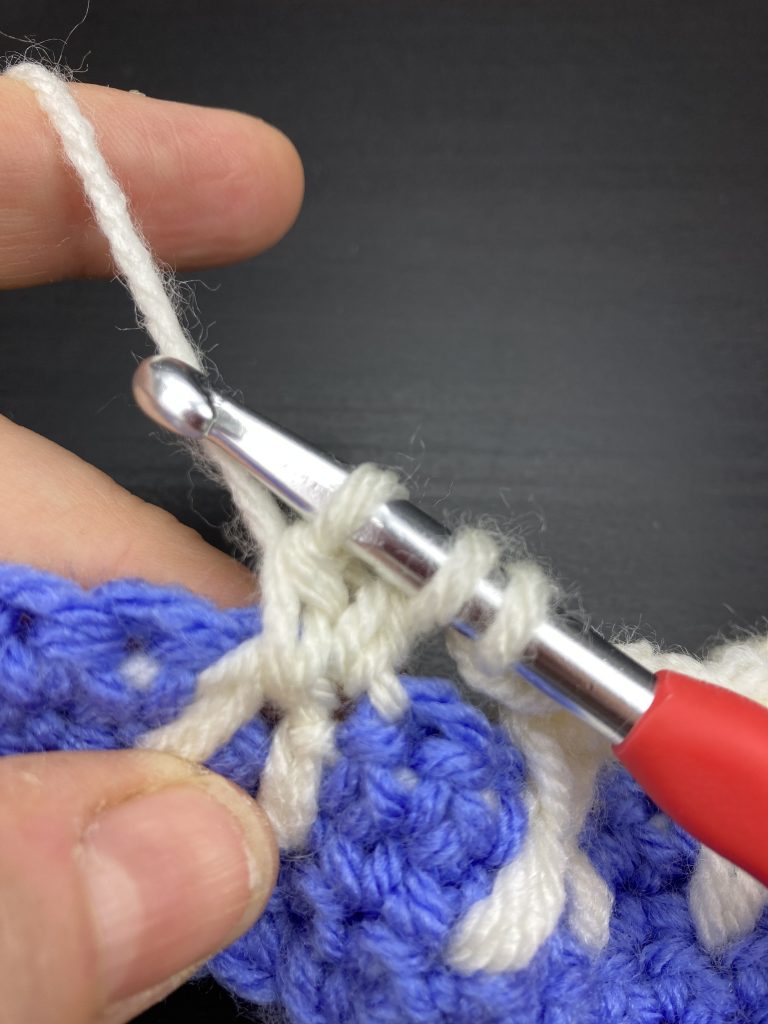
Wrap yarn B around the hook and pull back through all the loops on the hook leaving you with one loop on the hook and a completed ear stitch.
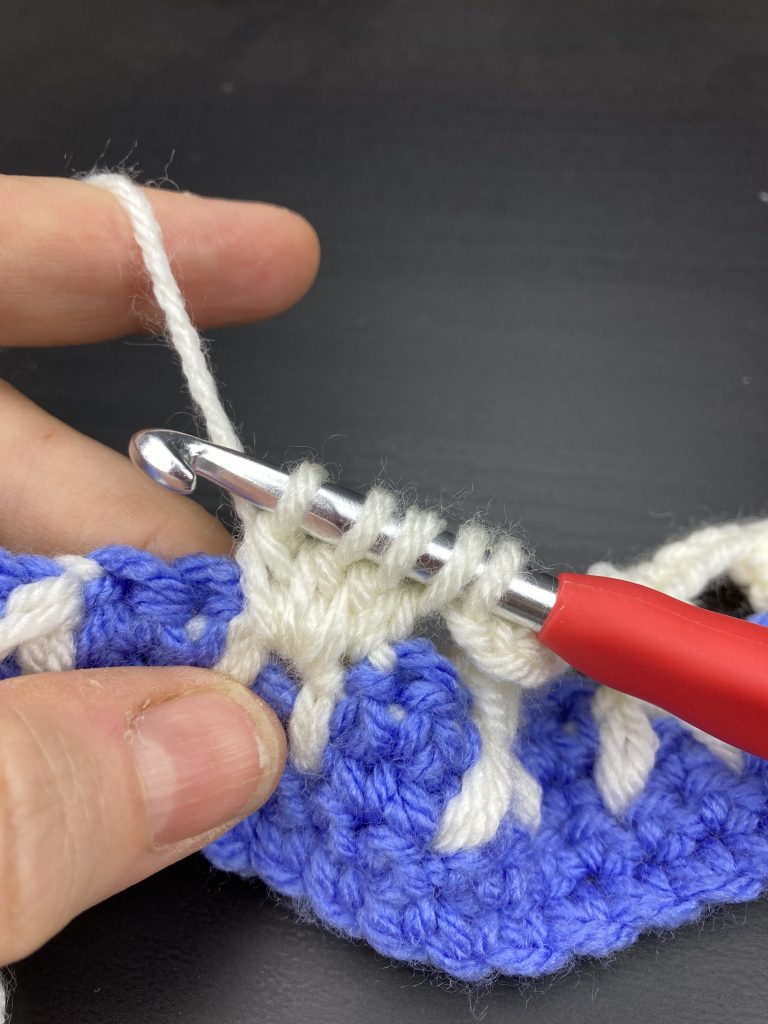
Hold yarn B against the top of the work then work 3 SC in yarn A, carrying yarn B along as shown below.
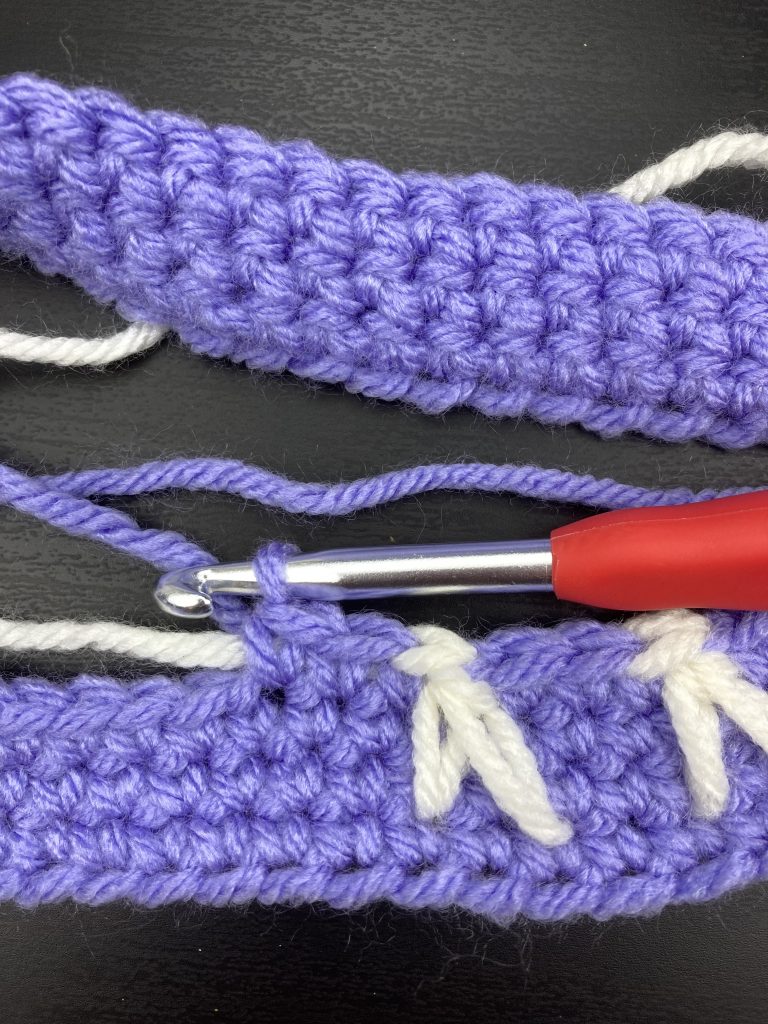
These four stitches form the bunny ears. Repeat as many times as you need to complete the row. Remember to keep an even tension by pulling the yarn gently each time you change colour. When you work your second pair of ears you should leave a gap of one stitch.
Fifth Row
Break off Yarn A because we will only be using yarn B on this row. Next time we need yarn A will be at the other end of the work. Work 5 chain stitches.
Each bunny is a four DC cluster stitch with the first DC being worked into the stitch in yarn B on the previous row. Work the remaining three DCs into the row below just between the ears. This is described in stages below with pictures.
Give your bunny a body!
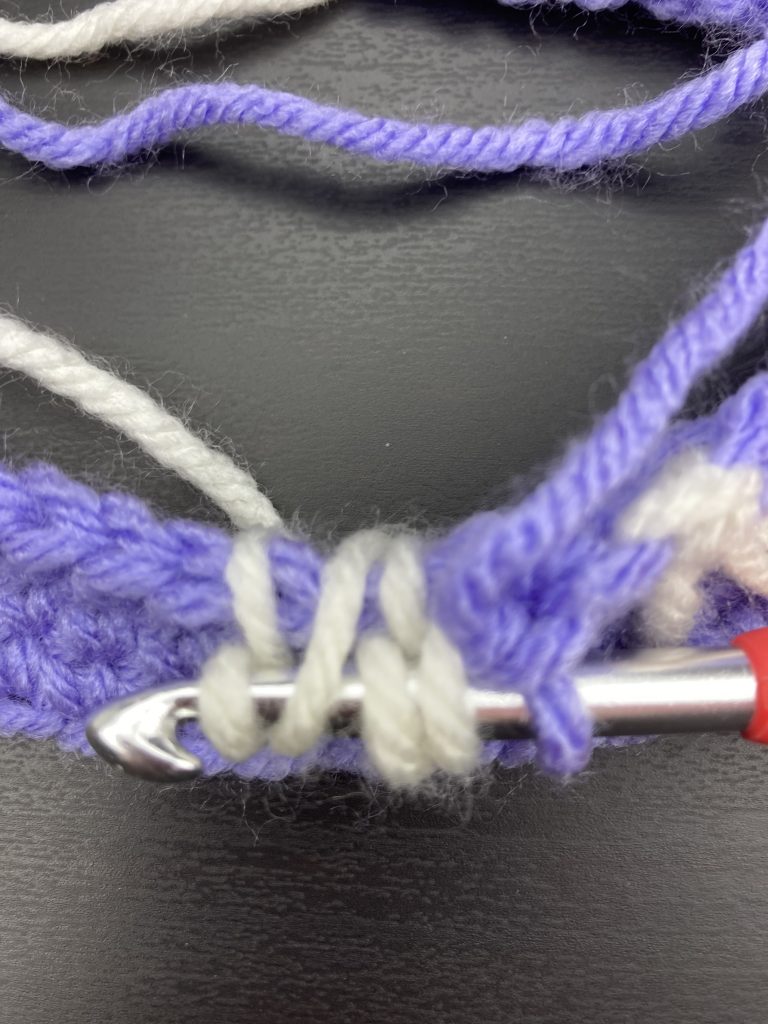
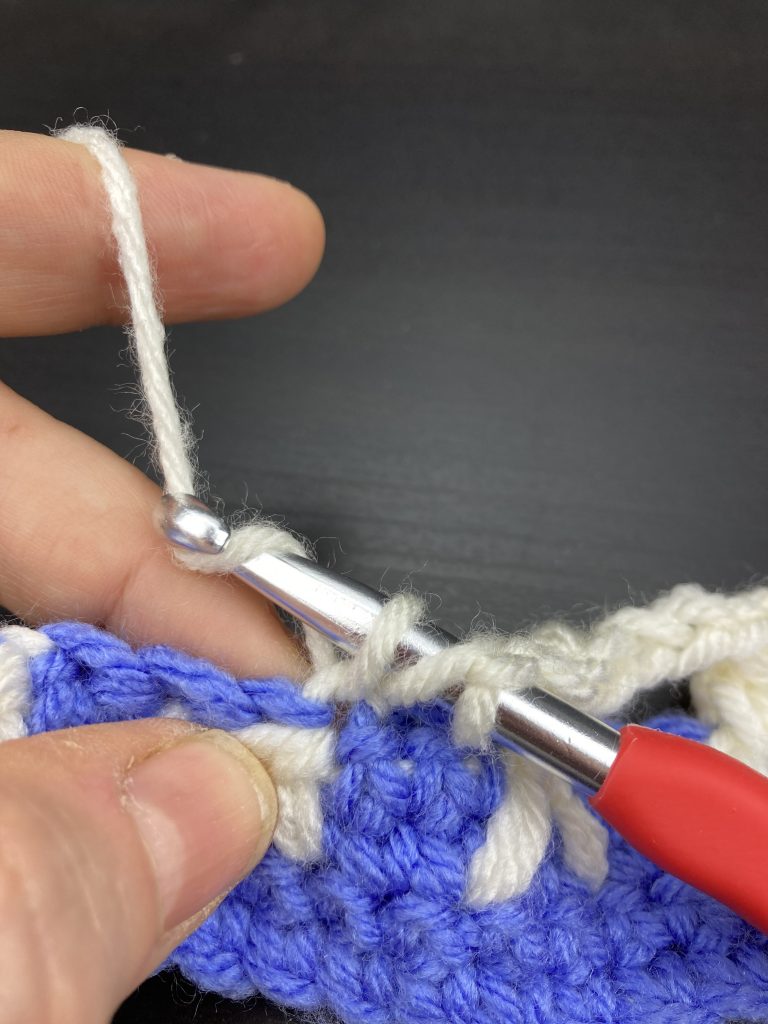
To work a cluster of DC * start by wrapping your yarn round the hook then pushing it into the stitch in yarn B on the previous row.

Wrap the yarn round then pull through two loops on the hook to complete half of the DC stitch. This leaves two loops on the hook.
Now start your second treble of the cluster. Wrap the yarn around the hook then insert it into the row below, just between the bunny ears. We are working on the wrong side of the piece on this row. It is important to check that your hook is coming through in the correct place between the ears so remember to check both sides!
Wrap the yarn around the hook and pull back through then you will have four loops on the hook. Next, wrap the yarn round and pull through two of loops to complete half of the second DC then leaving three loops on the hook.
Half way there on the bunny body!
Repeat twice more each time wrapping the yarn around then putting the hook in between the ear stitches. Wrap the yarn round and pull through, wrap the yarn round again then pull through two loops to complete half the third and fourth DC of the cluster. You should have five loops on the hook.
Wrap the yarn around the hook then pull back through all five loops on the hook and you have completed your bunny.
Chain 3 and repeat from * until you get to the end of the row. At the end of the row chain five then put a slip stitch into the end stitch of the previous row. This completes the row of bunny bodies.
Sixth Row
Join in yarn A and work 2 chain then work 2 SC into the gap below the chain on the previous row.
Work 4 SC into the gap between the first two bunnies then, keeping the tension even, continue to work 4SC into each gap between bunnies till you reach the end of the row then work 3 SC into the gap after the final bunny. Chain 2 and turn the work.
Seventh Row
Work a row of SC.
You are are done and you should be looking at a little row of bunnies 🙂
I hope that you like this free pattern for crochet bunny stitch using US terms and that you find the photos are helpful. The post is very long, so I have posted the free pattern using UK crochet terms separately . Really excited to share that I am working on producing a video in case the photos are not enough.
I haven’t seen anything like this stitch out there which is why I spent time creating this. I am happy for anyone to use it and would be excited to see your projects but please please please credit me and link back to my blog rather than putting up your own tutorials. That way I will be able to keep my little blog going and spend time creating more stitches and free patterns!
I do have patterns to follow which include crochet bunny stitch using US terms to make headbands, hats, bags, cushions, a crochet block and finally a blanket. Keep checking in or join my mailing list if you want to get hold of those. I will also update this post with links as I complete each pattern.
Happy crocheting!
Annie 🙂