Hello, In my last post I promised you another set of tips and ‘how to points’ on yarn salvage. The project is going very well here and I am drowning a bit in yarn!
With Autumn coming on, I have also started looking at the list of people I would like to make Christmas and Birthday presents for! I plan to use some of this new yarn stash to create beautiful things for my friends and family. I will post a list pattern links when I have it together but as a start point I am making my striped scarf up with some of the greens and greys.


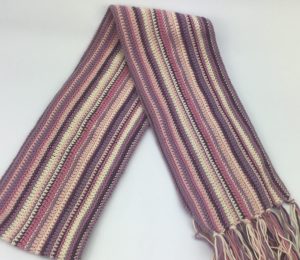
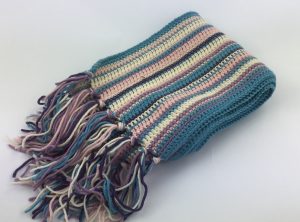
Here is a link to the Striped Scarf pattern and you can see the scarf above in pink and in blue. This type of pattern is ideal for using recycled yarn as you can vary the design according to the yarn you have available and it is easier to mix yarn weights. Anyway – I promised you tips….. here goes. The last set of tips focussed on garment selection. This list is more about what to do when you get your garments home and you need to do the unravelling! If you missed the first set of tips you can see them here – Yarn Salvage #1
Yarn Salvage Tips#2 – where to start unravelling
1. Firstly spend some time getting to know the garment. Look at every seam and pull the two joined edges as far apart as possible. There should be a set of horizontal stitches visible between the two pieces of the garment. If you are lucky these stitches will be in a slightly different thread but this is not always the case.
2. Side and sleeve seams are the easiest place to start. Snip through 3 or 4 of those horizontal joining stitches, at one end of the seam but if you’ve chosen the bottom edge, avoid the welt/rib/border. Instead, start a little higher up.
3. As well as the hole you have created by snipping the horizontal stitches you should be able to see a cut end of yarn. Pull on this and it might magically unravel the whole seam. If it doesn’t, go to the other end of the same seam and try again.
4. Most seams will unravel as described above if you persevere long enough. Beware of fluffy yarns however. Fluffy yarns need a lot of pulling and sometimes scissor work to prise them apart.
5. If all else fails, it might be necessary to snip all horizontal stitches but this is time taking and risky. It is very easy to snip part of the knitting which would mean you end up with smaller balls of recovered yarn and more ends to deal with in your project!
6. Sometimes the tops of sleeves and neck areas, particularly on fronts of jumpers, call for the use of scissors. There is no point in spending ages unpicking these areas just to finish up with very short lengths of yarn. Just cut across the knitting so that you have a reasonably long raw edge to start from.
7. Welts/ribs/borders and underarm seam intersections on some garments can be huge time wasting areas to deal with. No matter how long you take or how careful you are, there will be cuts to the knitting in those areas. Consider just cutting those nasty lumpy seams away with out even trying to unravel them.
8. Beware the double ball knitting demon!! There are some commercial machines that have two balls of yarn on the go in production. The balls are used to knit alternate rows. This means when you are unravelling you will have two balls of yarn to wind – swapping between them every row. You cannot know this before you unravel, at least we haven’t worked out a way to detect it yet…. but be prepared to deal with it if it occurs.
9. Take a view on whether to unravel ribbing at the neck and elsewhere. Sometimes it is worth the effort, sometimes not.
10. Finally, it is worth saving every scrap of cut away area or rib/welt/border until you have finished the project you are using the yarn for. You never know whether you will run out of yarn and just need a tiny bit more. If this happens, all the bits that were too time consuming to deal with suddenly become worthwhile!!
And that is it for now. I have a final post in this series for you next week. In that post I will cover what we do with the yarn we recover in order to prepare it for re-use.
Happy recycling!
Annie 🙂