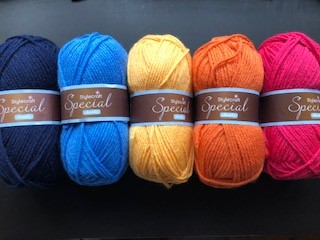
I am calling this pattern Lockdown Lapghan which I hope dates this post forever because I really hope that lockdown is a feature of 2020 alone! This is a great time to try new hobbies so I wanted to create a really easy pattern for crochet newbies. To complete the pattern, you only need to know how to do one stitch plus chain. This is an easy crochet lapghan for beginners. You can put your own stamp on the pattern by choosing a different set of colours. I am working with two colour ways initially. The first set of colours were inspired by autumn sunsets, I love the warmth of these colours.
The second set of colours I picked were more for winter and the approaching festive season. I am calling those Berries in the Snow :-).
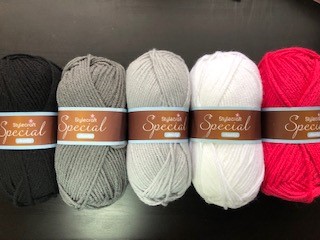
The yarn I am using is Stylecraft Special Chunky. This is a good quality inexpensive yarn with a great range of colours. I buy all my yarn through woolwarehouse in the UK as I find their range and customer service exceptionally good! Please note I have no relationship with this business but the link above will take you to their website.
If you are using Stylecraft Special Chunky yarn you will need a 6mm hook and each block will measure around 10 inches square. If you are using a different yarn please check the ball band for the appropriate hook size. This is the paper wrapped around the yarn and normally shows the suggested hook size in millimetres. As a guide to quantities of yarn – I bought four balls of each colour. This should give you more than you need to complete the lapghan. You might even get a cushion out of the leftovers 🙂
You will use the same basic square throughout this design. Colour changes within each square bring the design to life. I will cover colour changes in a separate post. If, like me, you have a design that includes several plain blocks of a single colour then I suggest you get started with those. Here are the instructions 🙂
Easy Crochet Lapghan for Beginners – basic square pattern – UK crochet terms.
First round
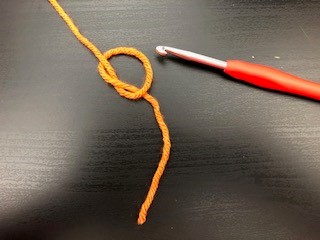
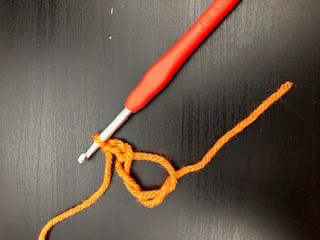
Make a magic loop and chain three. Photos below should help you with this.
Work into the magic loop as follows 2Tr, 2 CH, 3 Tr, 2CH, 3 Tr, 2CH, 3 Tr, 2CH, pull the magic loop closed and join with a slip stitch to the third loop of the starting chain. To join with a slip stitch push the hook through, wrap round the yarn and pull the yarn back through the loop and through the loop on the hook.
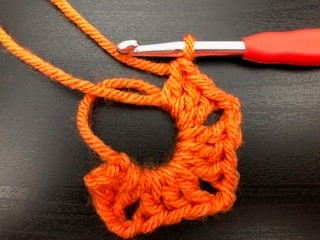
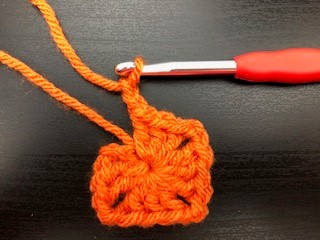
At the end of this round you should see a square is already starting to form.
Second round
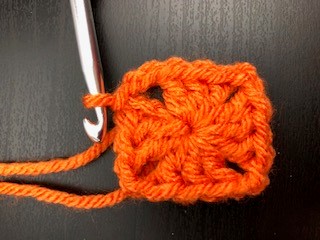
Chain 3, work 2 Tr one into each stitch on the previous round. Working into the corner 2 Tr, 2 CH, 2 Tr (as shown below). Work 3 Tr along the next side then into the corner again work 2 Tr, 2CH, 2 Tr. Repeat this pattern working 3 Tr on each side and 2 Tr, 2H, 2 Tr into each corner. When you are at the last corner join with a slip stitch to the top of the starting 3 chain.
Third round
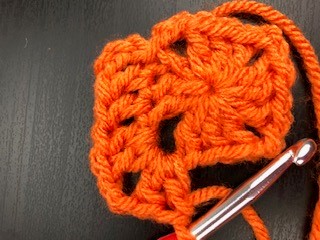
Chain 3, work 4 Tr one into each stitch on the previous round. Working into the corner on the odd rounds we will only be working 1 Tr, 2 CH, 1 Tr (as shown below). Work 7 Tr along the next side then into the corner again work 1 Tr, 2CH, 1 Tr. Repeat this pattern working 7 Tr on each side and 1 Tr, 2H, 1 Tr into each corner. When you are round the last corner work 2 Tr and join with a slip stitch to the top of the 3 starting chain.

Fourth round
Chain 3, work 5 Tr one into each stitch on the previous round. Working into the corner 2 Tr, 2 CH, 2 Tr. Work 9 Tr along the next side then into the corner again work 2 Tr, 2CH, 2 Tr. Repeat this pattern working 9 Tr on each side and 2 Tr, 2H, 2 Tr into each corner. When you are round the last corner work 3 Tr and join with a slip stitch to the top of the starting 3 chain.
Fifth round
Chain 3, work 7 Tr one into each stitch on the previous round. Working into the corner on the odd rounds we will only be working 1 Tr, 2 CH, 1 Tr. Work 13 Tr along the next side then into the corner again work 1 Tr, 2CH, 1 Tr. Repeat this pattern working 13 Tr on each side and 1 Tr, 2H, 1 Tr into each corner. When you are round the last corner work 5 Tr and join with a slip stitch to the top of the 3 starting chain.
Sixth round
Chain 3, work 8 Tr one into each stitch on the previous round. Working into the corner 2 Tr, 2 CH, 2 Tr. Work 15 Tr along the next side then into the corner again work 2 Tr, 2CH, 2 Tr. Repeat this pattern working 15 Tr on each side and 2 Tr, 2H, 2 Tr into each corner. When you are round the last corner work 6 Tr and join with a slip stitch to the top of the starting 3 chain.
Seventh round
Chain 3, work 10 Tr one into each stitch on the previous round. Working into the corner on the odd rounds we will only be working 1 Tr, 2 CH, 1 Tr. Work 19 Tr along the next side then into the corner again work 1 Tr, 2CH, 1 Tr. Repeat this pattern working 19 Tr on each side and 1 Tr, 2H, 1 Tr into each corner. When you are round the last corner work 8 Tr and join with a slip stitch to the top of the 3 starting chain.
Eighth round
Chain 3, work 11 Tr one into each stitch on the previous round. Working into the corner 2 Tr, 2 CH, 2 Tr. Work 21 Tr along the next side then into the corner again work 2 Tr, 2CH, 2 Tr. Repeat this pattern working 21 Tr on each side and 2 Tr, 2H, 2 Tr into each corner. When you are round the last corner work 9 Tr and join with a slip stitch to the top of the starting 3 chain.
Ninth round
Chain 3, work 13 Tr one into each stitch on the previous round. Working into the corner on the odd rounds we will only be working 1 Tr, 2 CH, 1 Tr. Work 25 Tr along the next side then into the corner again work 1 Tr, 2CH, 1 Tr. Repeat this pattern working 25 Tr on each side and 1 Tr, 2H, 1 Tr into each corner. When you are round the last corner work 11 Tr and join with a slip stitch to the top of the 3 starting chain.
Tenth round
Chain 3, work 14 Tr one into each stitch on the previous round. Working into the corner 2 Tr, 2 CH, 2 Tr. Work 27 Tr along the next side then into the corner again work 2 Tr, 2CH, 2 Tr. Repeat this pattern working 27 Tr on each side and 2 Tr, 2H, 2 Tr into each corner. When you are round the last corner work 12 Tr and join with a slip stitch to the top of the starting 3 chain.
And there it is, one completed block! The next section is a repeat of this one but gives the US crochet terms so jump down to ‘blocking and finishing’ if you have been following the UK instructions.
Easy Crochet Lapghan for Beginners – basic square pattern – US crochet terms.
First round
Make a magic loop and chain three. Photos above in the UK instructions should help you with this.
Work into the magic loop as follows 2Dc, 2 CH, 3 Dc, 2CH, 3 Dc, 2CH, 3 Dc, 2CH, pull the magic loop closed and join with a slip stitch to the third loop of the starting chain. To join with a slip stitch push the hook through, wrap round the yarn and pull the yarn back through the loop and through the loop on the hook.
At the end of this round you should see a square is already starting to form.
Second round
Chain 3, work 2 Dc one into each stitch on the previous round. Working into the corner 2 Dc, 2 CH, 2 Dc (as shown above in the UK instructions). Work 3 Dc along the next side then into the corner again work 2 Dc, 2CH, 2 Dc. Repeat this pattern working 3 Dc on each side and 2 Dc, 2H, 2 Dc into each corner. When you are at the last corner join with a slip stitch to the top of the starting 3 chain.
Third round
Chain 3, work 4 Dc one into each stitch on the previous round. Working into the corner on the odd rounds we will only be working 1 Dc, 2 CH, 1 Dc (as shown above in the UK instructions). Work 7 Dc along the next side then into the corner again work 1 Dc, 2CH, 1 Dc. Repeat this pattern working 7 Dc on each side and 1 Dc, 2H, 1 Dc into each corner. When you are round the last corner work 2 Dc and join with a slip stitch to the top of the 3 starting chain.
Fourth round
Chain 3, work 5 Dc one into each stitch on the previous round. Working into the corner 2 Dc, 2 CH, 2 Dc. Work 9 Dc along the next side then into the corner again work 2 Dc, 2CH, 2 Dc. Repeat this pattern working 9 Dc on each side and 2 Dc, 2H, 2 Dc into each corner. When you are round the last corner work 3 Dc and join with a slip stitch to the top of the starting 3 chain.
Fifth round
Chain 3, work 7 Dc one into each stitch on the previous round. Working into the corner on the odd rounds we will only be working 1 Dc, 2 CH, 1 Dc. Work 13 Dc along the next side then into the corner again work 1 Tr, 2CH, 1 Tr. Repeat this pattern working 13 Dc on each side and 1 Dc, 2H, 1 Dc into each corner. When you are round the last corner work 5 Dc and join with a slip stitch to the top of the 3 starting chain.
Sixth round
Chain 3, work 8 Dc one into each stitch on the previous round. Working into the corner 2 Dc, 2 CH, 2 Dc. Work 15 Dc along the next side then into the corner again work 2 Dc, 2CH, 2 Dc. Repeat this pattern working 15 Dc on each side and 2 Dc, 2H, 2 Dc into each corner. When you are round the last corner work 6 Dc and join with a slip stitch to the top of the starting 3 chain.
Seventh round
Chain 3, work 10 Dc one into each stitch on the previous round. Working into the corner on the odd rounds we will only be working 1 Dc, 2 CH, 1 Dc. Work 19 Dc along the next side then into the corner again work 1 Dc, 2CH, 1 Dc. Repeat this pattern working 19 Dc on each side and 1 Dc, 2H, 1 Dc into each corner. When you are round the last corner work 8 Dc and join with a slip stitch to the top of the 3 starting chain.
Eighth round
Chain 3, work 11 Dc one into each stitch on the previous round. Working into the corner 2 Dc, 2 CH, 2 Dc. Work 21 Dc along the next side then into the corner again work 2 Dc, 2CH, 2 Dc. Repeat this pattern working 21 Dc on each side and 2 Dc, 2H, 2 Dc into each corner. When you are round the last corner work 9 Dc and join with a slip stitch to the top of the starting 3 chain.
Ninth round
Chain 3, work 13 Dc one into each stitch on the previous round. Working into the corner on the odd rounds we will only be working 1 Dc, 2 CH, 1 Dc. Work 25 Dc along the next side then into the corner again work 1 Dc, 2CH, 1 Dc. Repeat this pattern working 25 Dc on each side and 1 Dc, 2H, 1 Dc into each corner. When you are round the last corner work 11 Dc and join with a slip stitch to the top of the 3 starting chain.
Tenth round
Chain 3, work 14 Dc one into each stitch on the previous round. Working into the corner 2 Dc, 2 CH, 2 Dc. Work 27 Dc along the next side then into the corner again work 2 Dc, 2CH, 2 Dc. Repeat this pattern working 27 Dc on each side and 2 Dc, 2H, 2 Dc into each corner. When you are round the last corner work 12 Dc and join with a slip stitch to the top of the starting 3 chain.
There you are – one finished square!!
Blocking and finishing
‘Blocking’ is important if you want to produce a lapghan that looks really good. When you block your work you set the dimensions of each square and remove any wrinkles and bumps. It is worth taking time over this step. You will need a blocking board and pins. You can pay for specialist equipment but I use children’s foam play floor tiles and dressmaking pins. Any solid surface that will take pins will work but you will be making it damp so bare that in mind!
Pin out each block and give it a little sprinkle of water then leave ideally over night. When you remove the pins you will see that the block has assumed the pinned shape and should now retain this shape (unless it is re-wet). I normally block squares as I make them to avoid having to do all the blocking in one go.
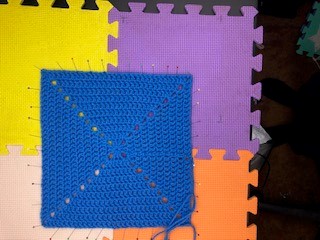
TIP – when I am making several blocks with the same dimensions I draw the shape on the blocking board and ease each square to those same dimensions. Sometimes there can be slight variation in yarn weight by colour within a yarn brand – although I find Stylecraft is very good on this point with little/no variation. Marking the size on the blocking board ensures you are blocking each square to the same dimensions!
I want to get this pattern up on my blog as soon as possible so I will leave the finishing off for a second post. Hope you don’t mind! Come back to me when you have finished all your blocks and the post should be here!
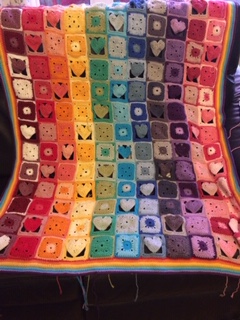
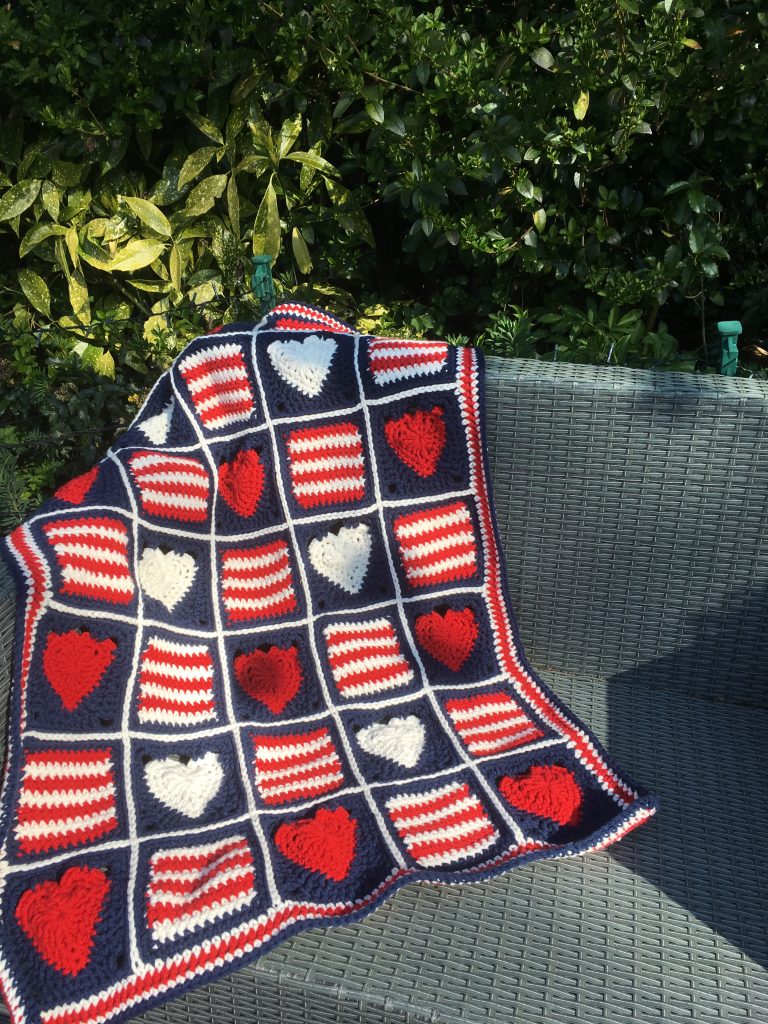
I really hope you enjoy this easy crochet lapghan for beginners and that you really enjoy making something beautiful in these difficult times. If you would like to try something a little more challenging then you can check out some of my other patterns here Hearts and Stripes Lapghan. Hearts in three sizes. Stars in three sizes. I know that crafting is certainly helping me. Happy crocheting!
Annie 🙂